Getting started
What Aliado is, how to sign in and how the platform is organized
Map
Real-time incidents, your missions and units, locations, directory and connections
Aliado AI
The risk intelligence agent and the monitoring of your missions by turns
Missions
Create, edit, start and close trips; tasks per stop, templates and bulk upload
Tracking and log
The detail of each mission: map, event log, statistics and driving times
Documents and Carta Porte
Trip documents, AI reading, instruction letter and Carta Porte
Appointments
Access invitations with documents, QR and archetypes; appointments sent and received
Tendering and rate card
Offer an appointment to several allies in turn, by rate or by order; rate card and quote requests
Chat
One conversation per mission with the driver: text, audio with transcription, threads and AI attachments
Notifications and alerts
The bell, Configure alerts, the Web/App/Email/WhatsApp/SMS channels and which notice each event generates
Catalogs
Users, assets, locations, templates, rate card, tags and your organization
Allies and tags
Alliances between organizations, carrier authorization and permissions shared by tag
Metrics and controlled visibility
Indicators of the operation and the board you share with your customers
Account, plans and credits
Your profile, Aliado's plans, how credits work, payments and invitations
Aliado app (drivers)
The driver's app: chat and voice, incidents, tasks, appointments with QR, notifications and log
Aliado Seguridad (guards)
The gate app: digital dispatch with scanning, seal and CTPAT/OEA inspection
Getting started
Aliado is Aleph's logistics control tower: a web platform to plan, dispatch and follow trips, coordinate appointments with your carriers and customers, and decide with route risk intelligence. This section gets you oriented before you go into each module.
What is Aliado and what can I do with the platform?
Aliado brings together everything that happens around a transport trip: route planning, the assignment of drivers and units, real-time GPS tracking, communication with the driver, the trip's documents and the access appointments at your customers' or suppliers' facilities.
The web platform is organized into six modules, which you will see in the left sidebar:
- Map: real-time incidents, your missions and units on the map, and Aliado AI, the agent that analyzes the risk of a route before departure.
- Missions: the trip board (airport view) where you create, edit, start and close missions.
- Chat: one conversation per mission with the driver and the rest of the team.
- Appointments: access invitations to facilities, with documents, QR and tendering among carriers.
- Metrics: indicators for scans, punctuality and performance.
- Catalogs: users, assets, locations, templates, rate card, tags and your organization.
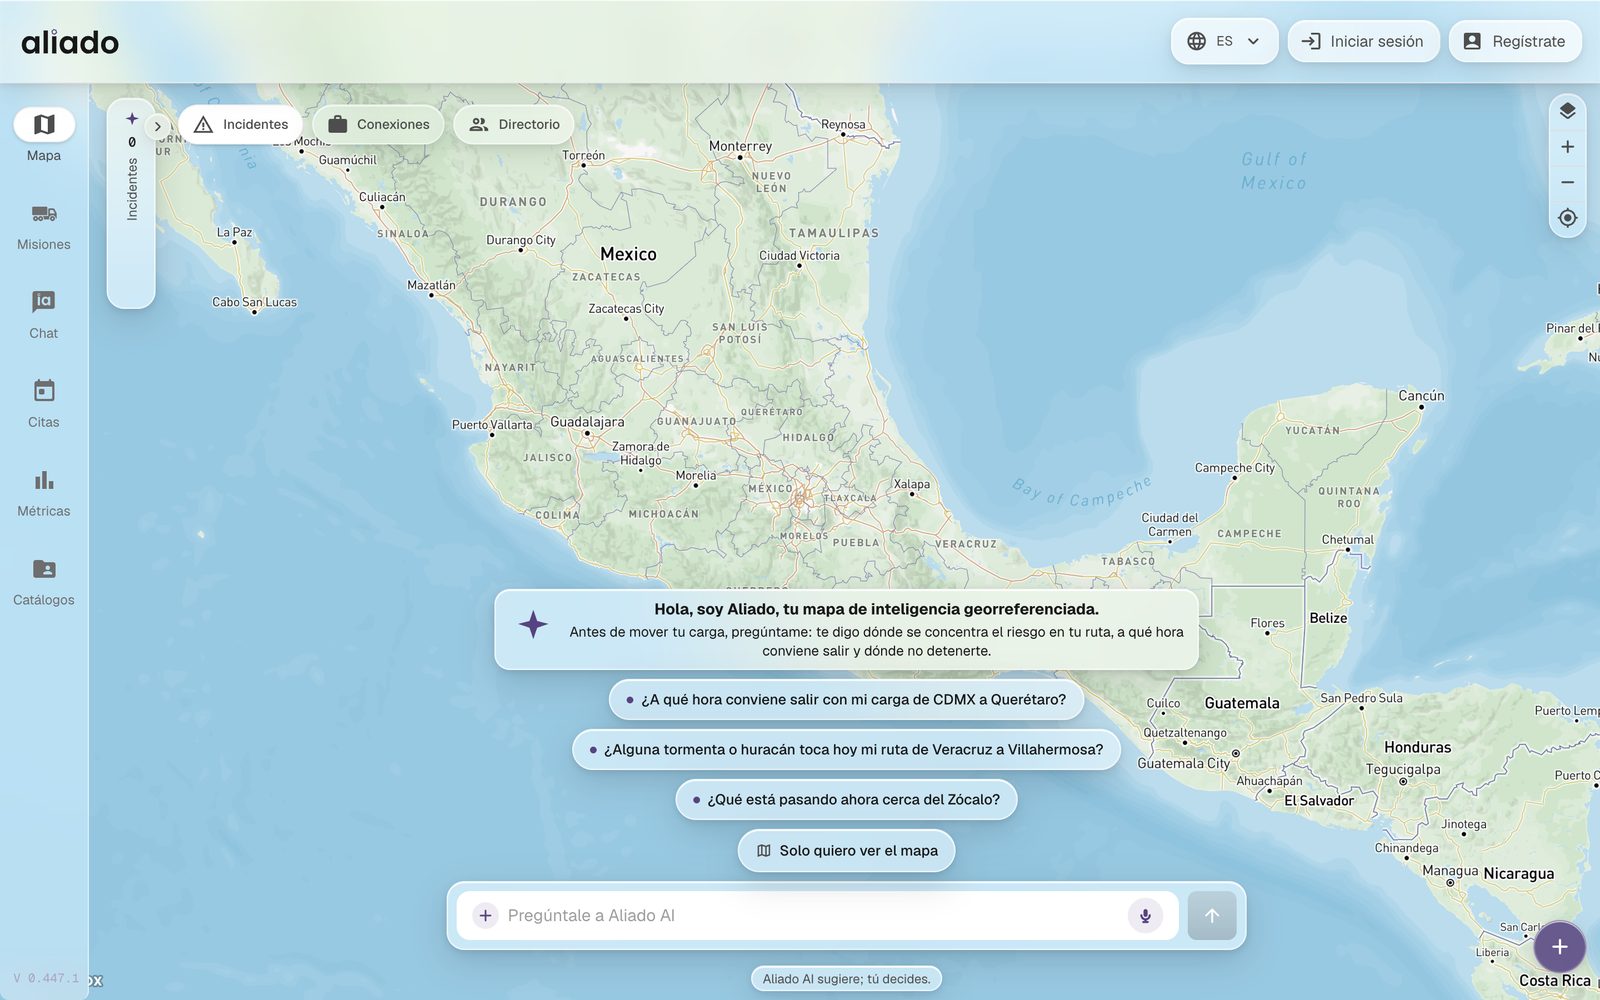
Besides the web there are two mobile apps: Aliado, for drivers (chat, incidents, tasks, appointments with QR) and Aliado Seguridad, for gate guards (dispatch with scanning). You will find them in Aliado app (drivers) and Aliado Seguridad (guards).
You may also be interested in: How the platform is organized | What a mission is | What Aliado AI is
How do I sign in to Aliado?
Sign in at ui.aliado.alephri.com with the email and password your administrator gave you. You can also use Continue with Google, Microsoft or Apple, as long as that email is already registered in your organization.
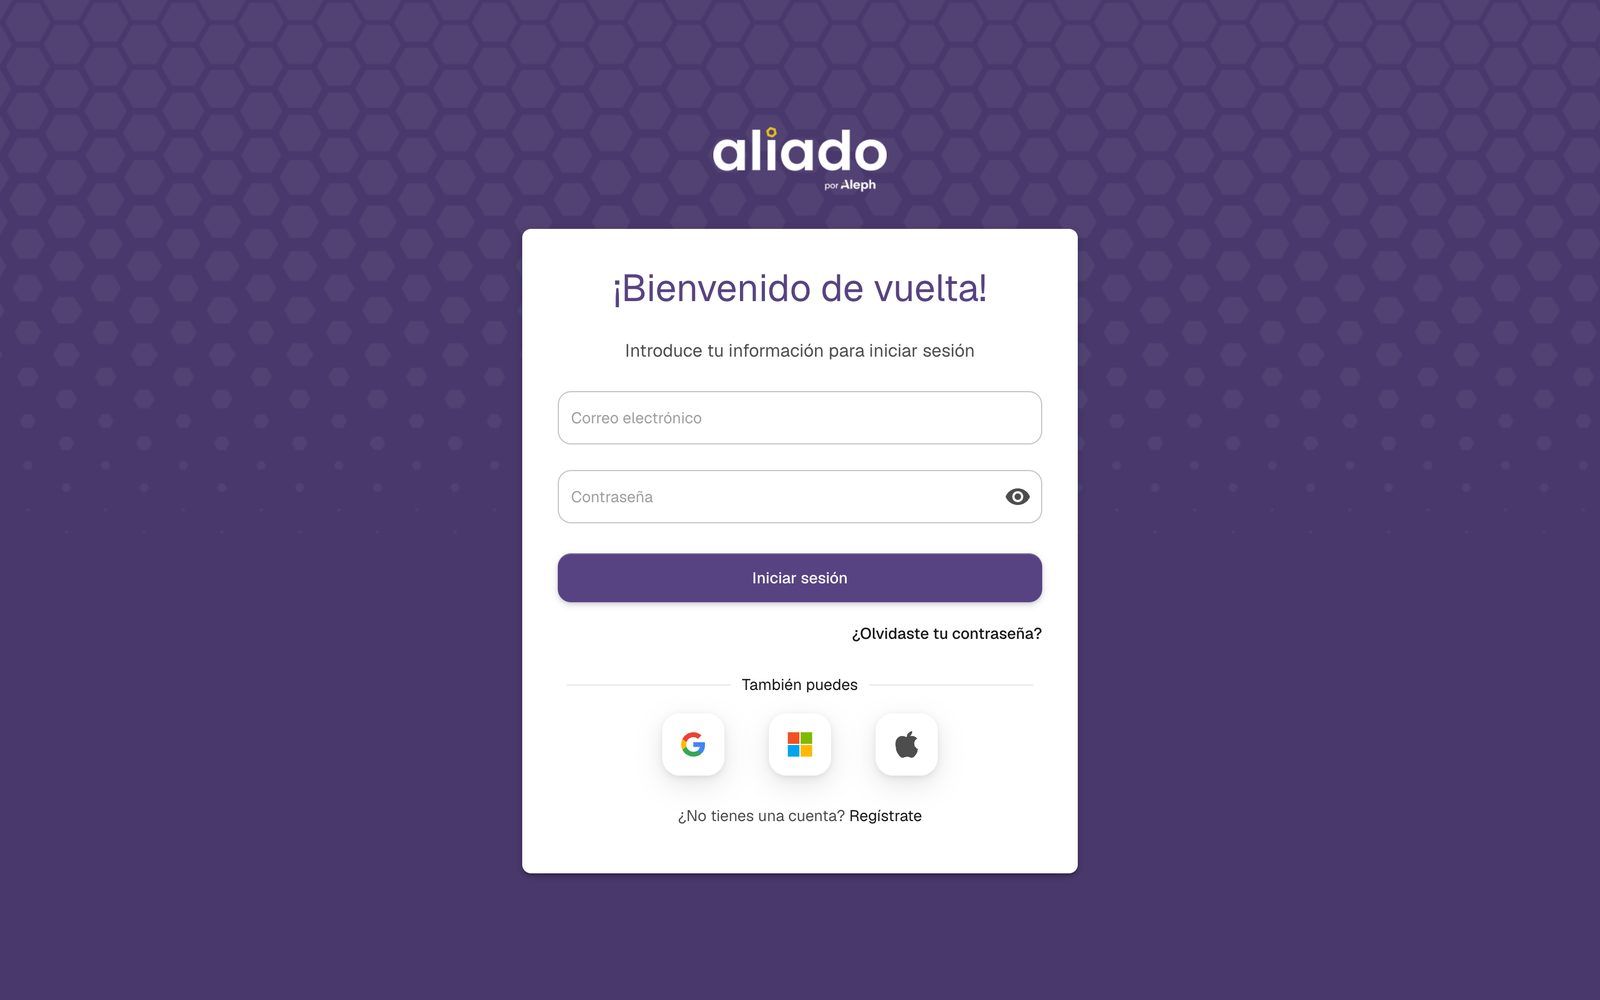
If you do not have an account, the Sign up link creates a new organization on the Free plan. If your company already uses Aliado, ask your administrator to create you as a user in Catalogs › Users or to invite you with your email.
You may also be interested in: I forgot my password | Create users
How is the platform organized?
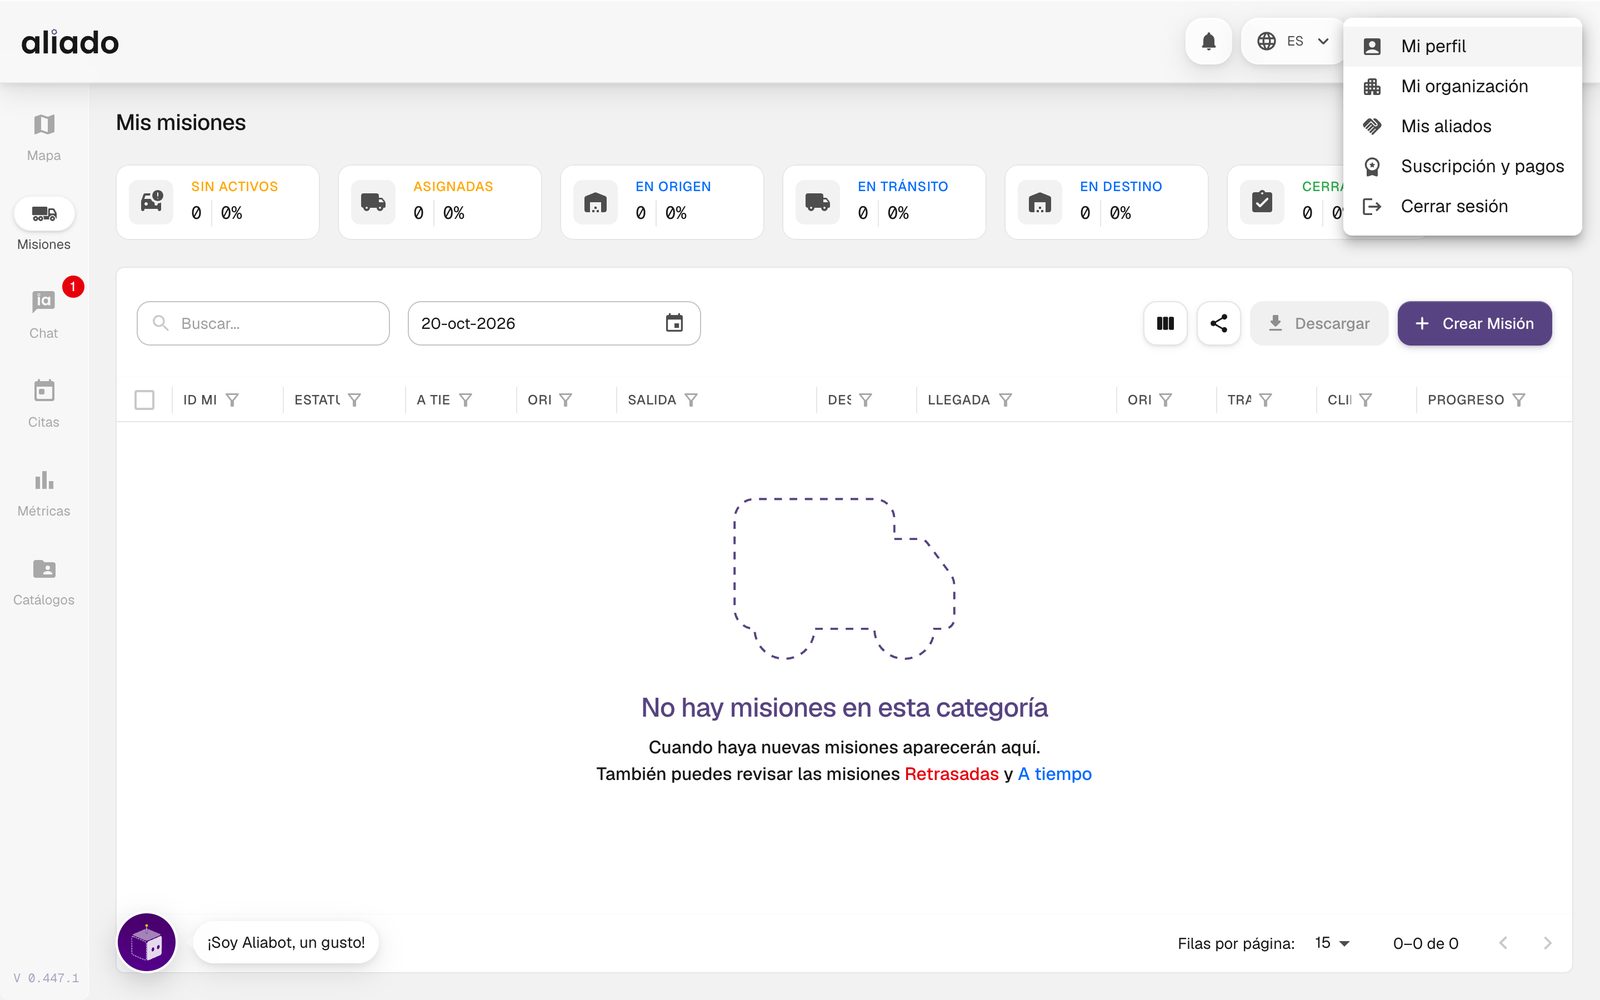
The left sidebar is the main menu. In order: Map, Missions, Chat (with the number of unread messages), Appointments, Metrics and Catalogs. On phones, the same menu opens from the icon in the top left corner.
In the header, from left to right, you have:
- The notifications bell, with the count of new notices.
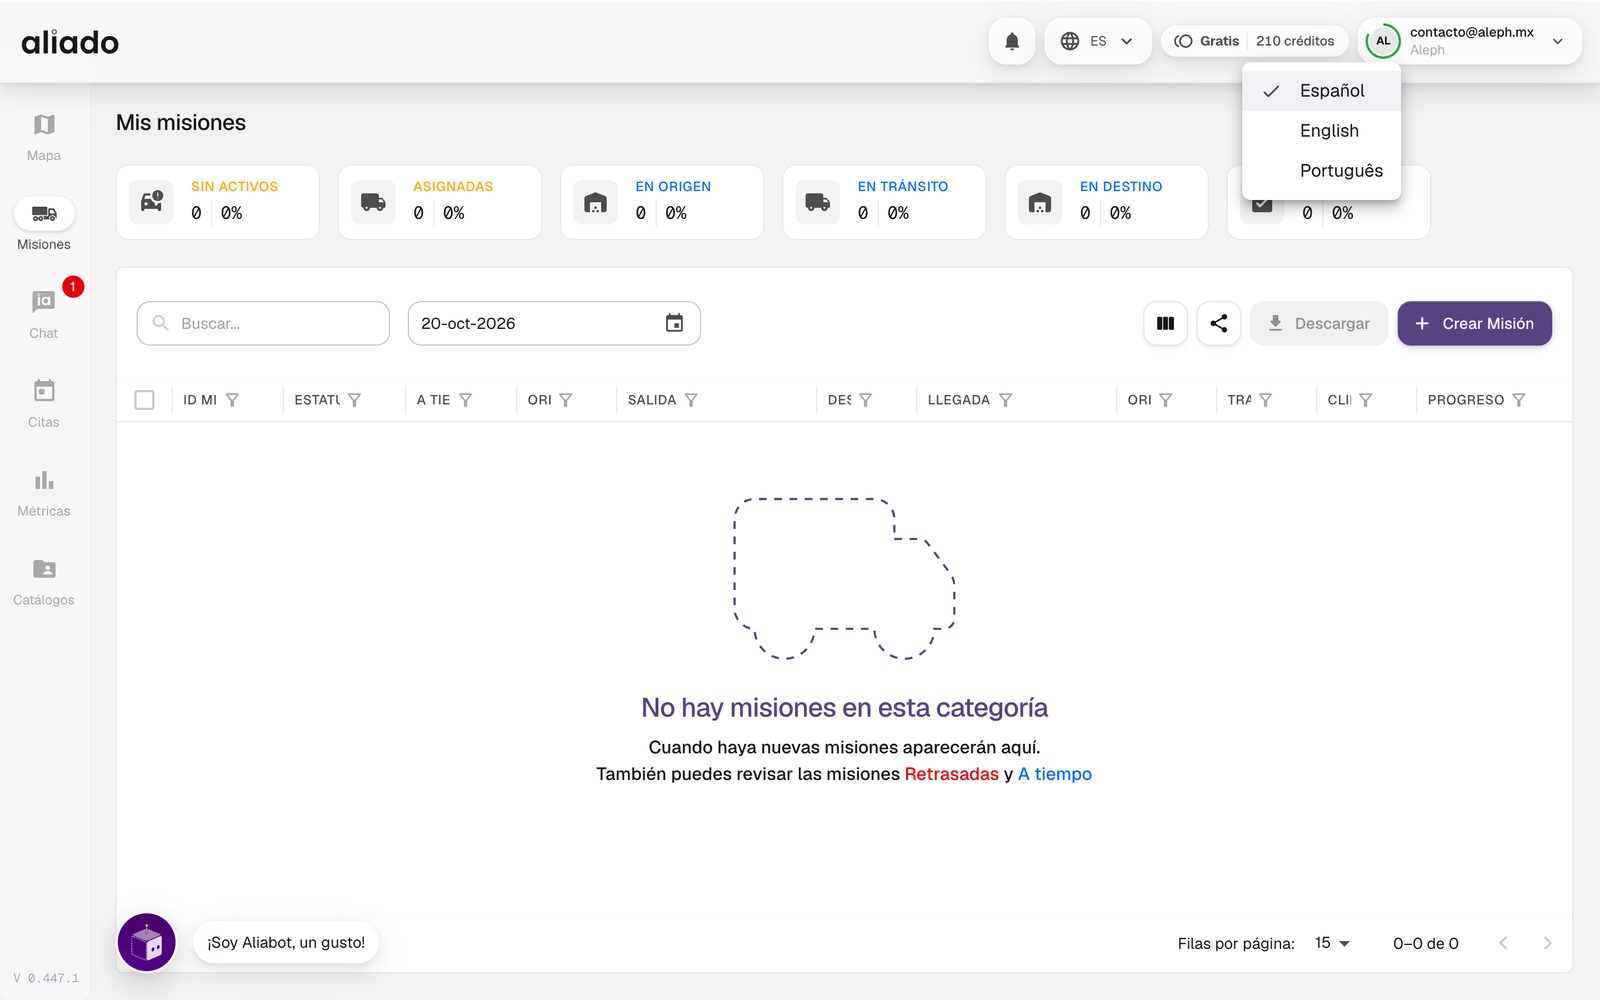
- The language (Español, English, Português).
- Your plan and credits available; tapping it takes you to Subscription and payments.
- Your account: My profile, My organization, My allies, Subscription and payments and Log out.
When you sign in the platform opens the Map in the Incidents view, where Aliado AI lives. If you change views during the session (Missions, Assets, Locations…), the Map remembers the last one you used.
You may also be interested in: Map views | Notifications
What user roles are there?
Each user in your organization has a role that defines what they can do:
| Role | Who it is for | Where they work |
|---|---|---|
| Administrator | Control tower, planning, administration | Web platform (and the app if needed) |
| Driver | Whoever drives the unit | Aliado app: chat, incidents, tasks, appointments with QR |
| Guard | Access gate or yard | Aliado Seguridad app: dispatch and scanning |
| Installer | Whoever installs GPS devices | Aliado app, to link devices |
Fine-grained permissions (which modules and which locations each user sees) are set from their profile, in the Permissions tab, and with tags when you share resources with your allies.
You may also be interested in: A user's permissions | Tags
What is the Aliado AI assistant, where do I ask it and how do I use it?
Aliado AI is Aliado's assistant, and there is only one: you ask it about your operation's data (missions, units, appointments, catalogs) and about the risk of a route or an area (incidents, weather, risk zones). You can write to it in several places:
- The bubble: the purple circle in the bottom left corner (you can drag it wherever suits you). When you open it, its window is called Aliado AI. It is across the whole platform, except in the Map views where the Aliado AI box is already on the map: there you ask in that box, which also queries your fleet.
- The Ask Aliado AI box on the Map (Incidents view): it analyzes routes, areas, incidents and weather and builds the report on the map.
- WhatsApp, if your organization has it: Aliado AI via WhatsApp.
In the bubble, the suggestions change with the screen you are on: The period's missions, The ones running late, Find a mission, Which units do I have active?, Today's appointments, An appointment's log, Find a user in the catalog… Answers arrive as cards with buttons that go straight to the data (Open mission, Open appointment, Open record, See on the map), and a line tells you what it looked up (Used N tools). If its welcome offers it, you can also ask there for the risk of a route or an area, or to be taken to where a mission or an appointment is created or an alert is configured.
In the bulk upload of missions, appointments and catalogs, the Aliado AI · Interpretation assistant panel reads your file and accepts instructions to improve the reading (for example, "column C is the economic number").
You may also be interested in: Aliado AI on the map | Aliado AI via WhatsApp | Bulk upload
Can I use Aliado in another language?
Yes. Tap the language selector in the header (it shows the code of the current language, such as EN) and choose Español, English or Português. The change applies right away and is saved to your profile, so you will see it the same way next time you sign in.
The emails Aliado sends (welcome, password reset, shared boards) also go out in each user's language.
How do I contact support or report a problem with the platform?
Inside the platform there is not yet a support button or a chat with the Aliado team. The contact channel is the form in this Help Center:
- Scroll to the bottom of any page of this Help Center, to the Still have a question? block.
- Write your Name, your Email and the message, and press Send. The message reaches the Aliado team (contacto@alephri.com) and we reply to that email.
To get it solved quickly, say in the message your organization, what you were trying to do, on which screen, the ID of the mission or the appointment if it applies, the approximate time and the exact text of the error you saw.
- Permissions, users or passwords: they are managed by your organization's administrator from Catalogs › Users; ask them first.
- A blockade, an accident or another event on the road is not reported to support: report it on the Map with the + button (Report an incident) so other users see it.
- Buying or changing a plan: in Subscription and payments, the Book a demo button takes you to the sales team.
You may also be interested in: Report an incident | Users | Plans
Where do I see what is new in Aliado?
The platform has no What's new section or a notice of what changed in each version: new features appear directly on their screen.
- To learn how a feature is used, search for it in this Help Center or ask Aliado AI.
- The mobile apps (Aliado and Aliado Seguridad) are updated from the store; if a feature in this guide does not appear on your phone, update the app.
- If you want to know whether something already exists or when it arrives, write to us from the Still have a question? form at the bottom of this page.
You may also be interested in: Support and contact | Aliado app
Is there an API to integrate Aliado with another system?
Yes: Aliado connects through an API with other systems, such as your ERP or TMS and GPS providers. Today that connection is enabled with the Aliado team: inside the platform there is not yet a screen to create your own API credentials or to read its documentation.
- Write to us from the Still have a question? form at the bottom of this Help Center.
- Tell us which system you want to connect and what you need to move: creating missions or appointments, receiving GPS positions, querying events or downloading reports.
Meanwhile, without programming anything, you can upload missions, appointments, users, assets and locations with Bulk upload, and download the boards and catalogs as CSV with Download. The External ID columns of users, assets and locations are for matching the records with those in your system.
You may also be interested in: Bulk upload of missions | Bulk upload of catalogs | Connect a unit's GPS
Map
The Map is Aliado's first module and the center of the live operation. A bar of views at the top changes what you see without reloading the map: Incidents, Missions, Assets, Locations, Connections and Directory.
What does the Map show and how do I change views?
When you enter the Map you will see a bar of pills at the top. Each one changes the layer and the side panel:
- Incidents: events on the road (blockades, accidents, weather, safety) and the Aliado AI agent. It is the default view.
- Missions: the active missions with their route and the GPS position of each unit, plus punctuality metrics.
- Assets: every unit in your fleet, on a mission or not, with its last GPS report.
- Locations: the points and geofences in your catalog (plants, distribution centers, yards).
- Connections: the board of loads and returns available among Aliado companies.
- Directory: the companies of the sector registered in Aliado, filterable by service, zone and certifications.
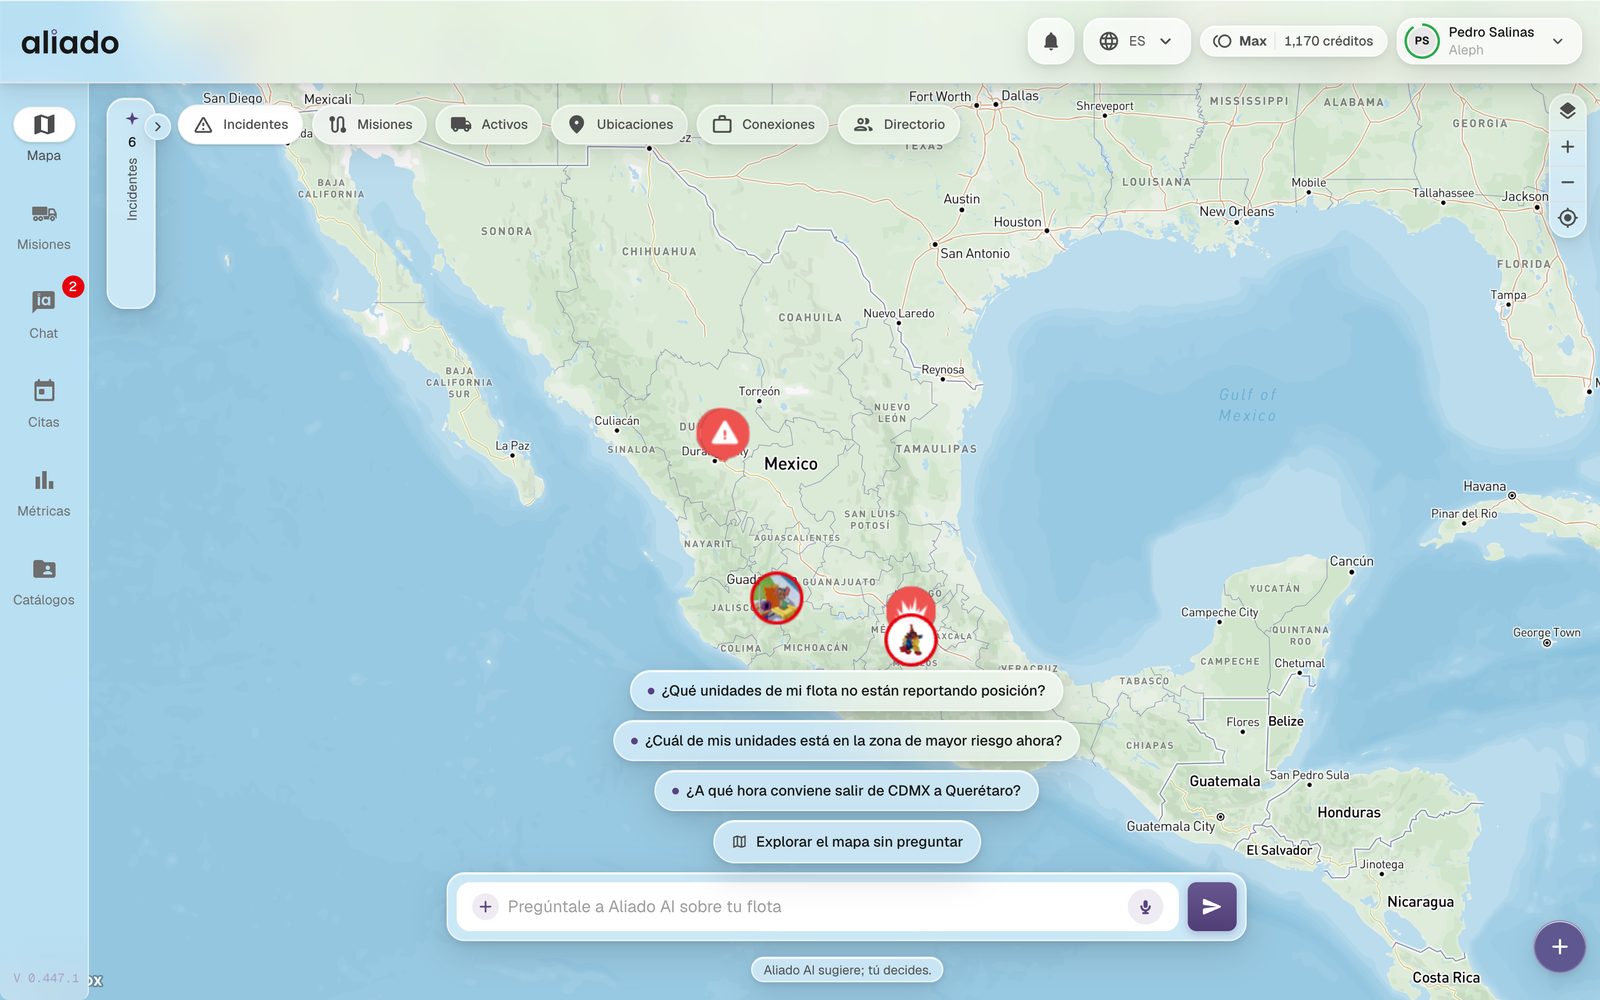
On the right are the map controls: Map style, zoom in and out, and My location. At the bottom right, the + button opens Report an incident.
You may also be interested in: Real-time incidents | See my units | Aliado AI
How do I see incidents in real time?
Incidents are external events on the road network that your fleet does not cause: blockades, demonstrations, accidents, road works, heavy rain, robberies. They are reported by the Aliado team, external sources, the press, Aleph's network of users and the drivers themselves from the app.
- On the Map, choose the Incidents view. Incidents appear as red markers; those with a photo show the image in the marker.
- Open the side panel with the › arrow to see the list of incidents in the area you are looking at, with their type and status.
- Use Filter to narrow by Incident type (Safety, Road, Weather, General) and Status (Active, Inactive, Scheduled), and the calendar to change the date.
- Click an incident to see its title, description, approximate start and source. From there you can Copy coordinates, Share the link or open a Live conversation about that event.
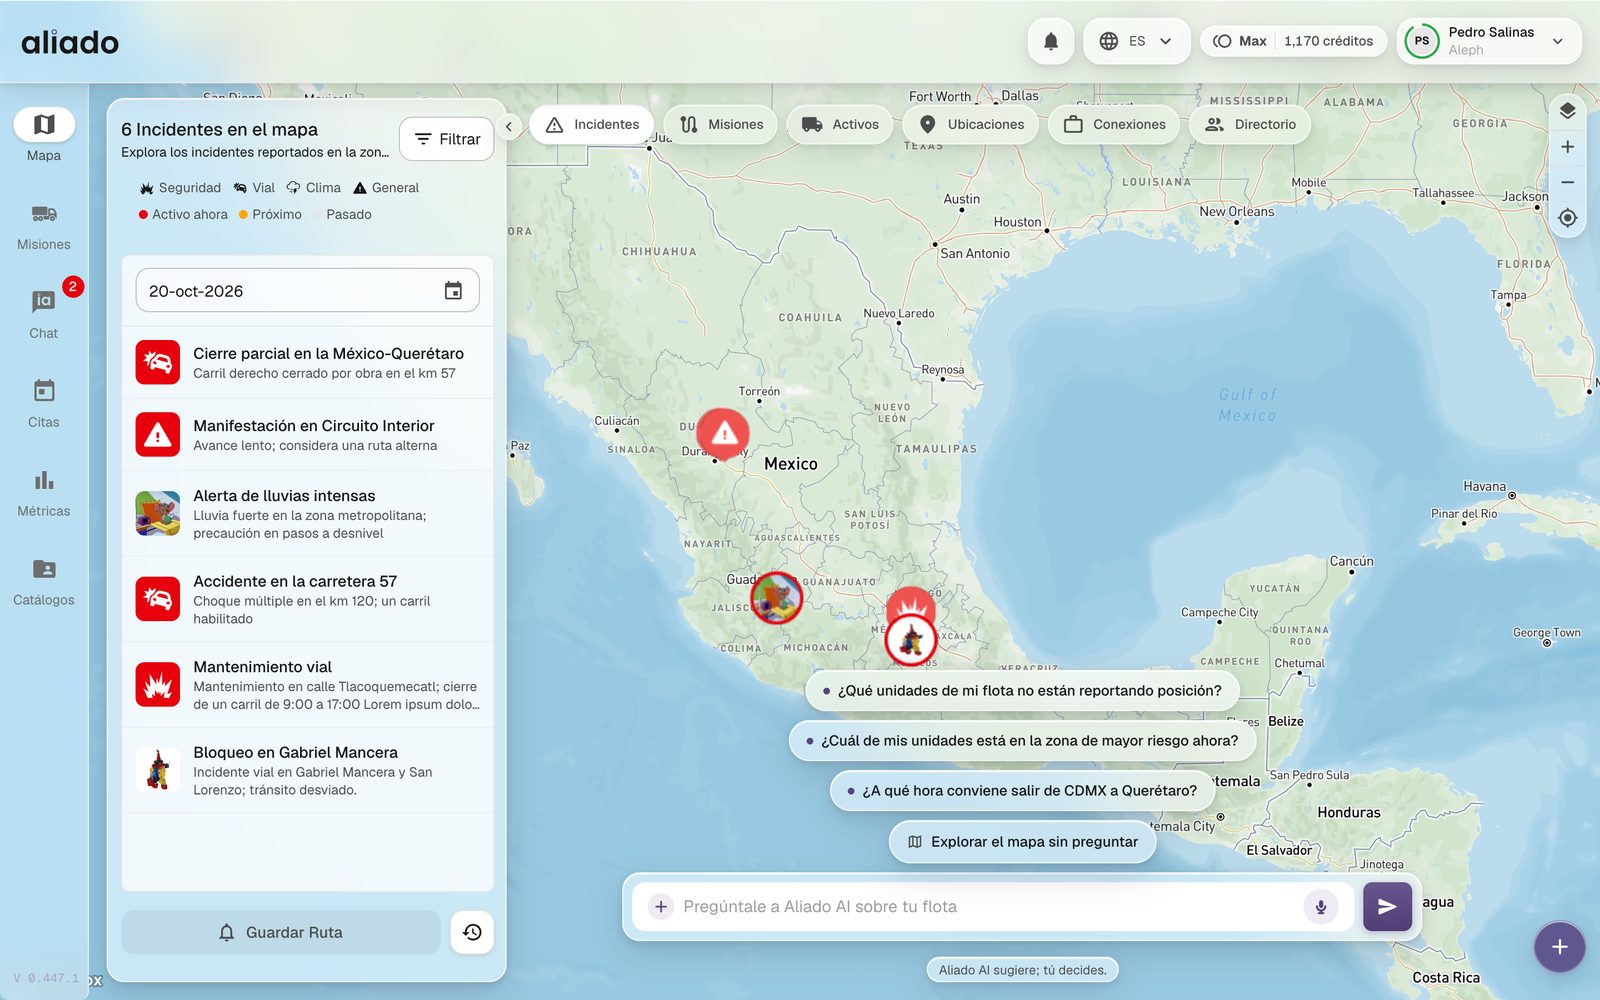
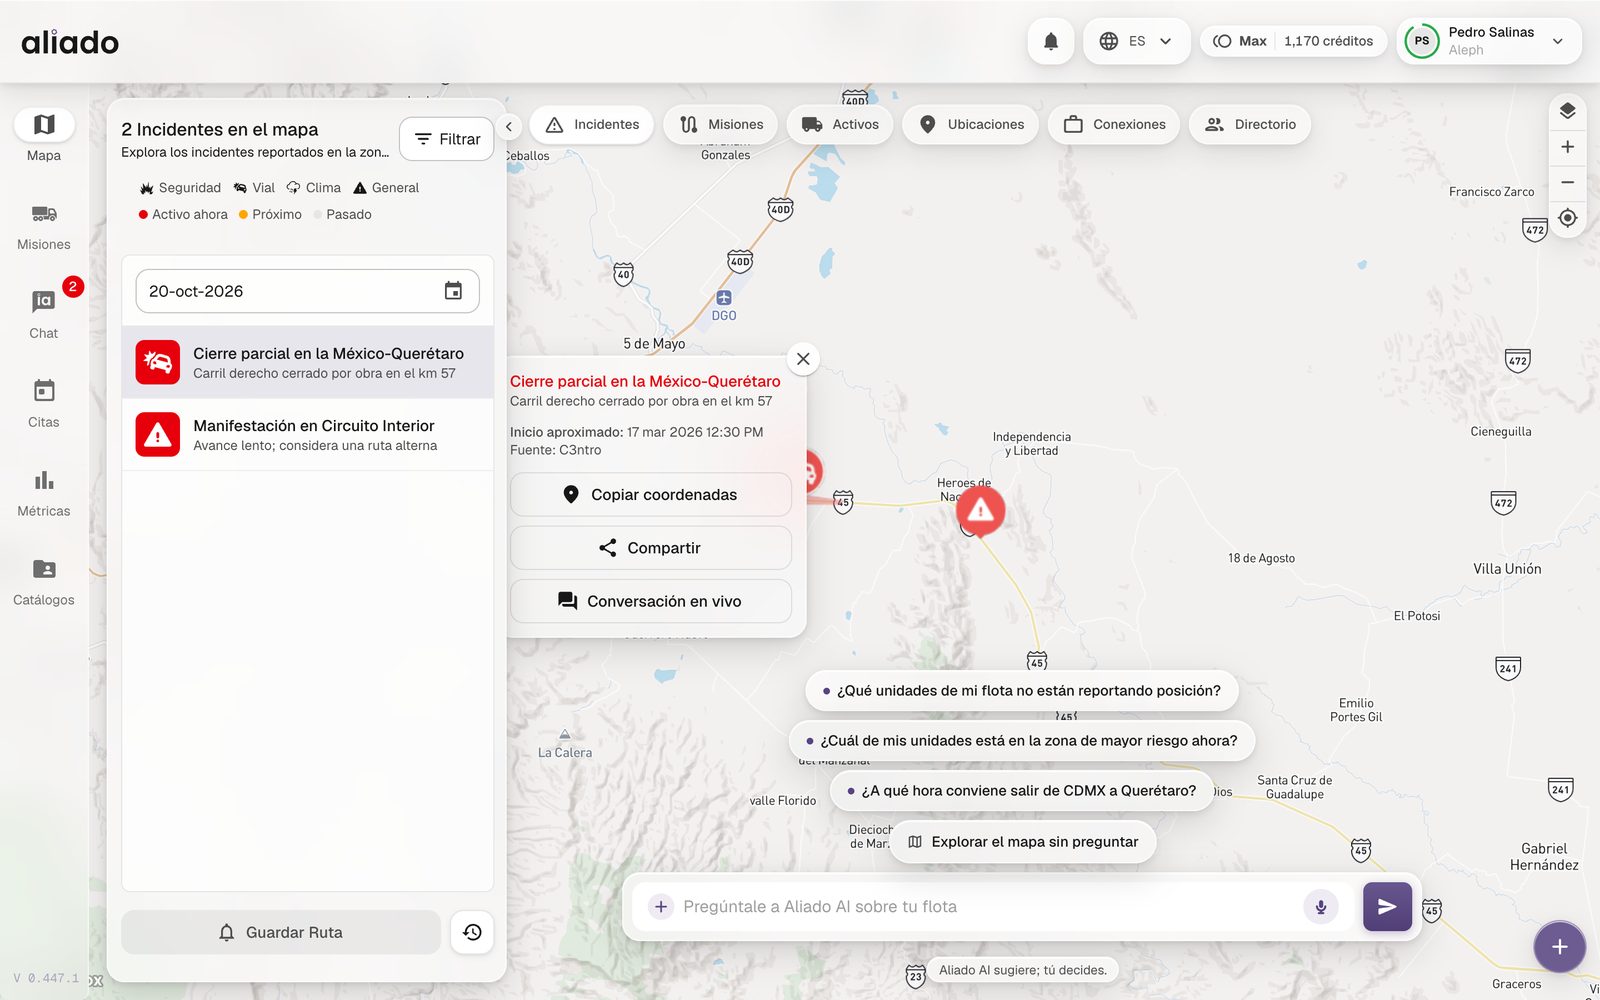
The panel's legend distinguishes Active now, Upcoming (scheduled, for example announced road works) and Past.
You may also be interested in: Incidents on my route | Report an incident | Road incidents vs. alerts from my units
How do I draw a route from the map and see the incidents that affect it?
You no longer look up a route by typing the destination in the map's search box: on a computer, the Map's text box is Aliado AI's. To see only the incidents on your way, use the route shortcut:
- Go to the Map, Incidents view. In Aliado AI's suggestions on the map press See incidents on a route. If you already have a conversation open, press New analysis › Start over to return to the suggestions.
- Fill in Starting point and End point. You can choose a location from your catalog, search for an address or paste a pair of coordinates.
- As soon as both points are set, Aliado draws the route (Generating route and searching for alerts...). The panel changes to Incidents on your route with the number of incidents that touch it; those left outside are dimmed on the map.
- Press Save route and write the Route name to receive a notice for each new incident that crosses it. Clear route erases the line to start another.
- The View saved routes icon opens Your routes: filter between My routes and Organization routes, load one on the map or press Analyze with Aliado AI.
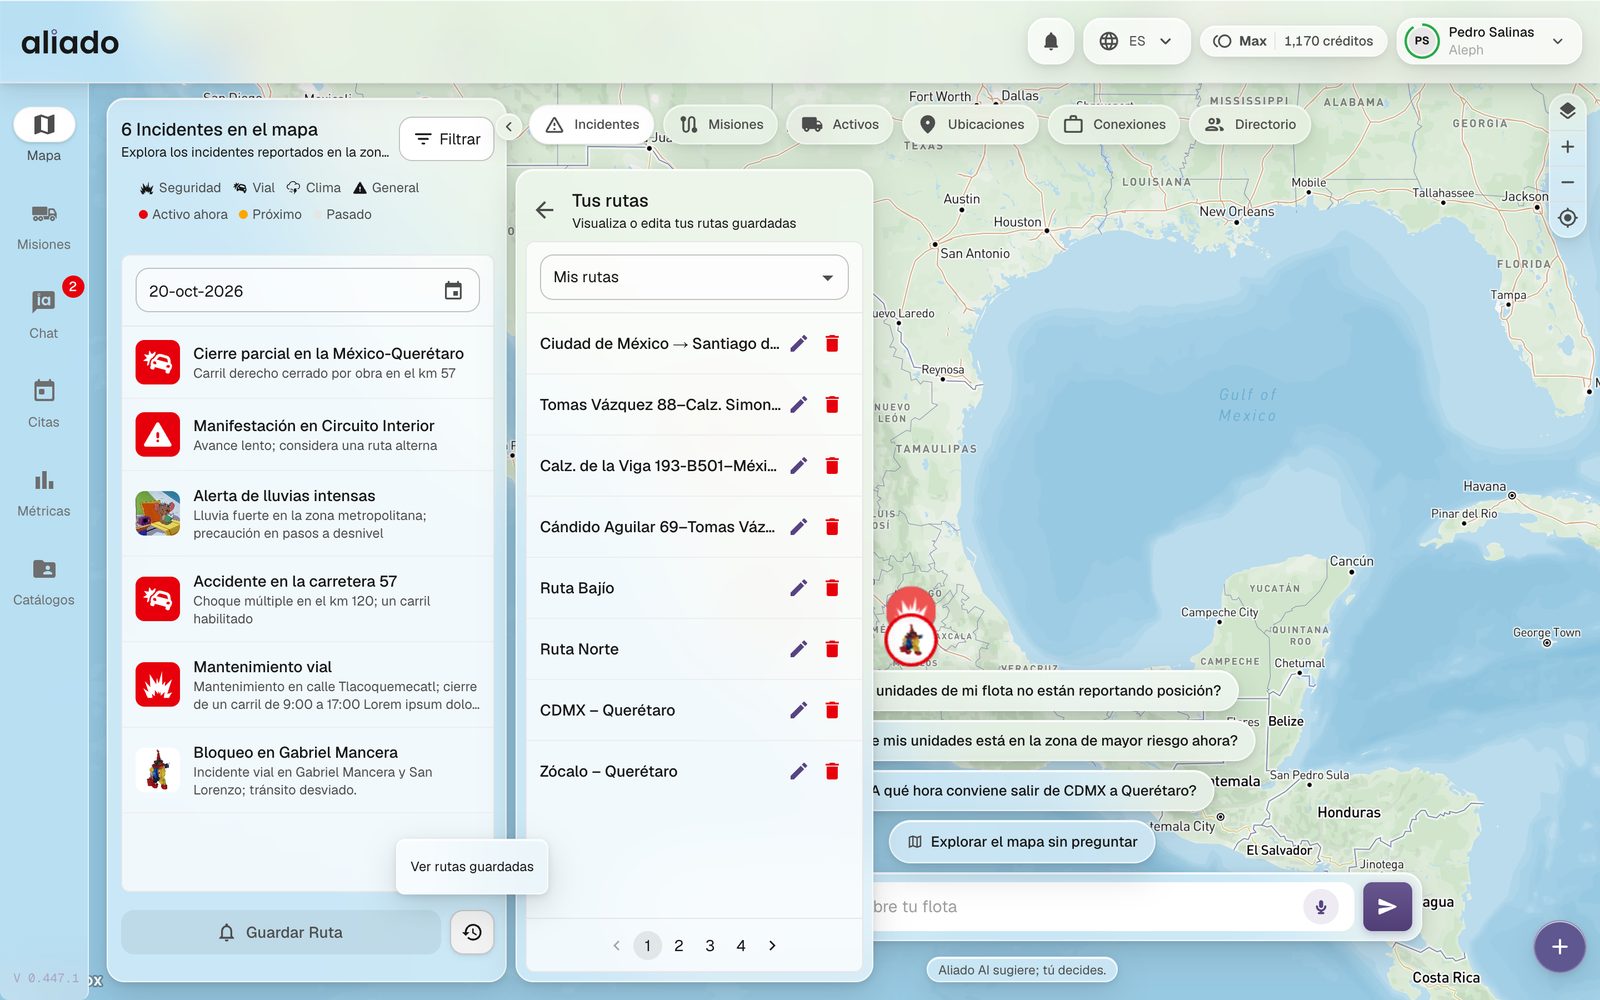
If instead you ask Aliado AI about the route ("What incidents are there from Mexico City to Querétaro?"), the answer arrives as an analysis in the Aliado AI tab, with its own section of incidents along the way.
You may also be interested in: Configure alerts | Aliado AI's route report | Watch a route with Aliado AI
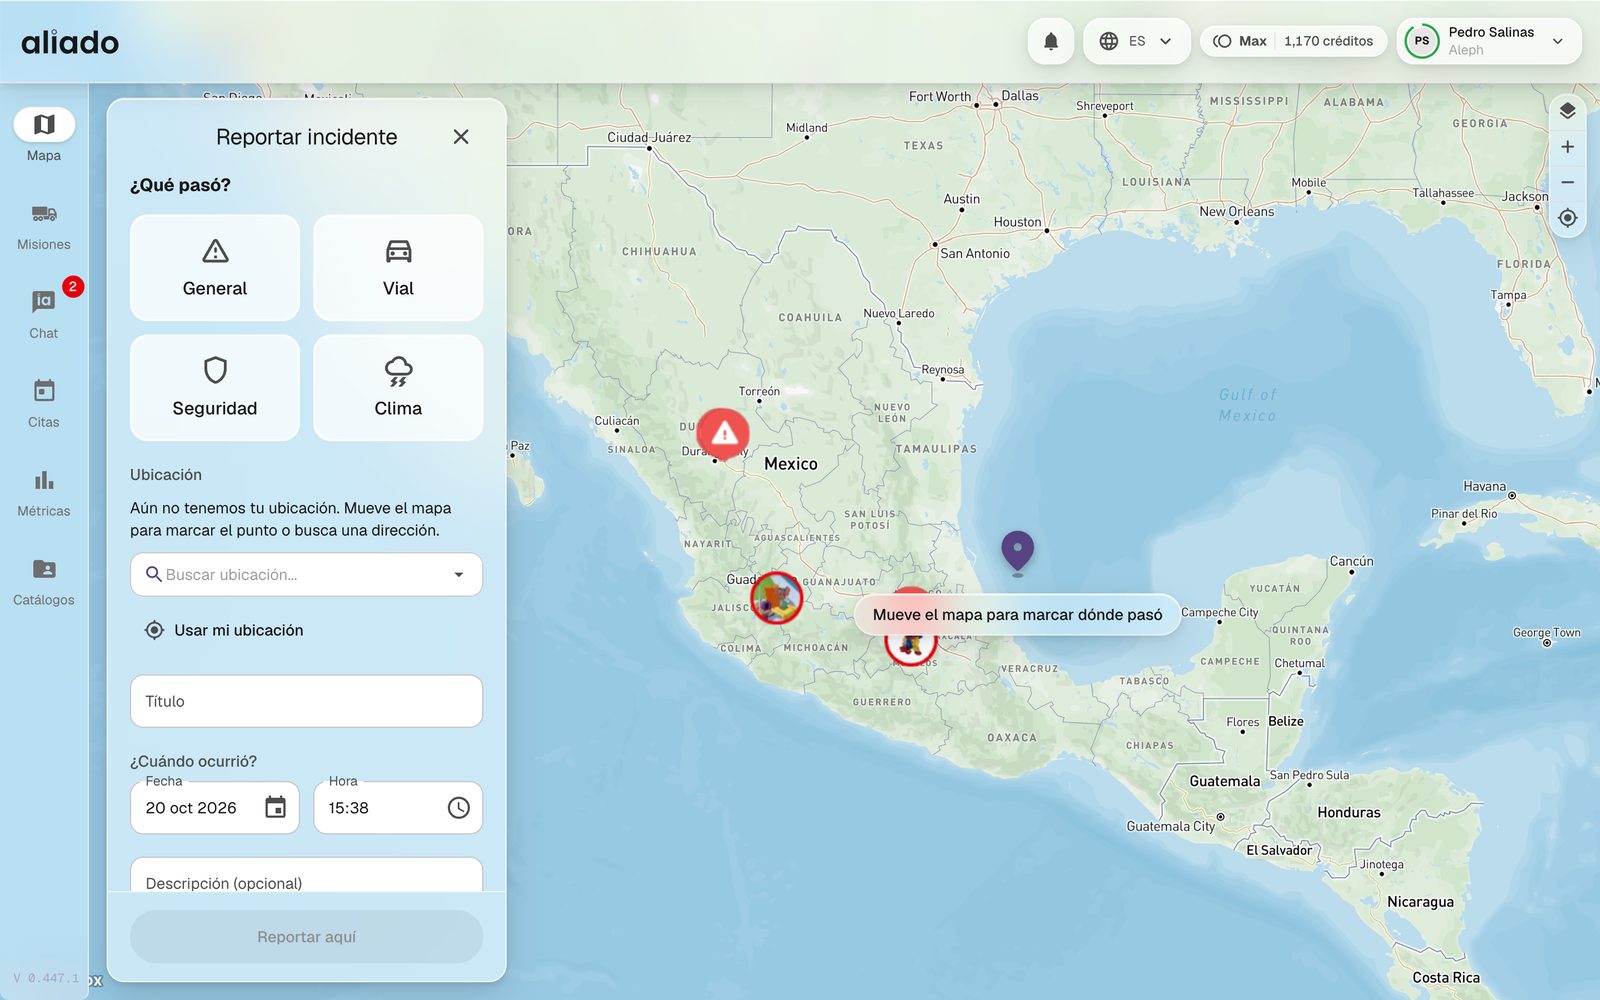
How do I report an incident from the map?
Any signed-in user can report what they see on the road; the incident is visible right away to the other users in the area.
- Press the + button in the bottom right corner of the Map (Report an incident).
- In What happened? choose the type: General, Road, Safety or Weather.
- Mark the location: move the map to the point, search for an address or use Use my location. If you report far from where you are, Aliado warns you.
- Write the Title (required), adjust the date and time if it happened earlier, and add a description if you like.
- Press Report here. Afterwards you can Add photo (up to three) to the incident already created.
The same quick report exists in the driver's app, in three taps and with the phone's camera.
You may also be interested in: Report from the app | Report from the chat
How do I see my units in real time?
The Assets view shows your whole connected fleet, on a mission or not. At the top of the panel there is a summary: All, No readings, Driving and Stopped; each card works as a filter.
- Choose the Assets view. Units close to each other are grouped in circles with the number of units; zoom in to separate them.
- Search by economic number in Search assets or filter by Status and Type.
- Select a unit to center it. You will see its current mission, economic number, position and GPS Last reading. From there you go into its detail with log and statistics.
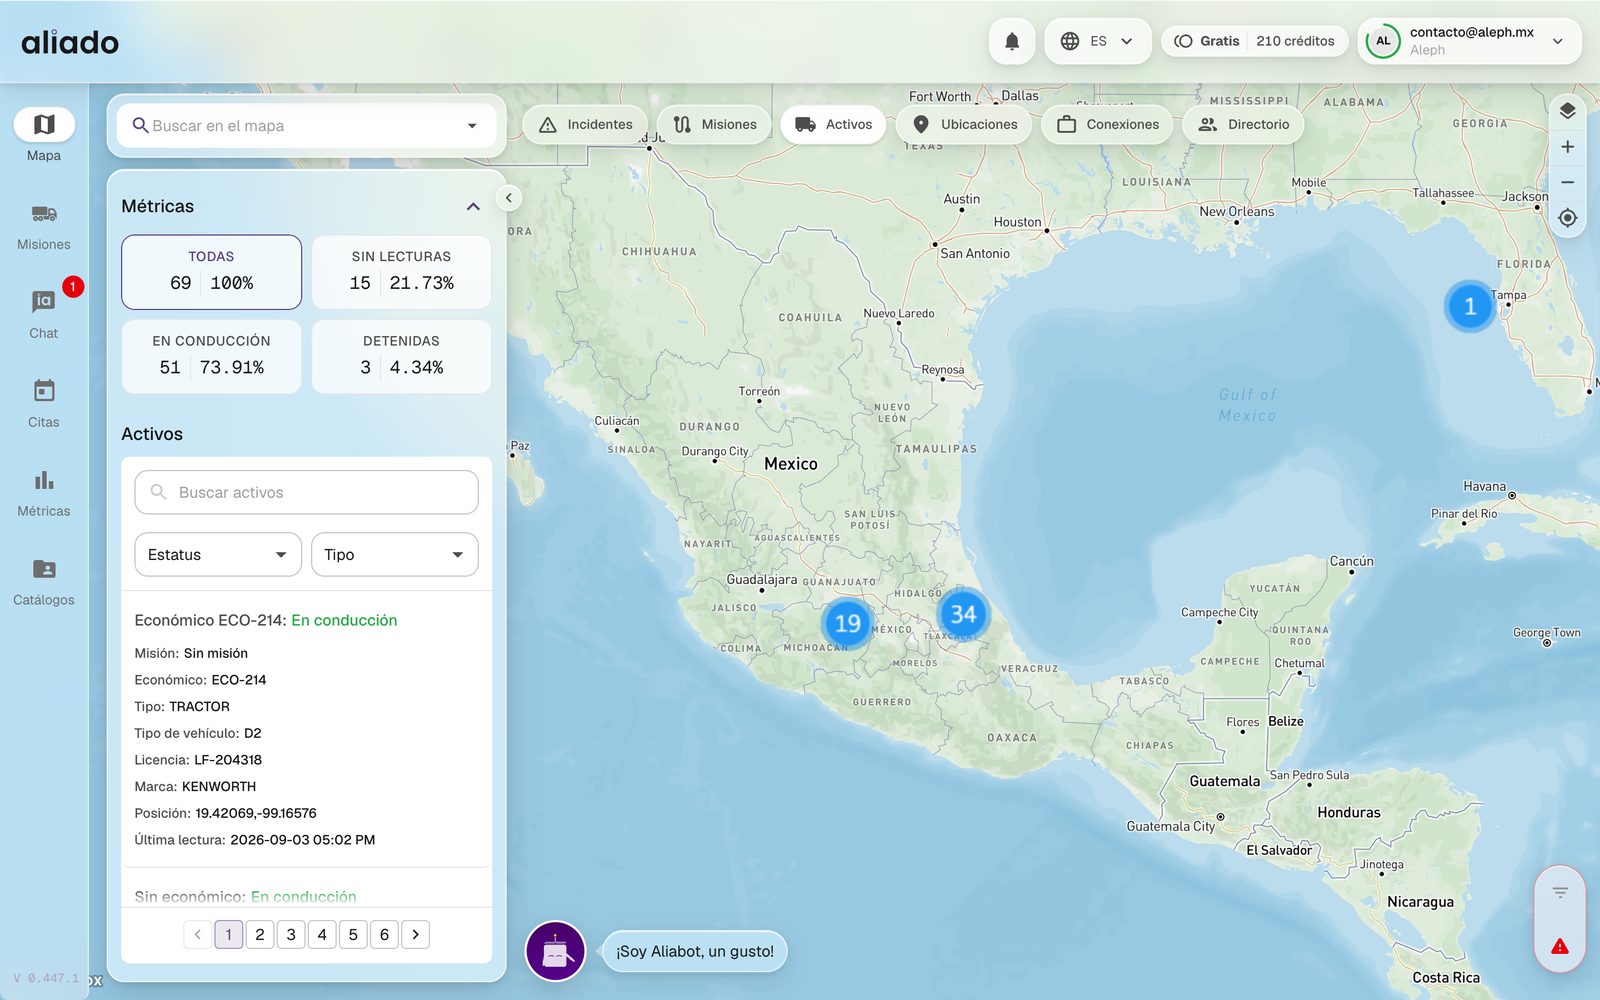
The marker's color tells which stage the unit is in: amber at origin, green in transit, purple at destination, gray closed and blue if it has no mission. A ! sign marks a delay.
You may also be interested in: A unit's log | No GPS signal alert
How do I follow the active missions on the map?
The Missions view shows the active missions with their route drawn and the unit's GPS position. The panel summarizes All, On time, Delayed and No assets, and below it lists each mission with origin, destination, driver, planned departure, planned arrival and ETA.
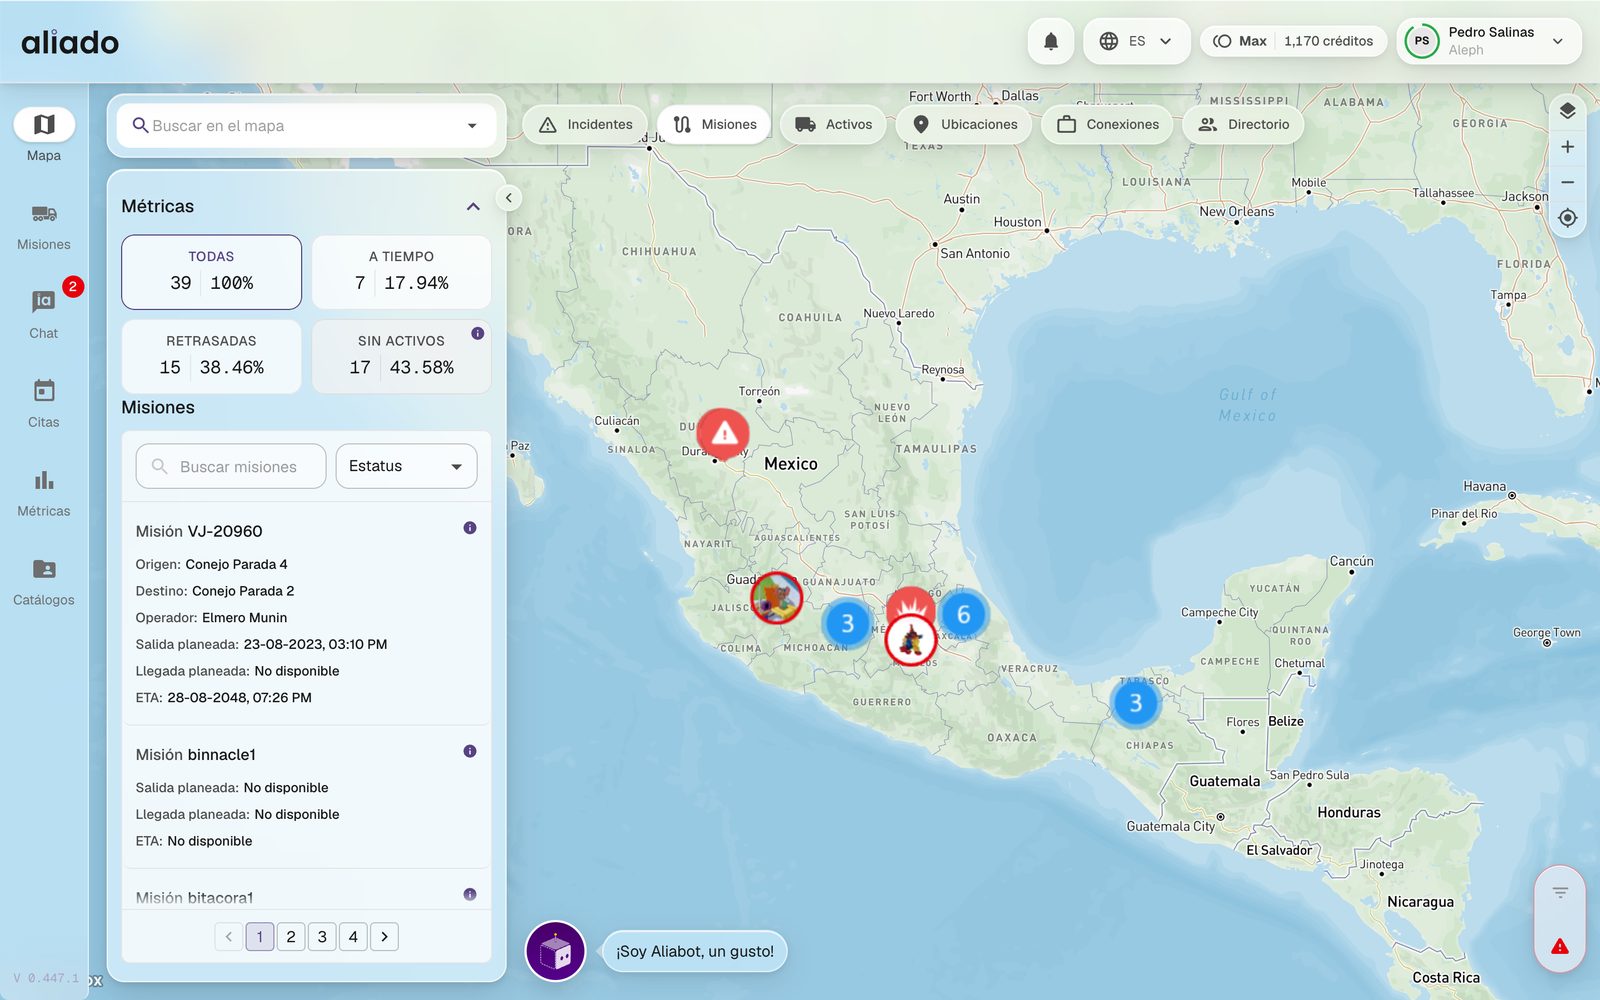
Click a mission in the list to center it and open its detail (log, assets and statistics). This view has no date selector: you always see what is active now.
You may also be interested in: Detail of a mission | Status of a mission
What is the Locations layer?
The Locations view paints on the map the points and geofences from Catalogs › Locations: plants, distribution centers, yards, reference points. The panel lists the locations in the visible area, with a search box and the All / Active / Inactive filter; hovering over one shows its card.
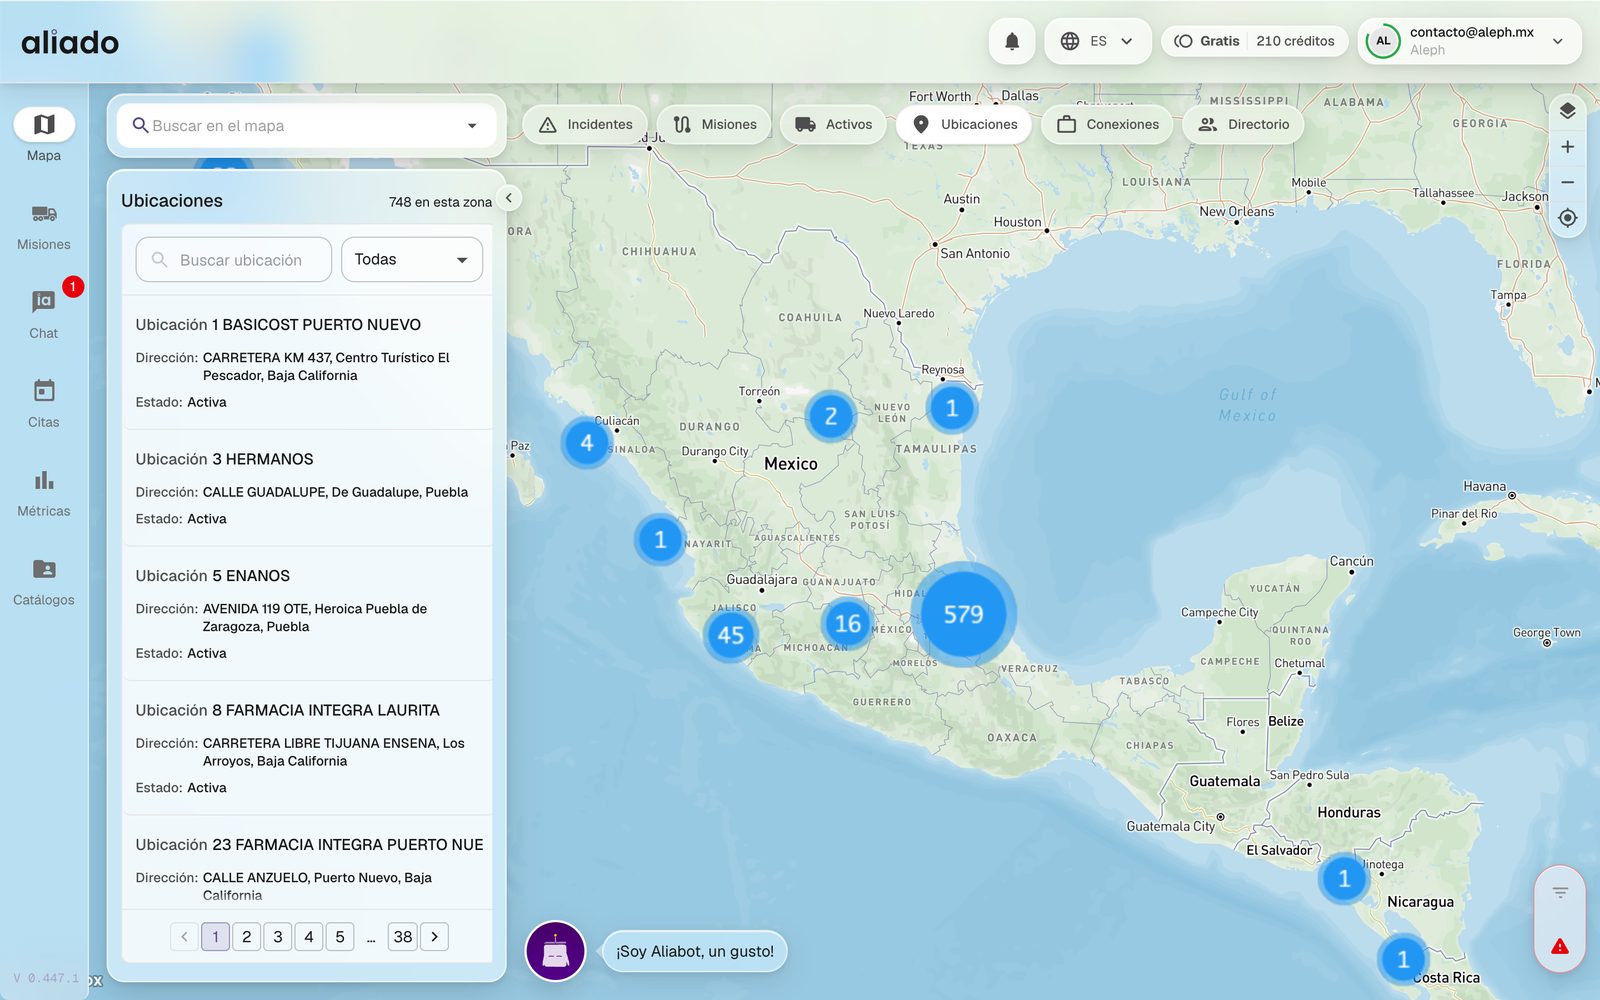
If an active incident covers one of your locations, Aliado can let you know: turn on Configure alerts › Road incidents › By location.
You may also be interested in: Locations catalog | Configure alerts
What is the Directory?
The Directory is the map of logistics companies registered in Aliado. Use it to find carriers, customers or partners by zone and to invite them as allies.
- Switch between Map and Grid in the panel.
- Search by name or filter by Service type (Dedicated, Semi-dedicated, Spot), Zones, Vehicle types, Trailer types and Certifications (CTPAT, OEA, Distintivo CANACAR, Recurso Confiable, Transporte Limpio SEMARNAT).
- Open a company to see its contact details and Share its card.
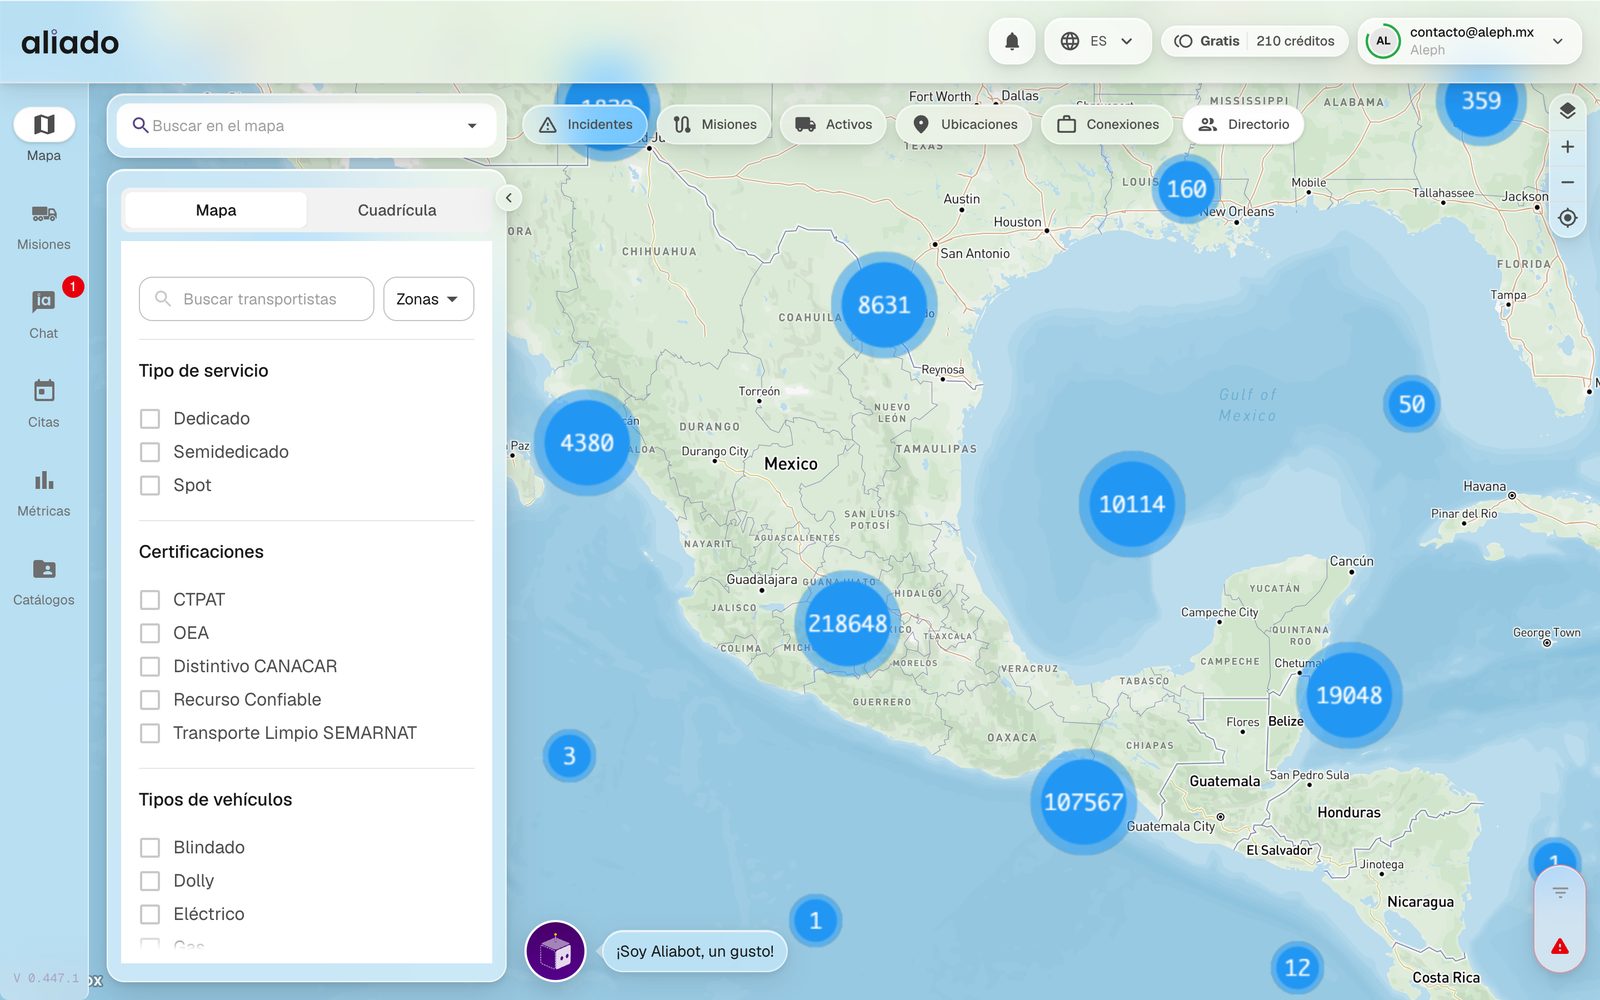
If your organization appears without a responsible person, from its card you can claim it with Are you the owner of this organization? by uploading the articles of incorporation (.pdf, .doc or .docx, 10 MB maximum). The answer arrives by email.
You may also be interested in: Invite an organization | My organization
What is Connections?
Connections is the load board inside Aliado. Publish a load you need to move or an empty return you want to make use of, and contact the advertiser by WhatsApp.
- Choose the Connections view. The Available loads and Available returns tabs filter by type; Arriving at and the date narrow the search.
- Press Publish an ad and choose Publish load or Publish return.
- Enter Starting point, Arriving at and the pickup date and time. Delivery and price range are optional.
- Press Publish trip. Your ads stay in My ads; Contact advertiser opens WhatsApp with a message ready.
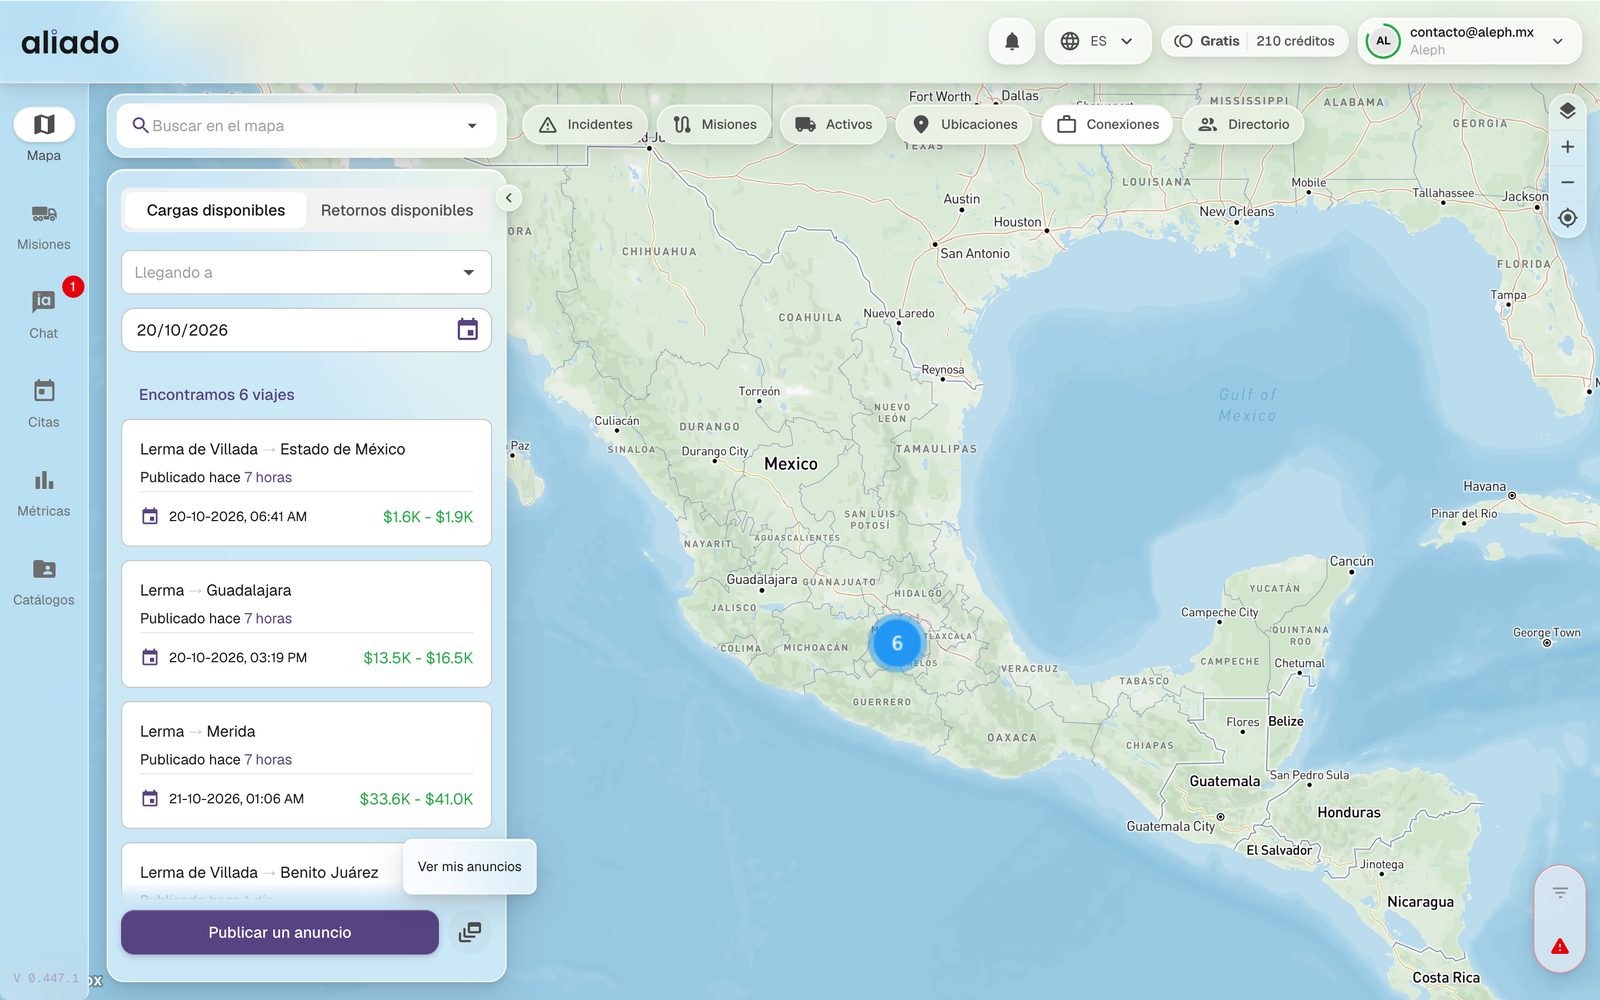
From the Missions board you can also publish in one click: a mission with No assets offers Post an ad to Connections, and a round trip with the return pending offers Post empty return in Connections.
You may also be interested in: Actions on a mission
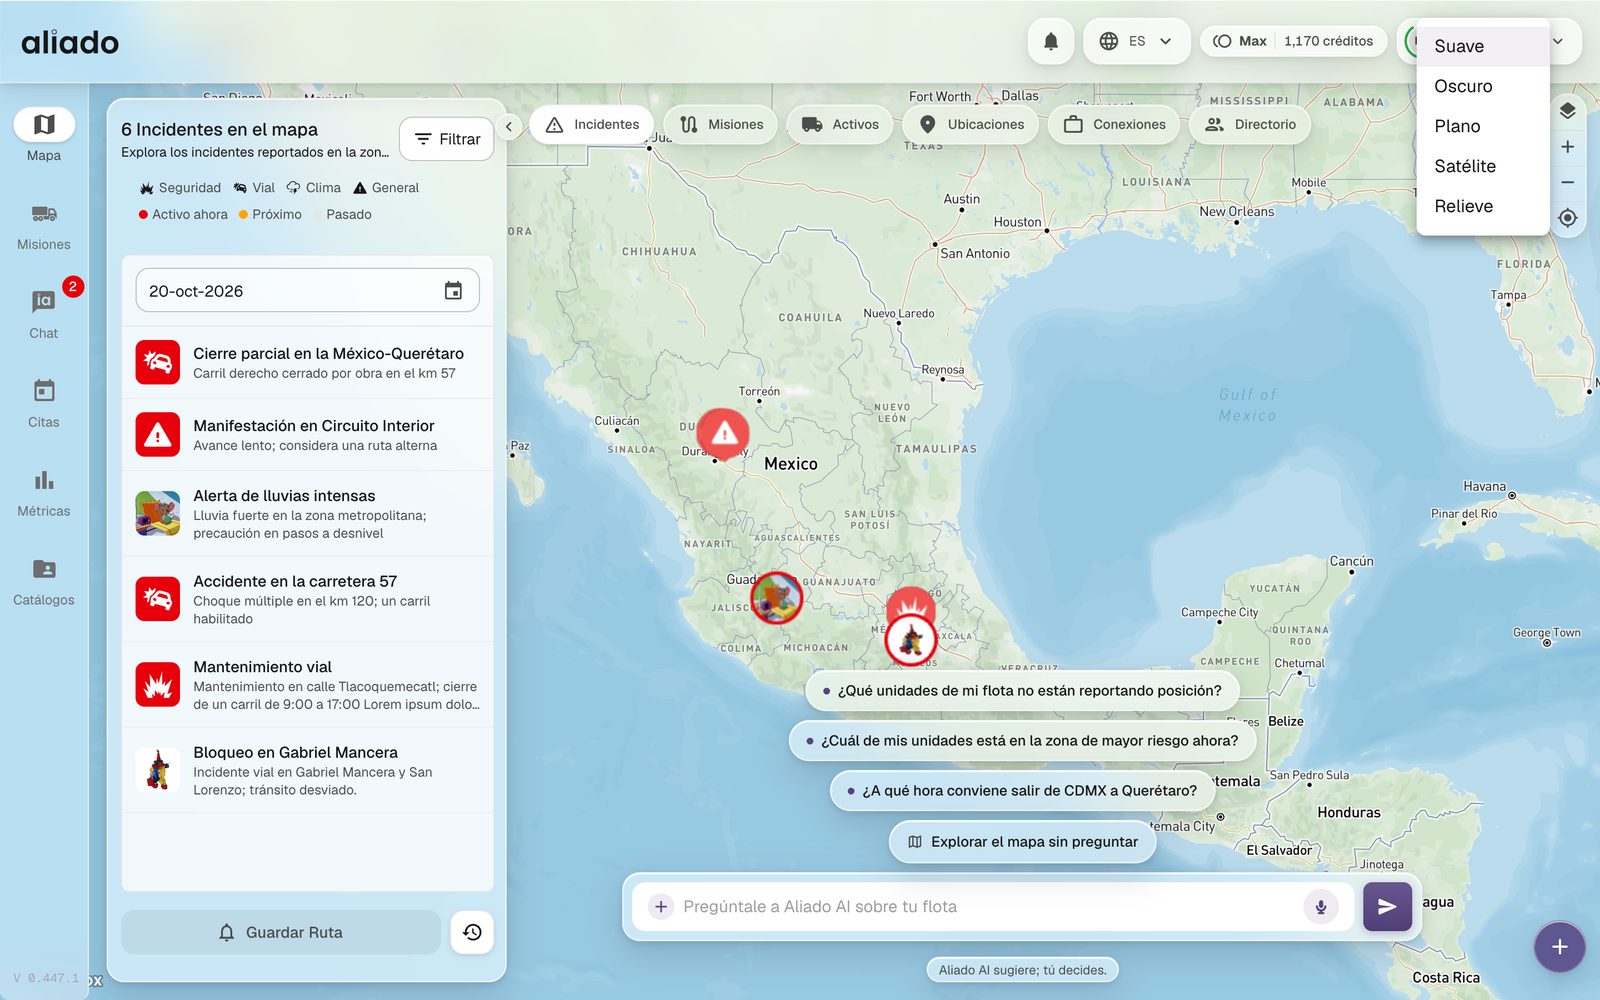
How do I change the map style?
The layers button in the top right corner offers five styles: Soft (default), Dark, Flat, Satellite and Outdoors. The style is kept when you change views.
How do I get the coordinates of a point on the map?
The main map has no right click and does not show the coordinates under the cursor. Depending on the point you are interested in:
- An incident: open it on the map and press Copy coordinates (on the phone the button says Coordinates). Latitude and longitude are copied, ready to paste.
- A location in your catalog: on the Map, Locations view, click it; its card shows the Coordinates. They also appear in the location's detail in Catalogs › Locations.
- Any other point: in Catalogs › Locations press Create location › Create from scratch and search for the address on the form's map. The Longitude and Latitude fields fill in by themselves; copy them and leave with Cancel if you do not want to save the location.
It also works the other way: if you already have the coordinates, paste them in Starting point or End point (the See incidents on a route shortcut) or in the stop search box when creating a mission, and Aliado locates that point. It accepts formats such as 19.4326, -99.1332, with a decimal comma or with N/W degrees.
You may also be interested in: Real-time incidents | Create locations | Incidents on my route
Aliado AI
Aliado AI is Aliado's assistant; in the Map's Incidents view you ask it in natural language about a route, an area or your fleet, and it answers with a report on the map: risk zones, current incidents, weather, best times and stops. With Monitoring with Aliado AI it also watches your missions by turns. Aliado AI suggests; you decide.
What is Aliado AI?
Aliado AI crosses real-time incidents, crime statistics by municipality (SESNSP), data from Aleph's network of users, weather forecasts and your own fleet to tell you where the risk of a route concentrates, what time it is best to leave and where not to stop.
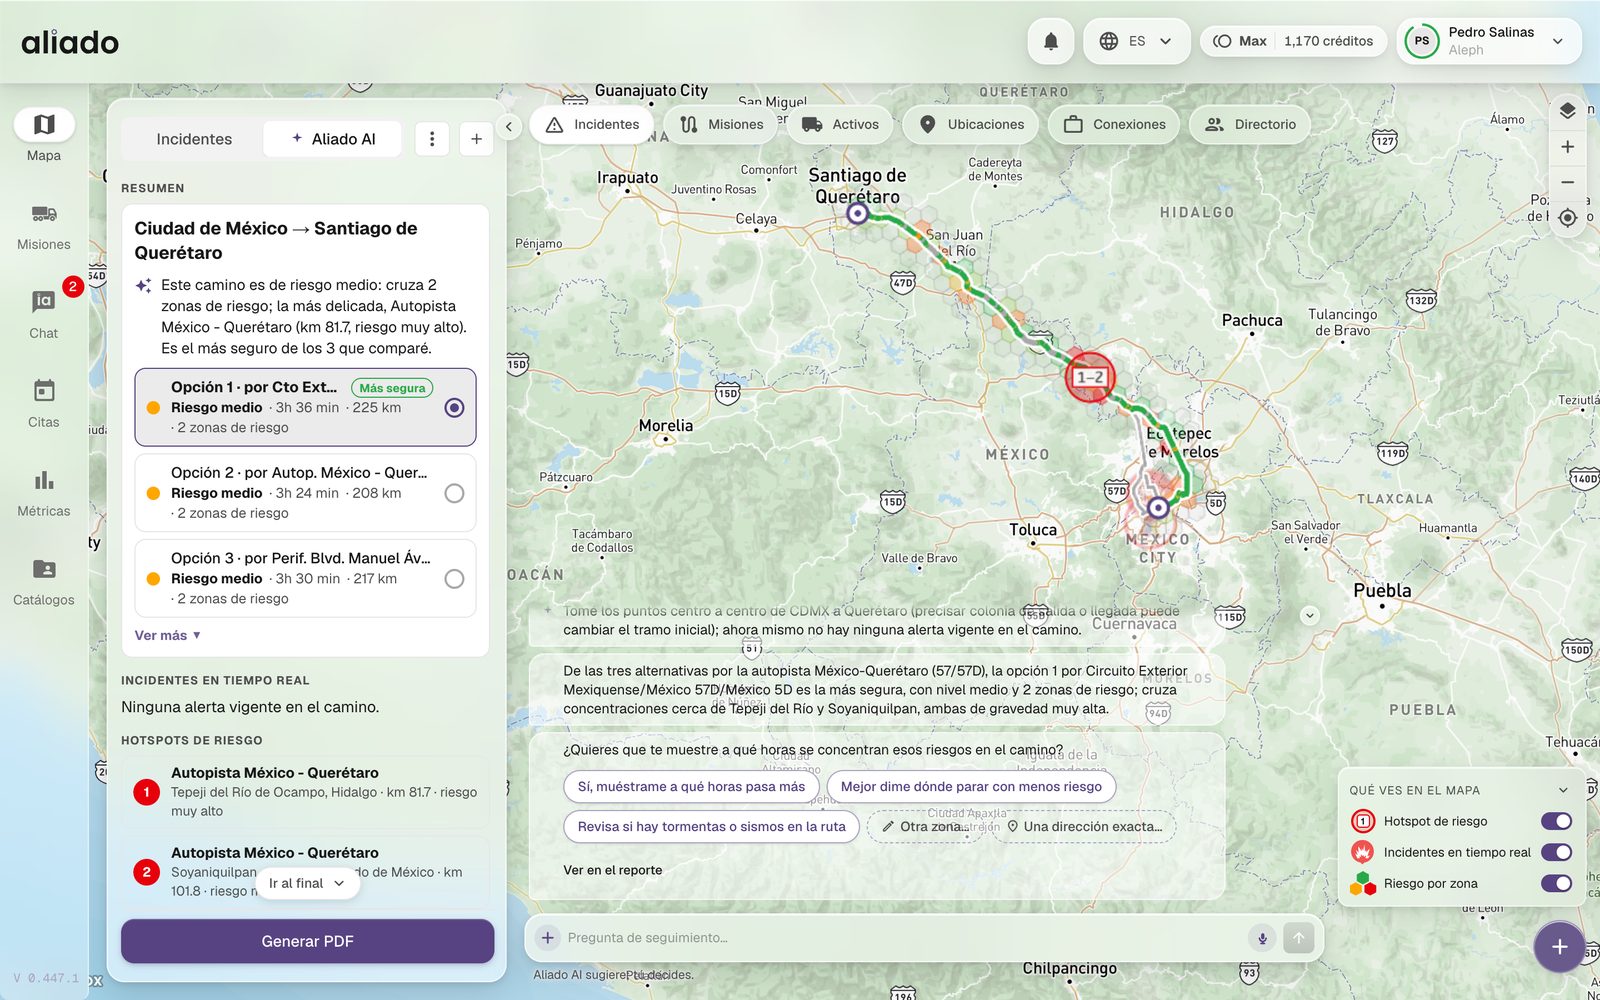
Each answer has two sides: the floating conversation over the map, with the bubbles, the clarifications and the next-step chips; and the report in the side panel, with the summary, the route options, the real-time incidents, the hotspots and the Generate PDF button.
You may also be interested in: How to ask | What the report includes | The Aliado AI assistant across the platform
How do I ask Aliado AI?
- Go to the Map, Incidents view. At the bottom you will see the Ask Aliado AI box.
- Write your question or press the microphone to dictate it. Examples: What risks are there today on the route from Mexico City to Querétaro on highway 57?, What time is it best to leave Monterrey for Saltillo?, Which of my units is in the highest-risk area right now?
- While it crosses data, the map centers on the area. When it finishes, the answer appears in bubbles and the report is built in the panel.
- Continue with the chips it proposes (see the crime clock, where to stop with less risk, check hurricanes and storms, another area, an exact address) or write a follow-up question.
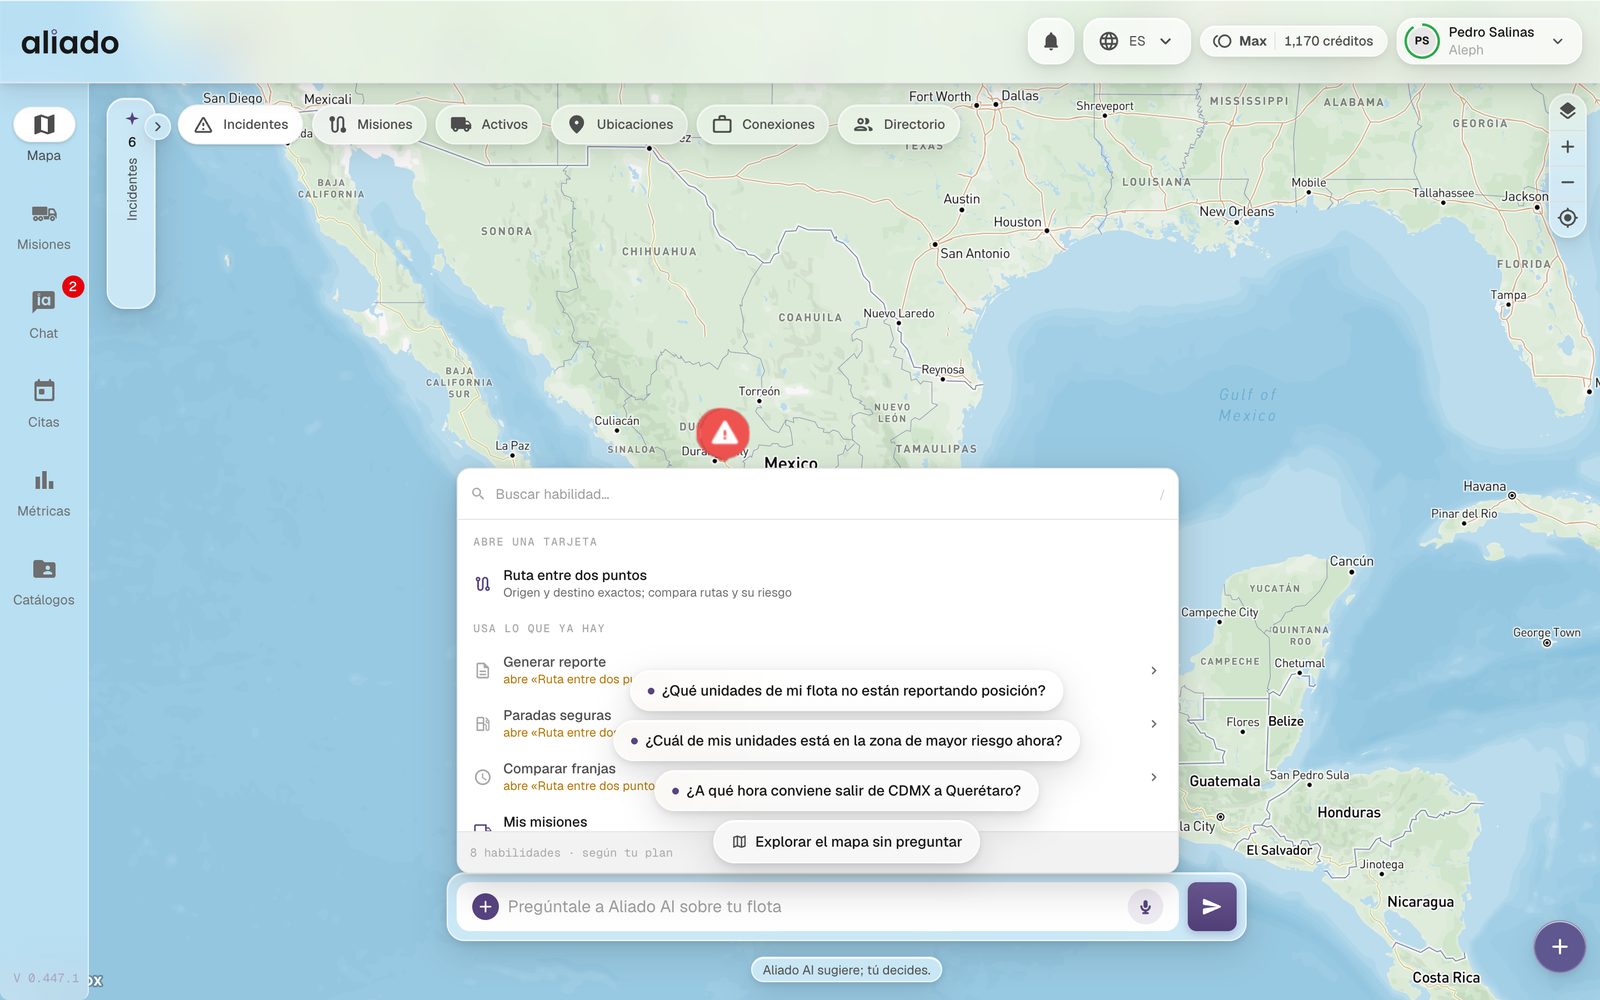
The Skills button (or the / key) lists everything the agent can do: open Route between two points, generate the report, look for safe stops, compare time bands, review your missions… Some skills first ask for a route, a registered fleet or an account.
With New analysis you start from scratch (the previous conversation is not recovered). When you are signed in, the history keeps your conversations so you can return to them.
What does the route report include?
When you ask about a route, the side panel becomes a report:
- Summary: risk level of the road, how many risk zones it crosses and which is the most delicate.
- Route options: up to three alternatives with time, distance, risk zones and the Safest label. Choose one to see it on the map.
- Real-time incidents: current alerts on the road.
- Risk hotspots: stretches with high or very high risk, with kilometer and municipality.
- Crime clock: at what hours incidents concentrate on that stretch.
- Stops: where to stop with less risk.
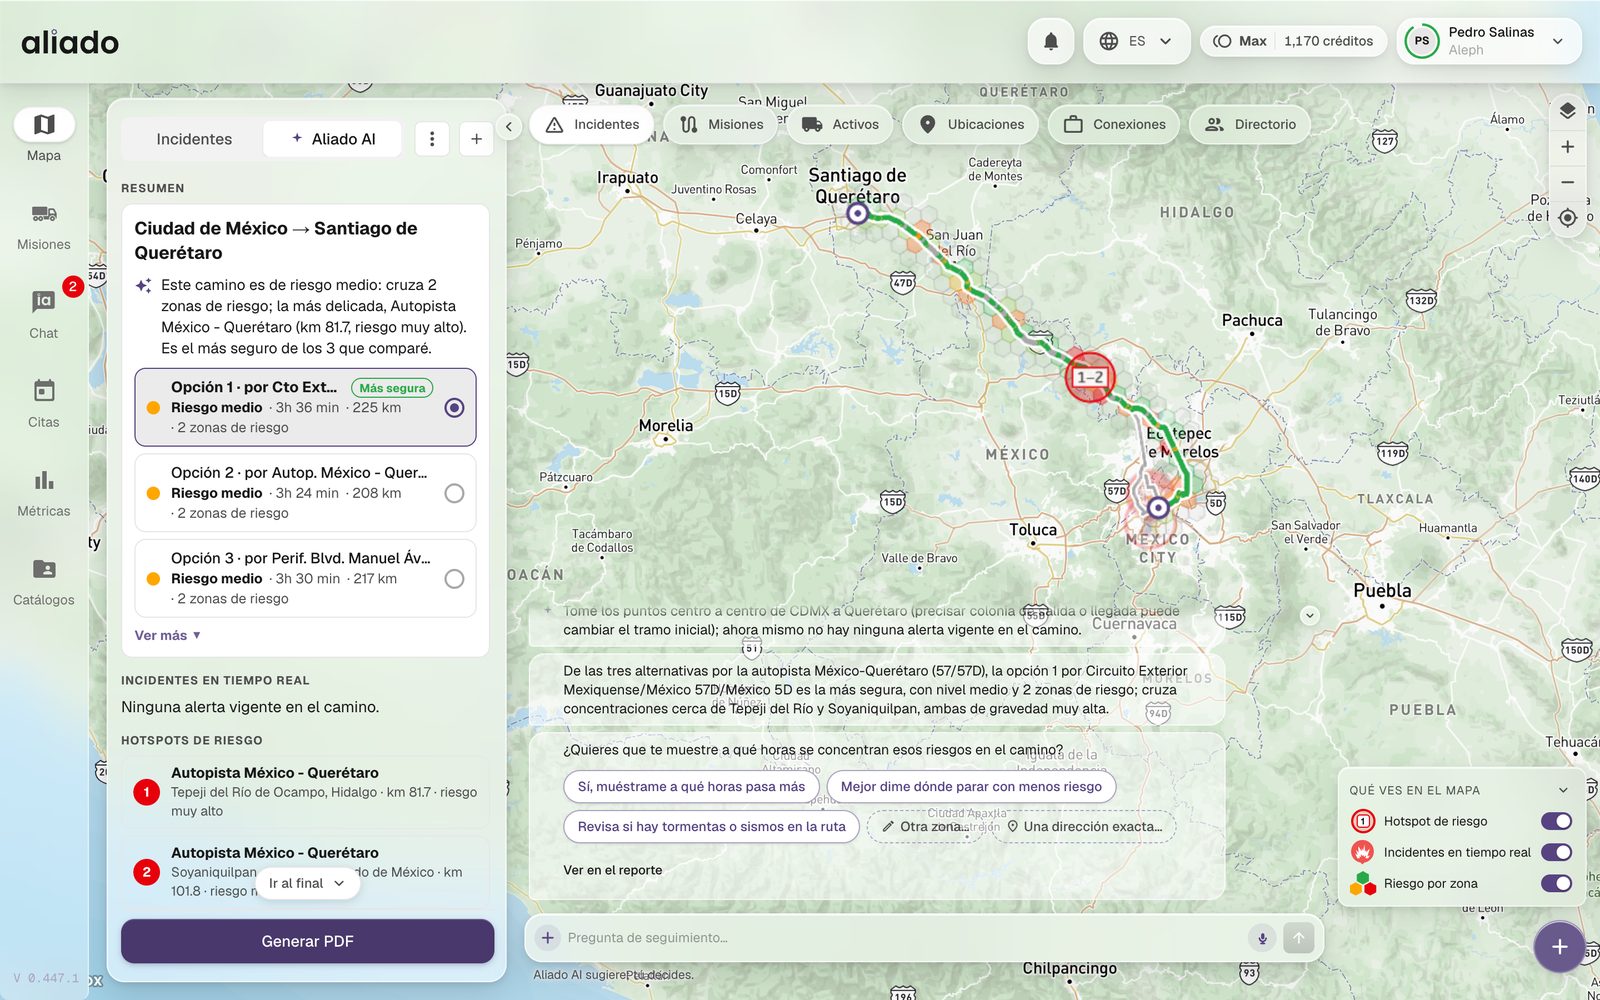
Generate PDF downloads the full report with the route's name, ready to share with the driver or the customer. From a saved route you can also choose Analyze with Aliado AI.
At the end of each answer you can rate it with Did this answer help? Yes / No; that helps us improve the agent.
Which layers can I see on the map?
The What you see on the map box, in the bottom right corner, explains each layer and lets you turn it off or on:
- Risk hotspot: numbered rings over the critical stretches of the route.
- Real-time incidents: the red pins of current incidents (always visible, never grouped).
- Risk by zone: hexagons colored by risk level.
- Historical incidents and Low-risk stop when the analysis includes them.
Aliado AI can also show weather and context layers when you ask for them or when they are relevant to your route:
- Hurricanes and storms: track and cone of each active system; if there are several, you choose which one to see.
- Moving Wind and Watch it move, which plays the forecast for the next 120 hours.
- Forecast rain with the ranges of Mexico's National Meteorological Service (SMN).
- Recent Earthquakes.
- Government data: crime incidence by municipality published by the SESNSP (with about two months of lag; provisional months are drawn dotted).
You may also be interested in: Aliado AI credits
What is "Watch this route"?
At the end of a report the Watch this route card appears. When you turn it on, Aliado notifies you of each new incident on that route, in the app and by email, without you having to ask again.
- If you do not have an account, leave your email and Aliado creates one right away.
- Each email carries the option to stop receiving them. By watching you accept the privacy notice.
- Watching a route is free; your plan includes a number of full alerts, and when you run out we let you know there is an incident without the detail, at most once a day.
Watched routes are managed together with your saved routes in Your routes.
You may also be interested in: Save routes
How much does it cost to use Aliado AI?
Aliado AI is paid with your organization's credits, the same ones you use for missions, appointments and notifications. Each analysis layer you ask for on a route deducts credits; Watch this route costs nothing.
- The Today's credits counter next to the question box shows how many you have left; when you are running low N left appears.
- When you run out you will see You've used today's questions and the Upgrade plan option. Daily credits renew every day and do not accumulate.
- The Pro and Max plans include unlimited Aliado AI analyses; the Free plan is enough for one analysis a day.
The price of each action and what your plan includes are always shown up to date in Subscription and payments.
You may also be interested in: Aliado plans | How credits work
Can I use Aliado AI without an account?
Yes. The public map at ui.aliado.alephri.com opens directly in Aliado AI with the Incidents, Connections and Directory views. You can ask about a route and see the report without signing up.
Without an account the conversation is not saved, the report cannot be downloaded and some skills ask you to Create account. With the free sign-up you take the report with you, watch routes and receive welcome credits.
You may also be interested in: Free plan
How do I enlarge the map of a route Aliado AI already analyzed?
The report and the conversation float over the map; the map remains whole behind them. To see the route larger on a computer:
- Collapse the panel: the round button on the right edge of the report panel reduces it to a narrow bar. Expand the panel, in the same place, brings it back.
- Minimize conversation: the arrow on the floating conversation reduces it (you can also drag it down). Show conversation brings it back.
- Zoom in or out with the map buttons or the mouse wheel, and drag the map to travel along the route.
- On the report cards that offer it, See on the map takes the camera to what that card shows.
On the phone, each answer arrives as a card over the map. Read report opens the report almost full screen and the Close conversation arrow returns you to the map; pinch to zoom.
You may also be interested in: The route report | Map layers
What is Monitoring with Aliado AI (AI Monitoring) and how do I use it?
Monitoring with Aliado AI watches your operation by turns (shifts), as a monitoring agent would: every so often it reviews the missions in progress, the last GPS reading of each asset and the new events; it opens a case when something deserves attention, asks the driver in the mission chat and, if a person is needed, tags the turn's responsible users.
- Press the radar icon in the header, next to the bell (Open monitoring with Aliado AI). If there are urgent cases, the icon shows how many.
- In the Turns tab press New turn and fill in: Turn name; Instruction, in your own words, of what you want it to watch (at least 10 characters; for example, "What matters to me is that we are not robbed; traffic looks after punctuality"); optional Scope by Mission folios or Assets (empty = your whole organization); Cadence (every 5, 10, 15, 30 or 60 minutes); Daily budget (credits); and Responsible users, up to ten (if you choose nobody, the responsible user is you).
- Press Create turn. The turn reviews by itself according to its cadence; Check now forces a review at that moment.
- In the Cases tab you see what it found, the urgent first, with priority Call now, Watch or For the cut. Each case explains What happened, Why it matters, What Aliado AI did and What comes next.
- Mark the case with Attend (it was real) or Ignore (false alarm), or press Notify responsible users so Aliado AI tags them in the mission chat on its next review.
From the turn you can also Pause, Resume, Edit or End (an ended turn can no longer be resumed). See all opens the full monitoring screen.
To watch a single mission, open its detail on the Map (Missions view) and press the Watch with Aliado AI icon: a new turn opens with the folio and an instruction already written, ready for Create turn.
To see the radar icon you need permission on the Map (View or Edit and create). If you have the permission and it does not appear, monitoring is not yet active for your account: write to us from the contact form.
You may also be interested in: Try the monitoring | Credits | The mission chat
How do I try AI Monitoring with a test unit and a test mission?
The simplest way is to watch a single test mission. Monitoring reviews missions in progress and the last GPS reading of their assets, so you need a unit that already reports position.
- Choose the unit: an asset from Catalogs › Assets that reports GPS. Check it on the Map, Assets view: it must have a recent Last reading.
- Create the mission in Missions › Create mission with that unit, a driver and a Mission ID that is easy to recognize (for example, TEST-MONITORING).
- Start it with Start mission.
- Open its detail on the Map (Missions view) and press Watch with Aliado AI. Review the turn that opens (name Turn · your folio and the instruction Watch mission…: tell me if it stops off-site, deviates or stops reporting) and press Create turn.
- Press Check now so you do not wait for the cadence. If the review finds something, in a moment you will see the case in the Cases tab of the radar icon. If the tab stays empty, the review saw nothing out of the ordinary: that is also a result of the test.
- When the test is over, press End on the turn and close or cancel the test mission.
You may also be interested in: Monitoring with Aliado AI | Start a mission | End or cancel
Missions
A mission is the digital record of a trip. The Missions module is the day's trip board (the "airport view"): at a glance you know who is on time, who is delayed and who still has no unit.
What is a mission and what statuses does it have?
A mission groups everything that happens on a trip: origin and destinations, the planned route, the assigned assets and drivers, the start and close window, the tasks per stop, the documents and each GPS event recorded along the way.
The status tells you where the trip is:
| Status | What it means |
|---|---|
| No assets | The mission exists but has no unit or driver assigned. |
| Assigned | It already has an asset or a driver; it can be started. |
| At origin | The mission started and the unit is at the departure point. |
| In transit | The unit left the origin and is on its way. |
| At destination | The unit arrived at the last destination. |
| Closed | The trip ended; it no longer records events. |
| Canceled | It was canceled before it ended. |
Next to the status, the On time column compares the commitment with reality: On time or Delayed. A trip is on time if it arrives on time; before departure only the departure is evaluated. The delay tolerance (how many minutes are forgiven) is set per organization. The Departure and Arrival columns show the gap in color: blue if it is ahead, red if it is late, and an icon tells whether the calculation comes from the ETA or from the actual time.
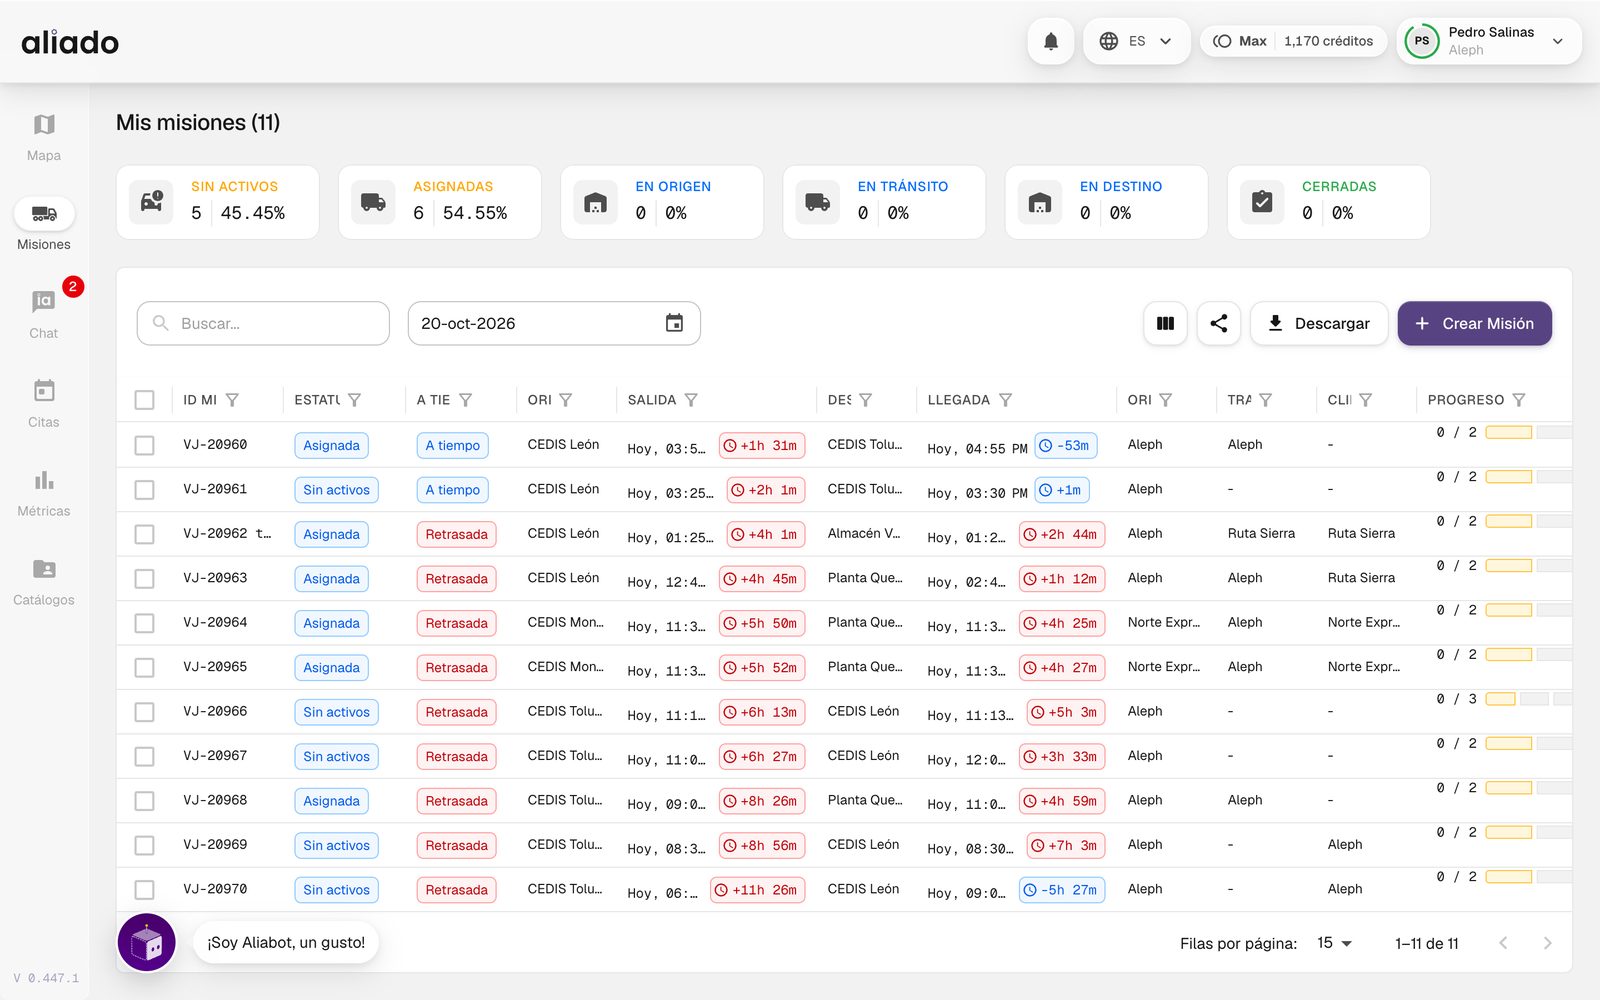
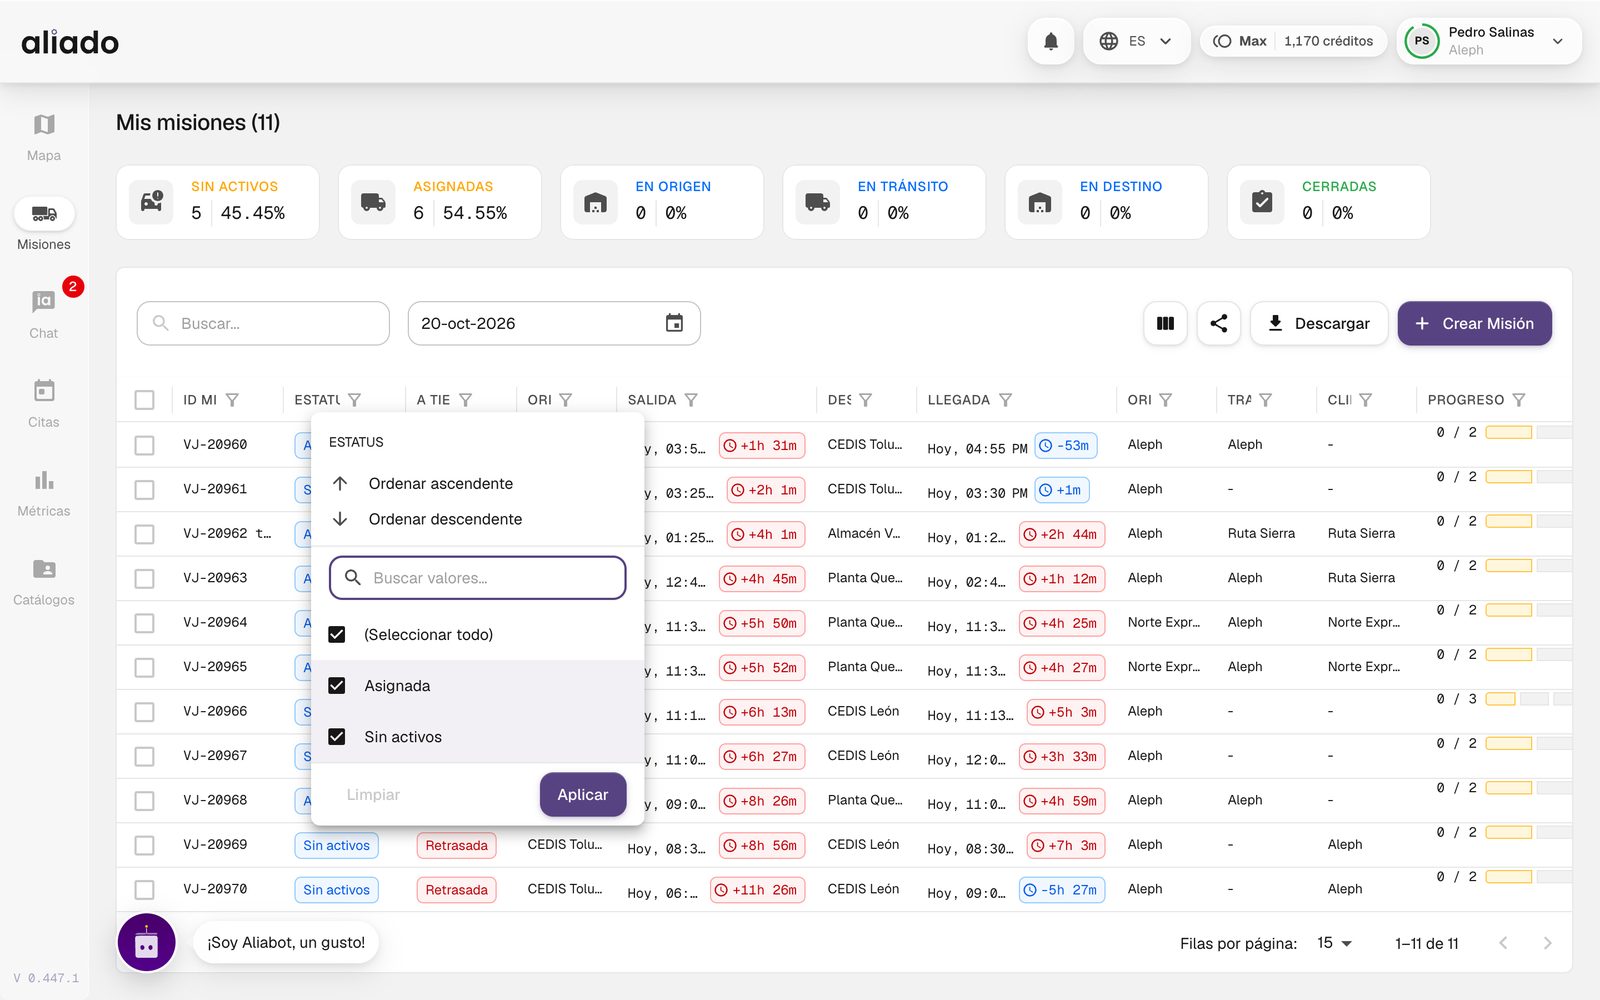
The cards at the top (No assets, Assigned, At origin, In transit, At destination, Closed) count the missions of the chosen dates. They are not buttons: to filter by status use the filter of the Status column (the card of the status you filtered is highlighted). The board's date is today by default; change it with the calendar.
You may also be interested in: Create a mission | Start a mission | Detail and log
How do I create a mission from scratch?
The Mission creator is a panel over the map: what you enter on the left is drawn on the right. The only things required to save are at least one stop and the Mission ID.
- Go to Missions, press Create mission and choose Create from scratch.
- In Mission route tap Departure from origin: search for the location (only the active locations of your catalog and those your allies share with you appear; you can also paste coordinates), schedule the departure date and time and press Save origin.
- Tap Arrival at the destination and repeat. With Add destination you add intermediate stops; at each stop you can turn on Tasks (see the next article).
- The geo-route is suggested by itself once there are two stops with coordinates, calculated for a truck according to the vehicle profile. If you prefer your own line, upload a .kml or .gpx file with the upload icon; when you change stops the route is recalculated without losing what you already edited.
- In Assets select one or more units (your own or those of your authorized allies) and in Drivers the people responsible.
- Set Scheduled start and end: start and end date and time of the trip.
- Enter the Mission ID (your folio) and, if you use tags, assign them with the tag icon. Press Create mission.
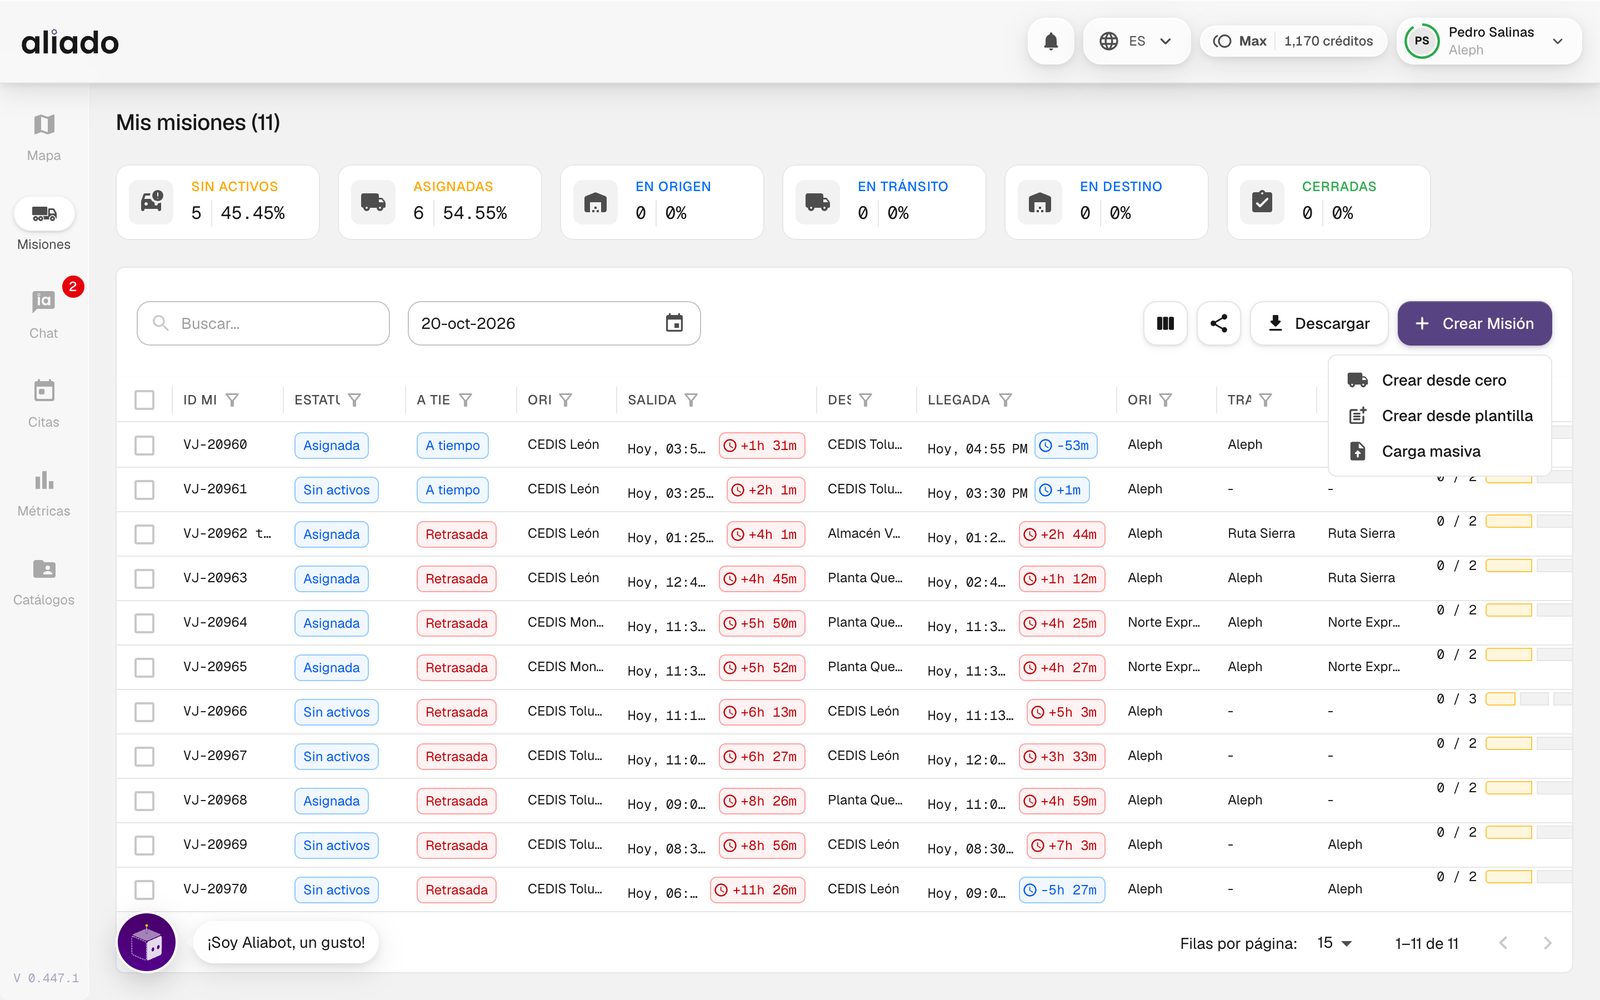
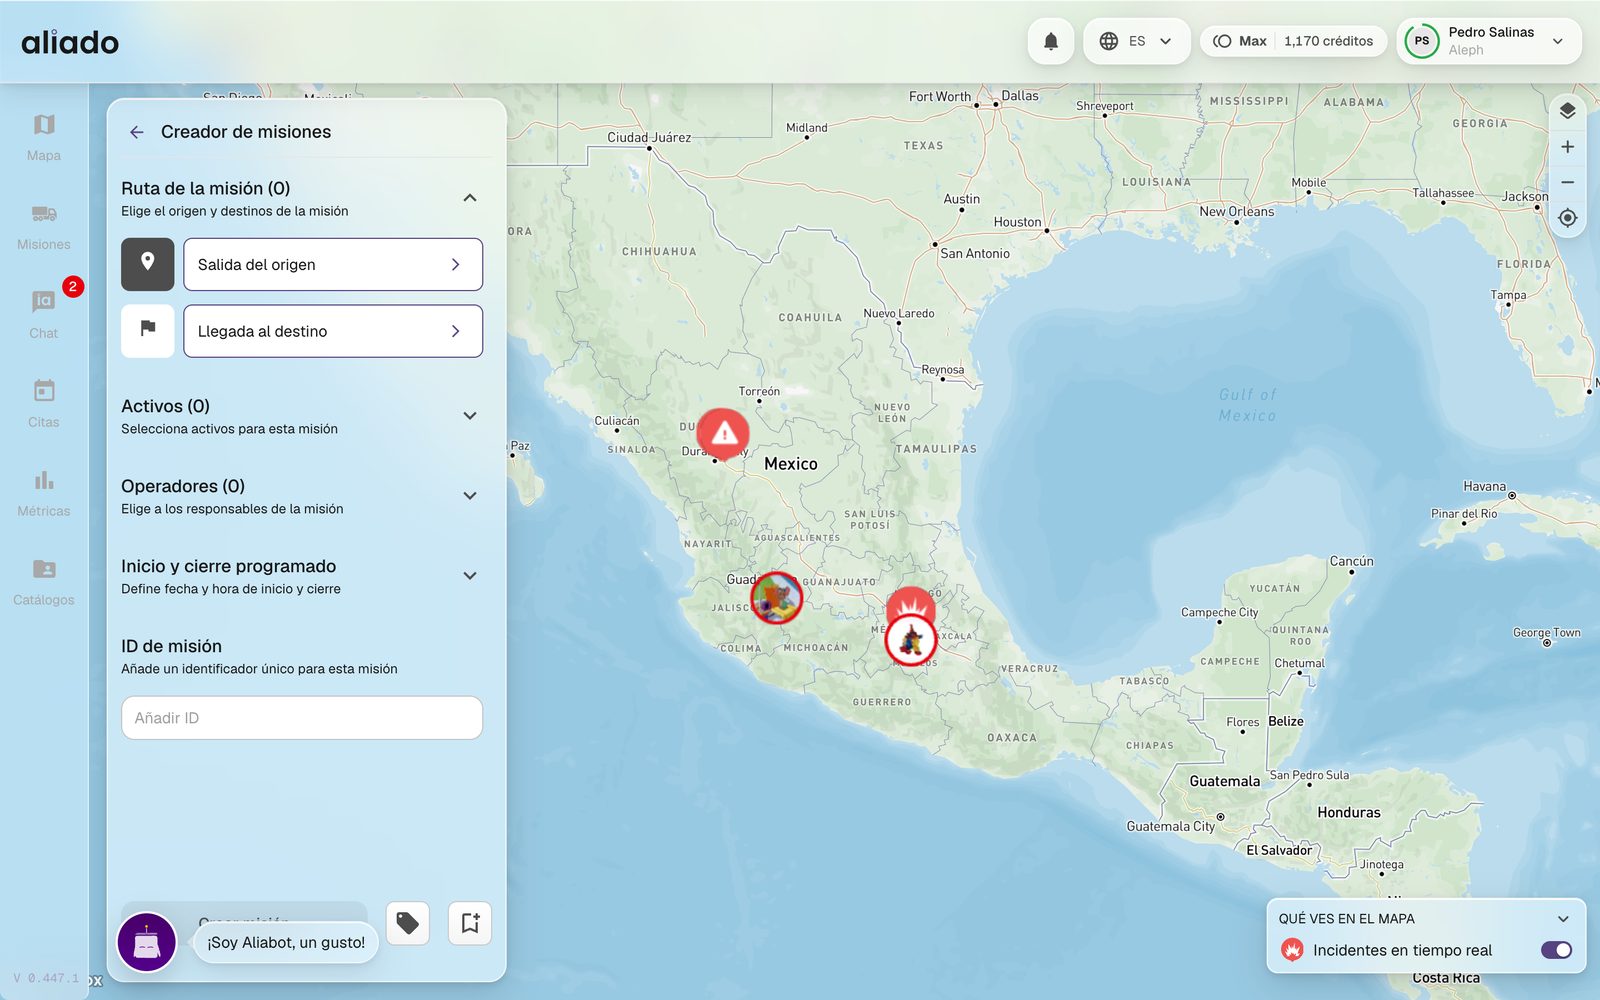
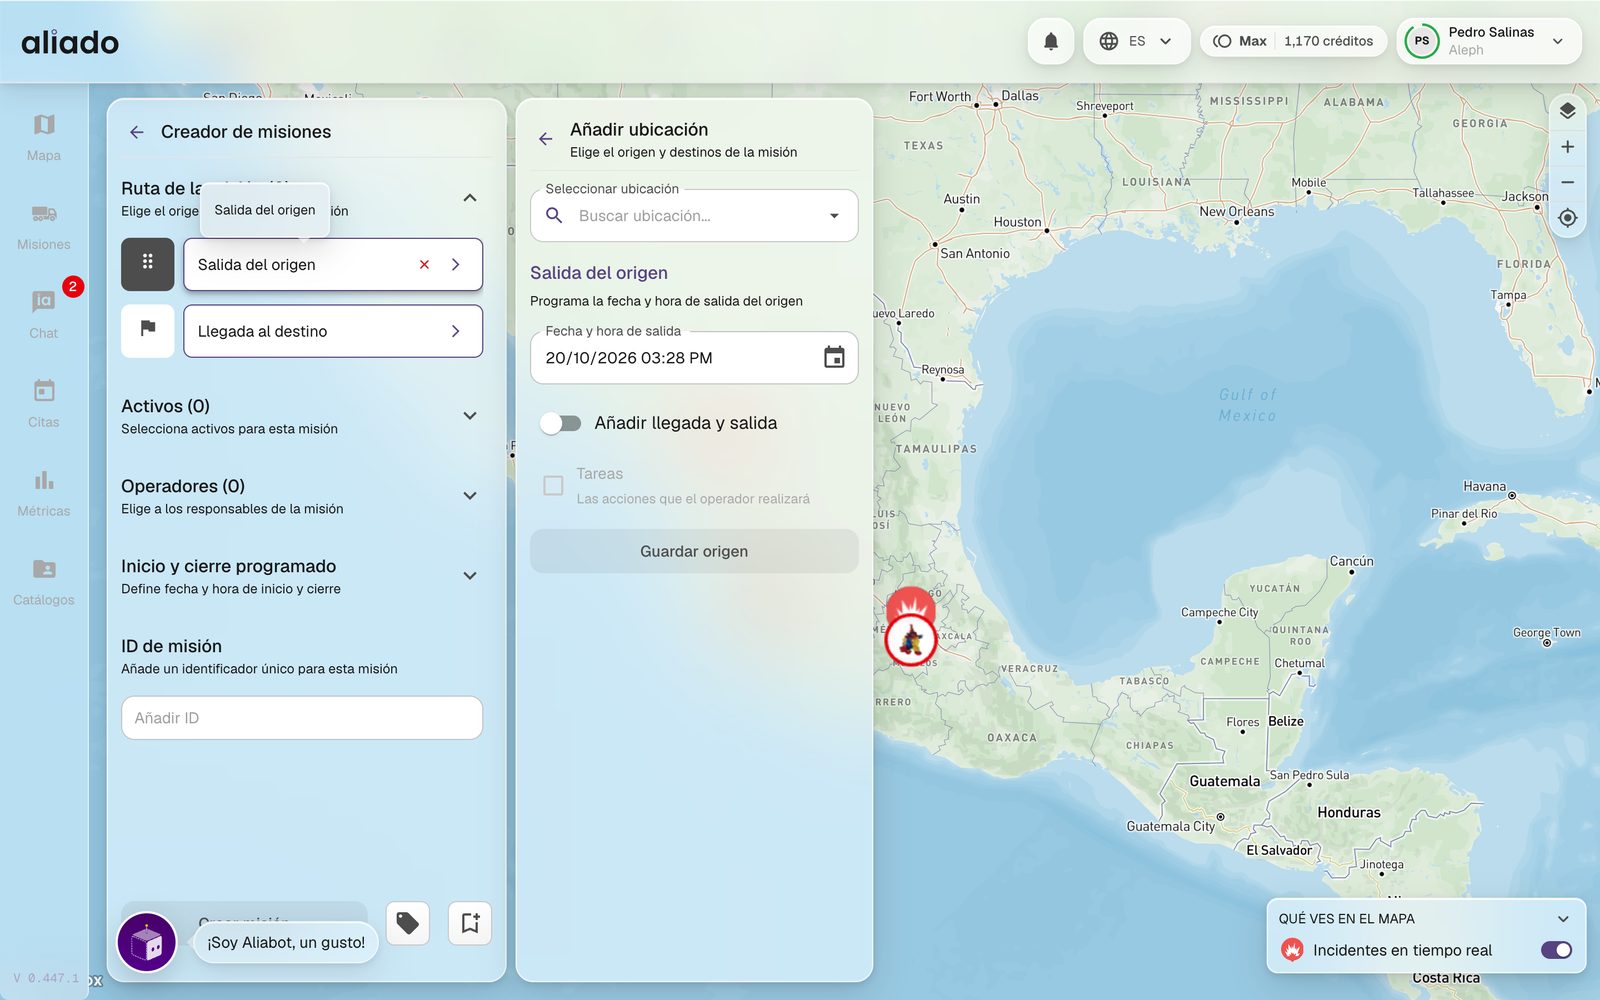
When saving, the bookmark icon lets you save the mission as a template to reuse it. The creator's What you see on the map box shows the real-time incidents on your route while you plan.
You may also be interested in: Tasks per stop | Bulk upload | Templates | Start mission
How do I add tasks per stop with evidence?
Each stop can carry tasks: actions the driver must perform on arrival (take a photo of the load, collect a signature, ask for a delivery code). The evidence stays in the mission's log.
- In the stop's panel check the Tasks box (Actions the operator will perform) and press Add task.
- Enter the Task title and the Additional details; both are required.
- If you want proof of completion, check Request evidence and choose the type: Photograph (say what the driver must photograph), Signature or 4-digit code.
- For Signature and 4-digit code enter the Validator: name, email and number in international format (for example +52 55 1234 5678). The PIN code is generated at random and sent only to the validator's email; the driver asks for it at the dock.
- Press Save task, add as many as you need and close the stop with Save destination.
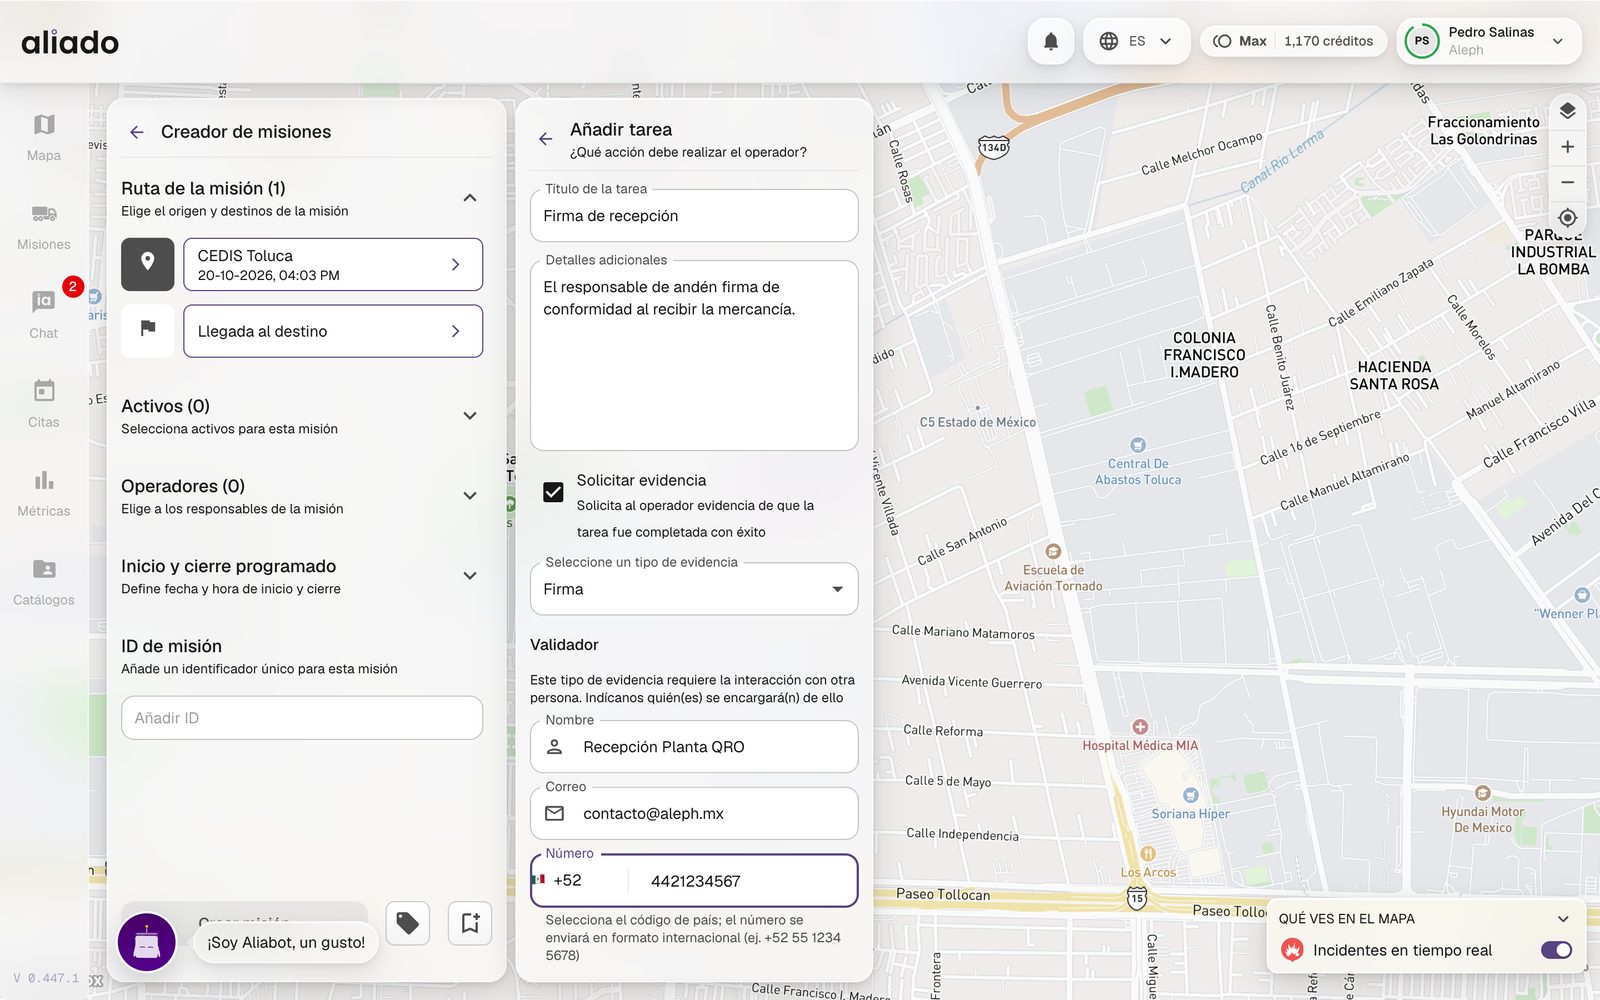
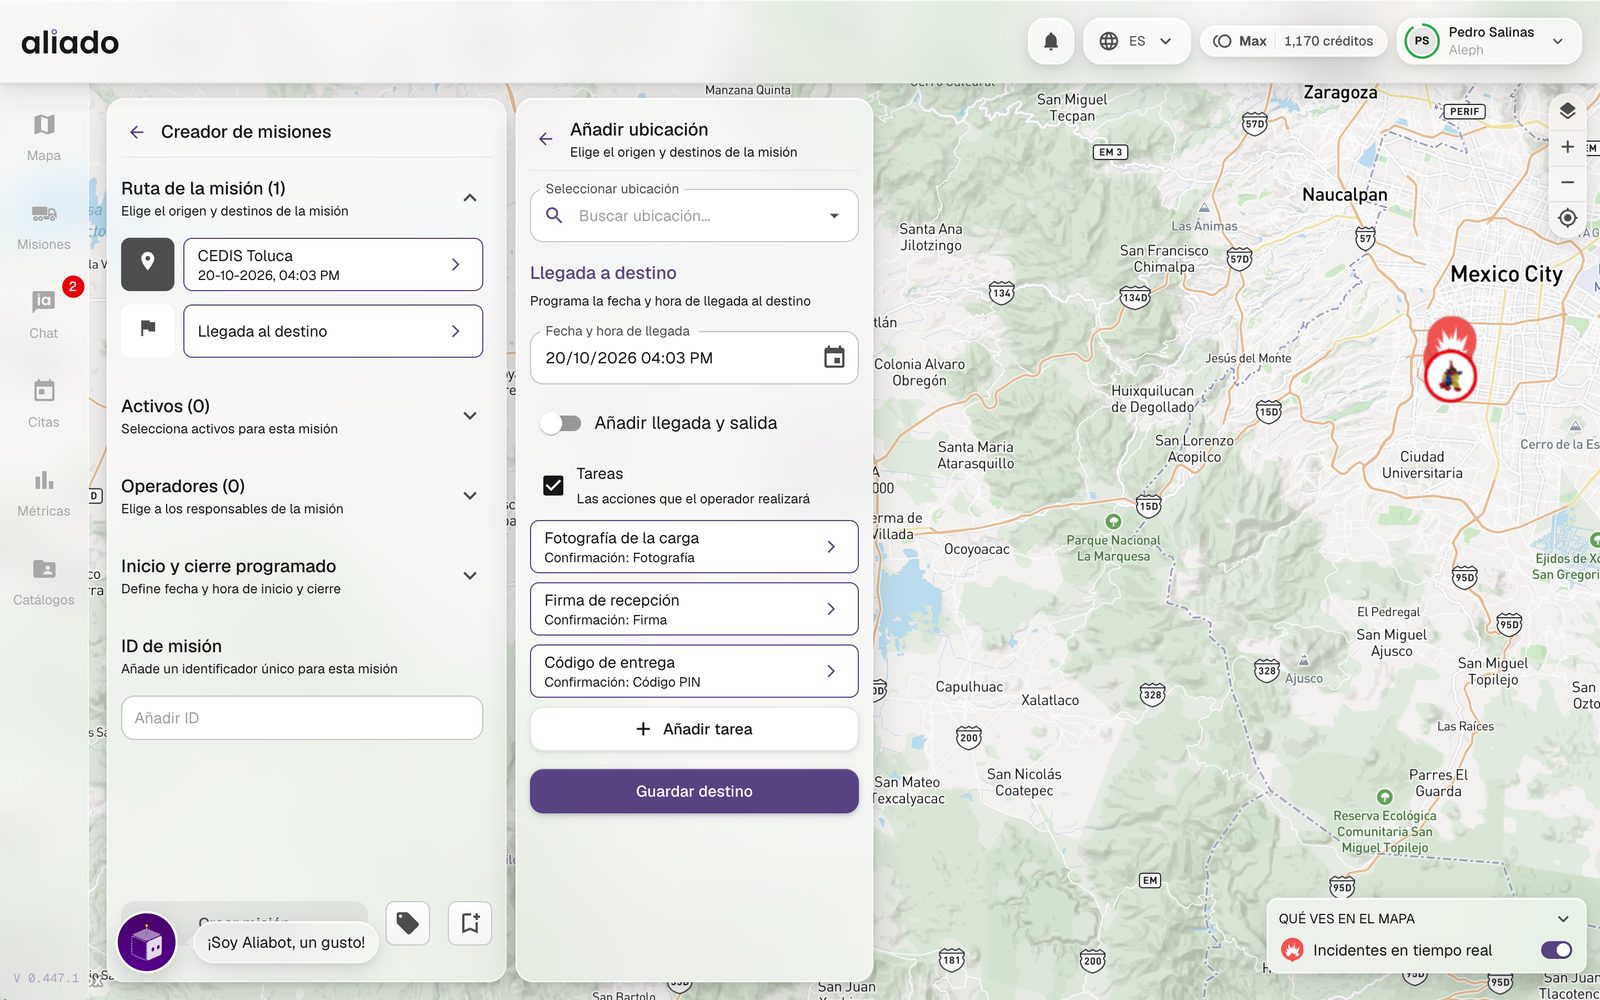
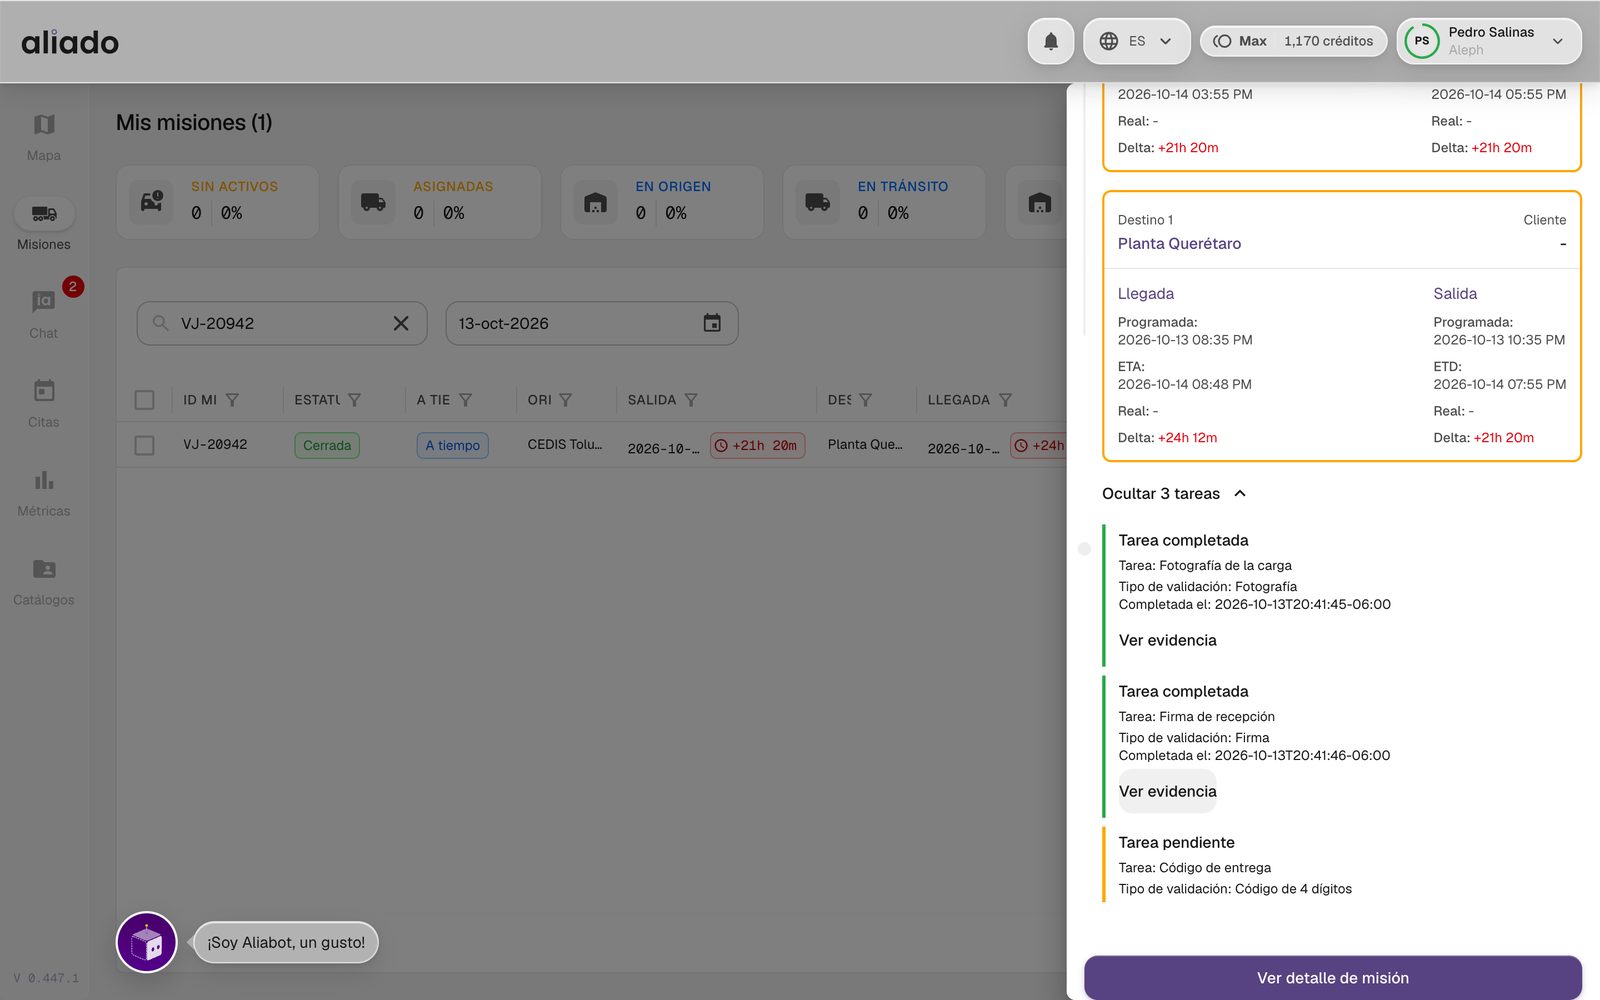
The driver completes the tasks from the Aliado app. On the Missions board, the mission's drawer shows Show N tasks with the state of each one and the View evidence button; in the log the Completed task event appears with who signed, who took the photo or who confirmed.
You may also be interested in: Complete tasks from the app | What the log records
How do I edit a mission?
You can edit a mission as long as it is not Closed or Canceled. If it is already started, changing stops or the route affects the tracking in progress, so it is better to edit before starting.
- On the Missions board hover over the row and press Show actions (the three dots). Choose Edit mission.
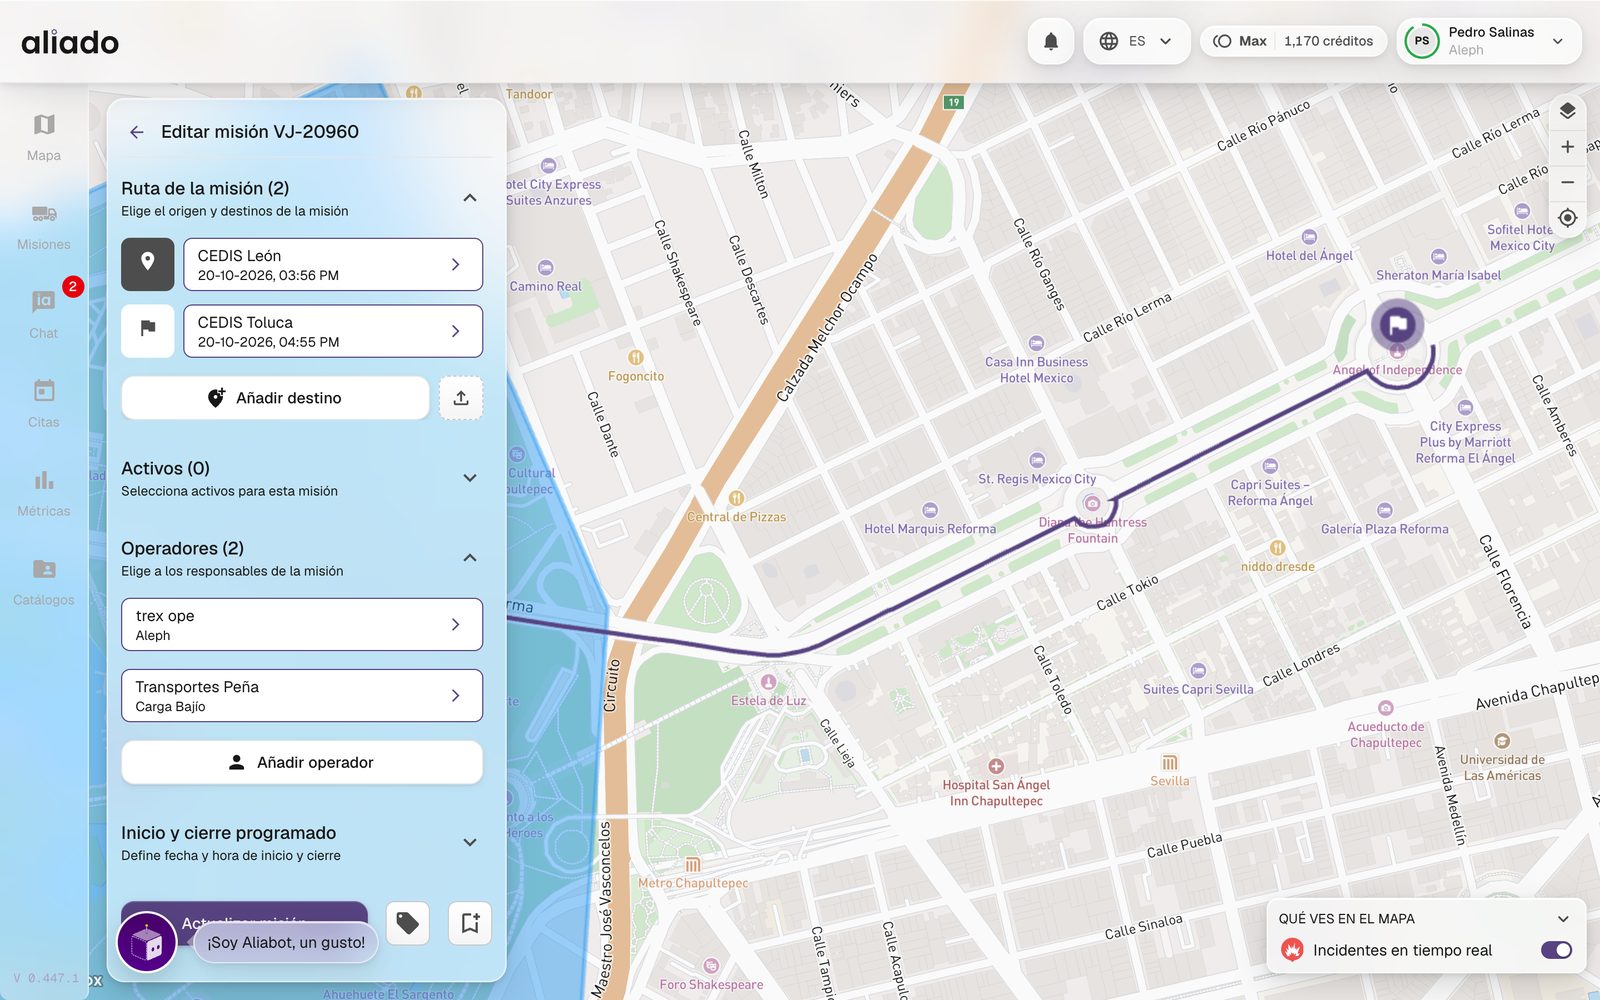
- The same creator opens with the data loaded. Tap any stop to change location, schedule or tasks; use Add destination, Add driver or the Assets section as needed.
- To replace the geo-route, delete the previous file and upload the new one, or let Aliado suggest it again when you move the stops.
- Press Update mission.
You may also be interested in: Create mission | End or cancel
How do I start a mission?
Starting a mission turns on the recording of events inside it: stops, deviations, arrivals, chat messages, tasks. From that moment everything stays in its log.
- Find the mission on the board (search box, filters or the Assigned card).
- Hover over the row, open Show actions and press the Start mission icon (the play triangle). For several at once, check the boxes on the left and use the bulk action.
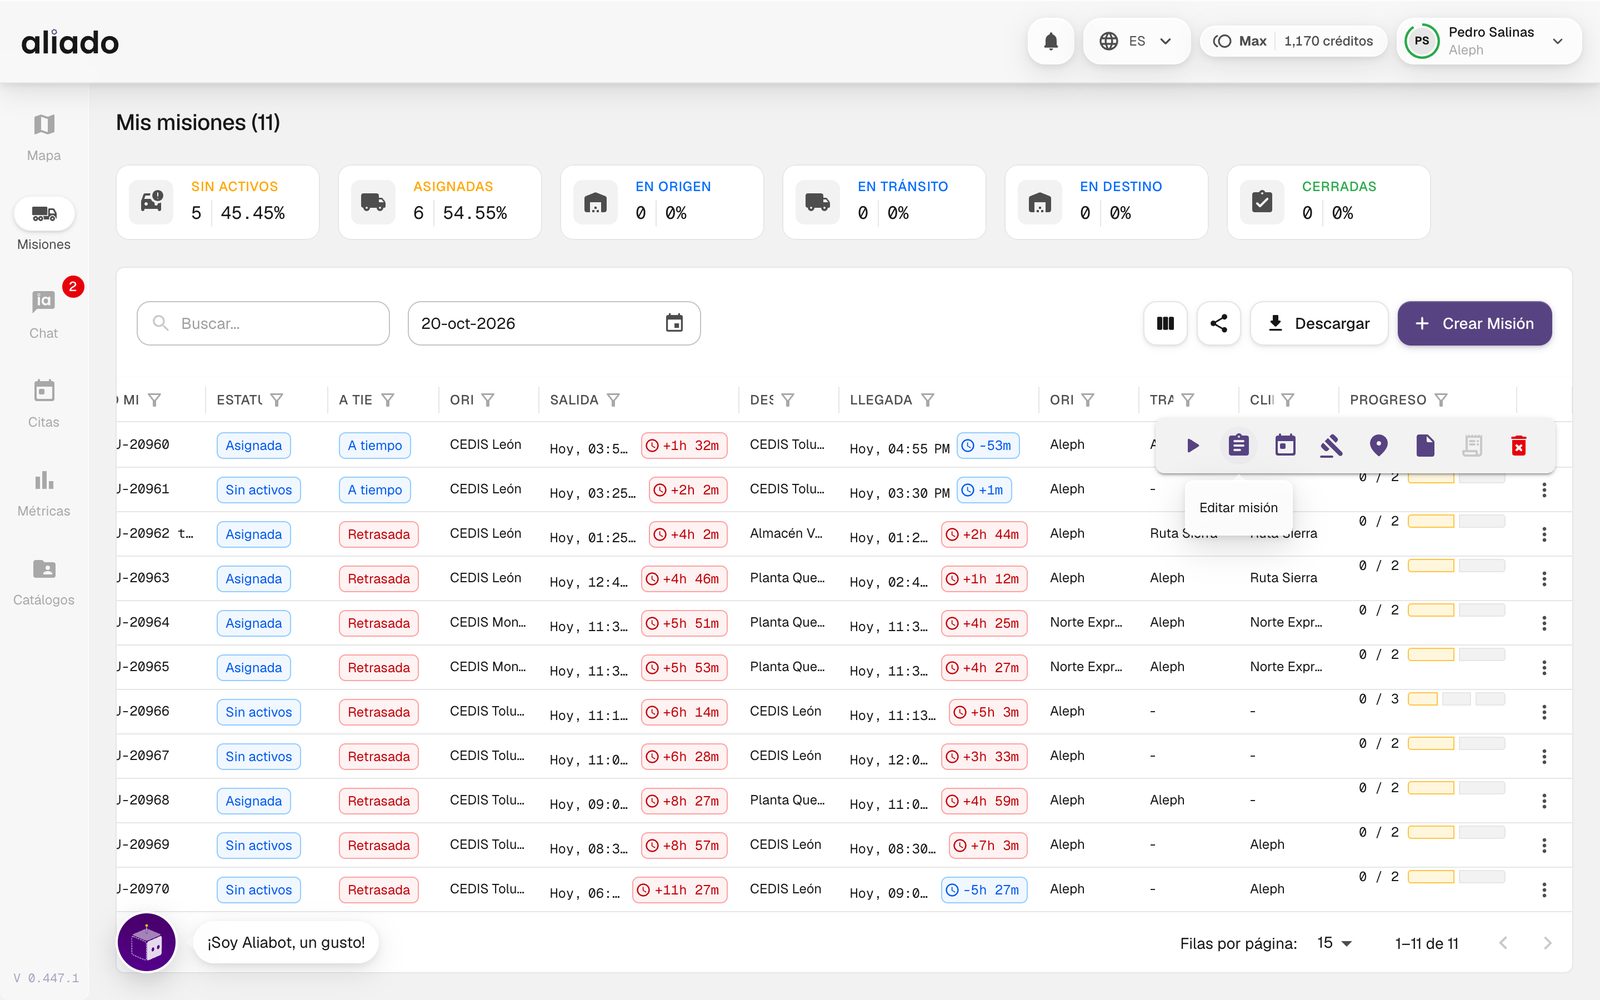
To start, the mission needs at least one asset or one driver assigned; otherwise Aliado tells you. Missions can also be started from the driver's app, by integration or automatically according to the scheduled window.
You may also be interested in: End or cancel a mission | What the log records
How do I end or cancel a mission?
A mission ends in three ways: the unit arrives at the last destination and the system closes it, you end it by hand, or it is canceled.
- End mission: from the row actions, when the trip is over. It stops recording events and moves to Closed. It cannot be reopened; if you need to continue, create another mission.
- Cancel (the red icon in the actions): for trips that will not take place. It moves to Canceled. You can cancel several at once by selecting them with the checkboxes.
- The automatic close applies when the unit fulfills the last destination or the mission's window runs out; the log records that the mission ended, with the way it ended.
You may also be interested in: Start mission | Edit mission
How do I create missions with a bulk upload?
If you have many trips, upload them in an .xlsx or .csv file. The upload's Aliado AI assistant interprets the columns; you review and correct before anything is created.
- In Missions press Create mission › Bulk upload.
- Drag the file to Upload file or click to choose it. If your format is unusual, tell Aliado AI how to read it in Tell us about your file....
- Press Process file. The state moves from Interpreting to Interpreted; if something does not fit you will see Pending arrangements.
- Review the table: you can widen columns, filter and find/replace. Each row says whether it is new, an edit or a recovery, and Aliado warns you if a destination is already in another mission on the same day.
- Press Process N missions and confirm. Only the valid rows are created; those that need attention are exported in a CSV for you to correct.
View history shows your previous uploads and their result; the history updates by itself. You can also be notified when an upload finishes being interpreted or processed (Configure alerts, bulk uploads section).
You may also be interested in: Bulk upload of catalogs | Templates
How do I use templates and recurrence?
A template saves a reusable base configuration: stops, geo-route, assets, drivers and tasks. They live in Catalogs › Templates and are created from there or when saving a mission.
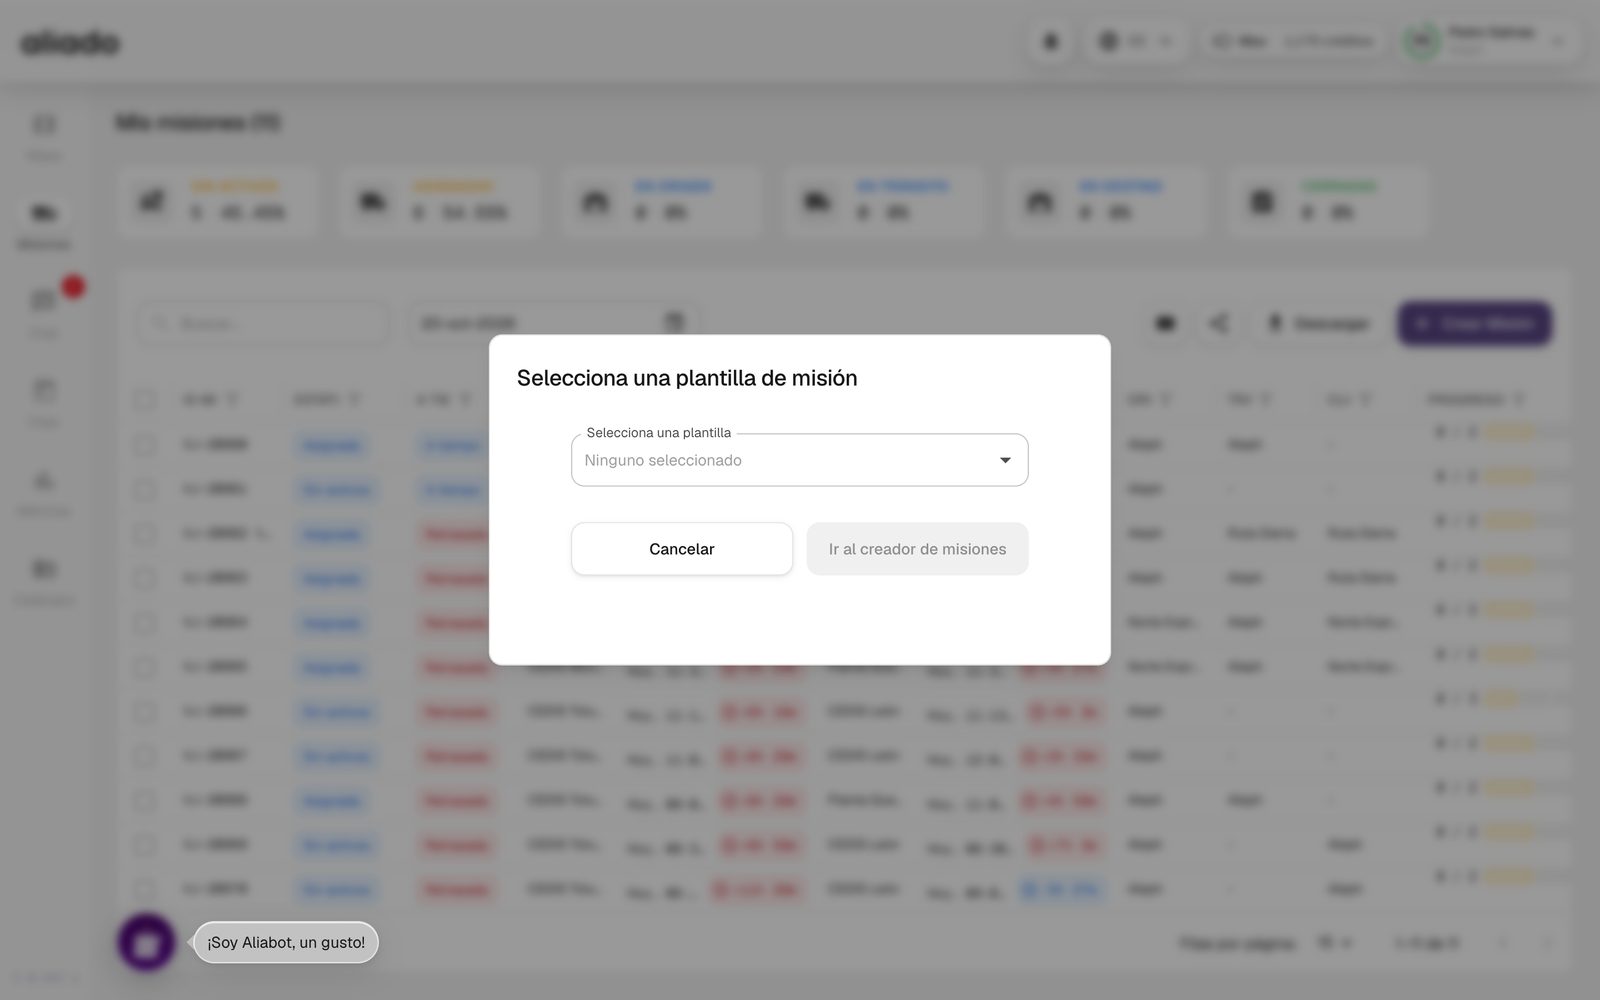
- In Missions press Create mission › Create from template.
- Choose the template in Select a mission template and press Go to mission creator.
- The creator opens with the data preloaded. Adjust what changes (dates, driver) and save.
If a trip repeats, give the template a recurrence: daily, weekly, biweekly, monthly or yearly, ending never, on a date or after N repetitions. The missions are generated by themselves.
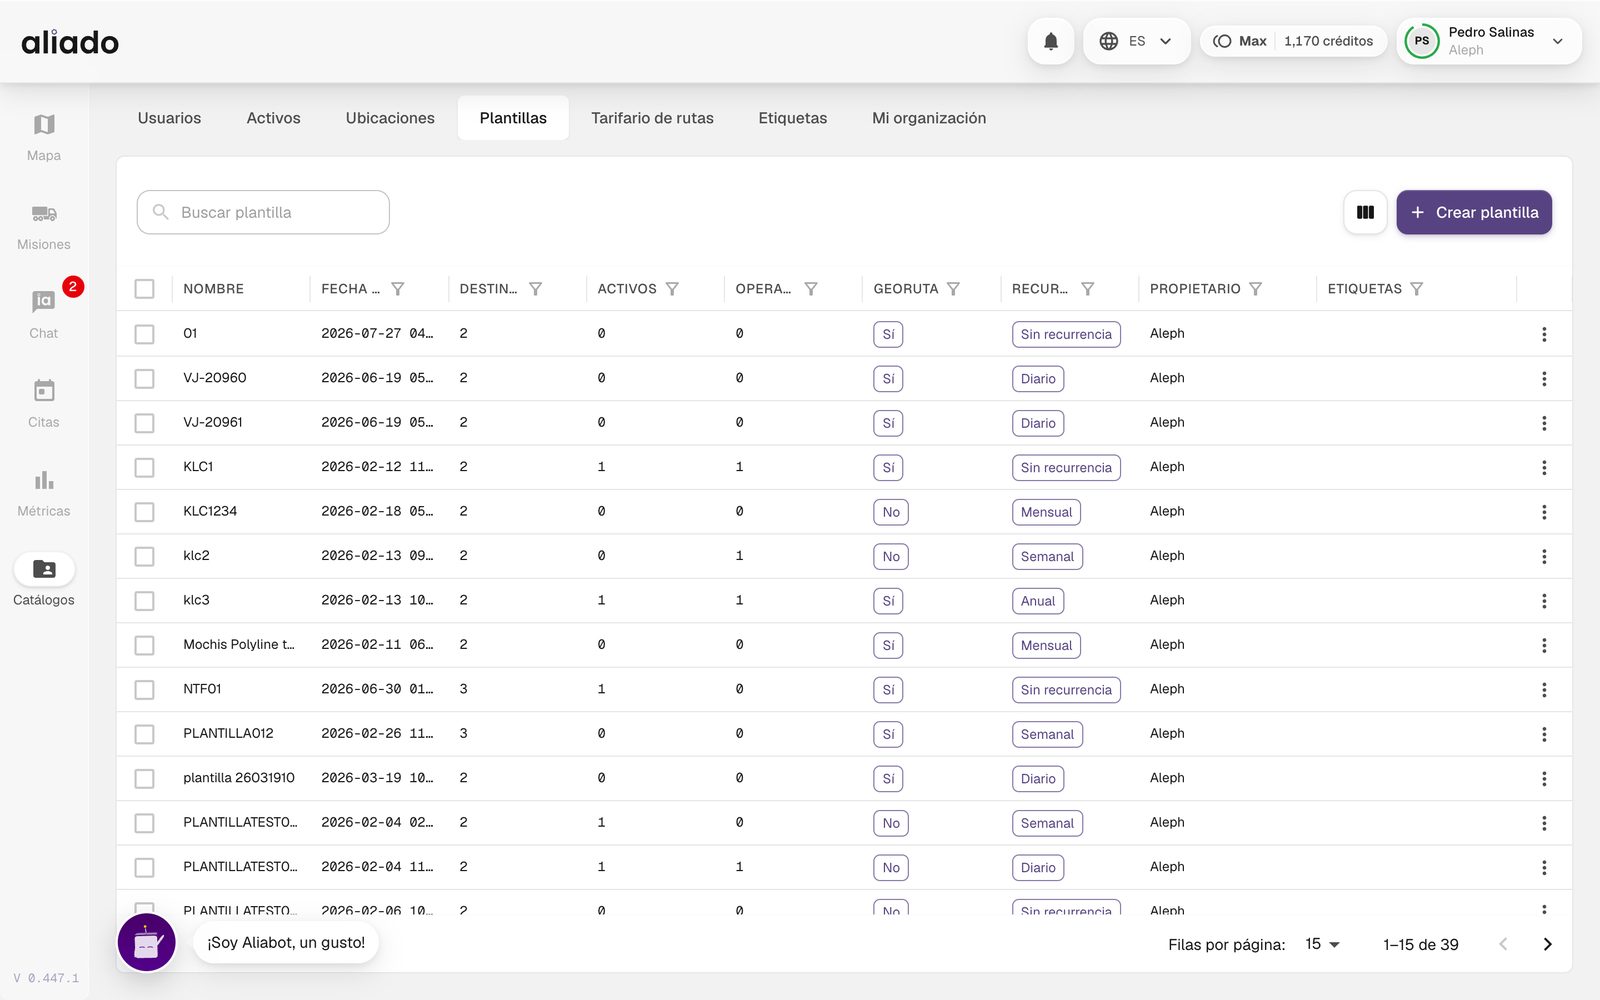
Templates can also be created by bulk upload from the catalog.
You may also be interested in: Templates catalog
What else can I do from the board?
When you hover over a mission and open Show actions you have, from left to right: Start mission, Edit mission, Create appointment, Create appointment by tendering, Detail, Documents, Generate Carta Porte / invoice and Cancel. Actions that do not apply to the mission's state appear disabled.
In the board's top bar:
- Search by ID, origin, destination or carrier, and the calendar to change the day.
- Show/Hide columns and the Excel-style filters of each column: funnel with a list of values, ascending or descending order and search; filters combine with each other.
- Controlled visibility (share icon) to give your customers a board of their deliveries.
- Download the itinerary as CSV respecting the active filters.
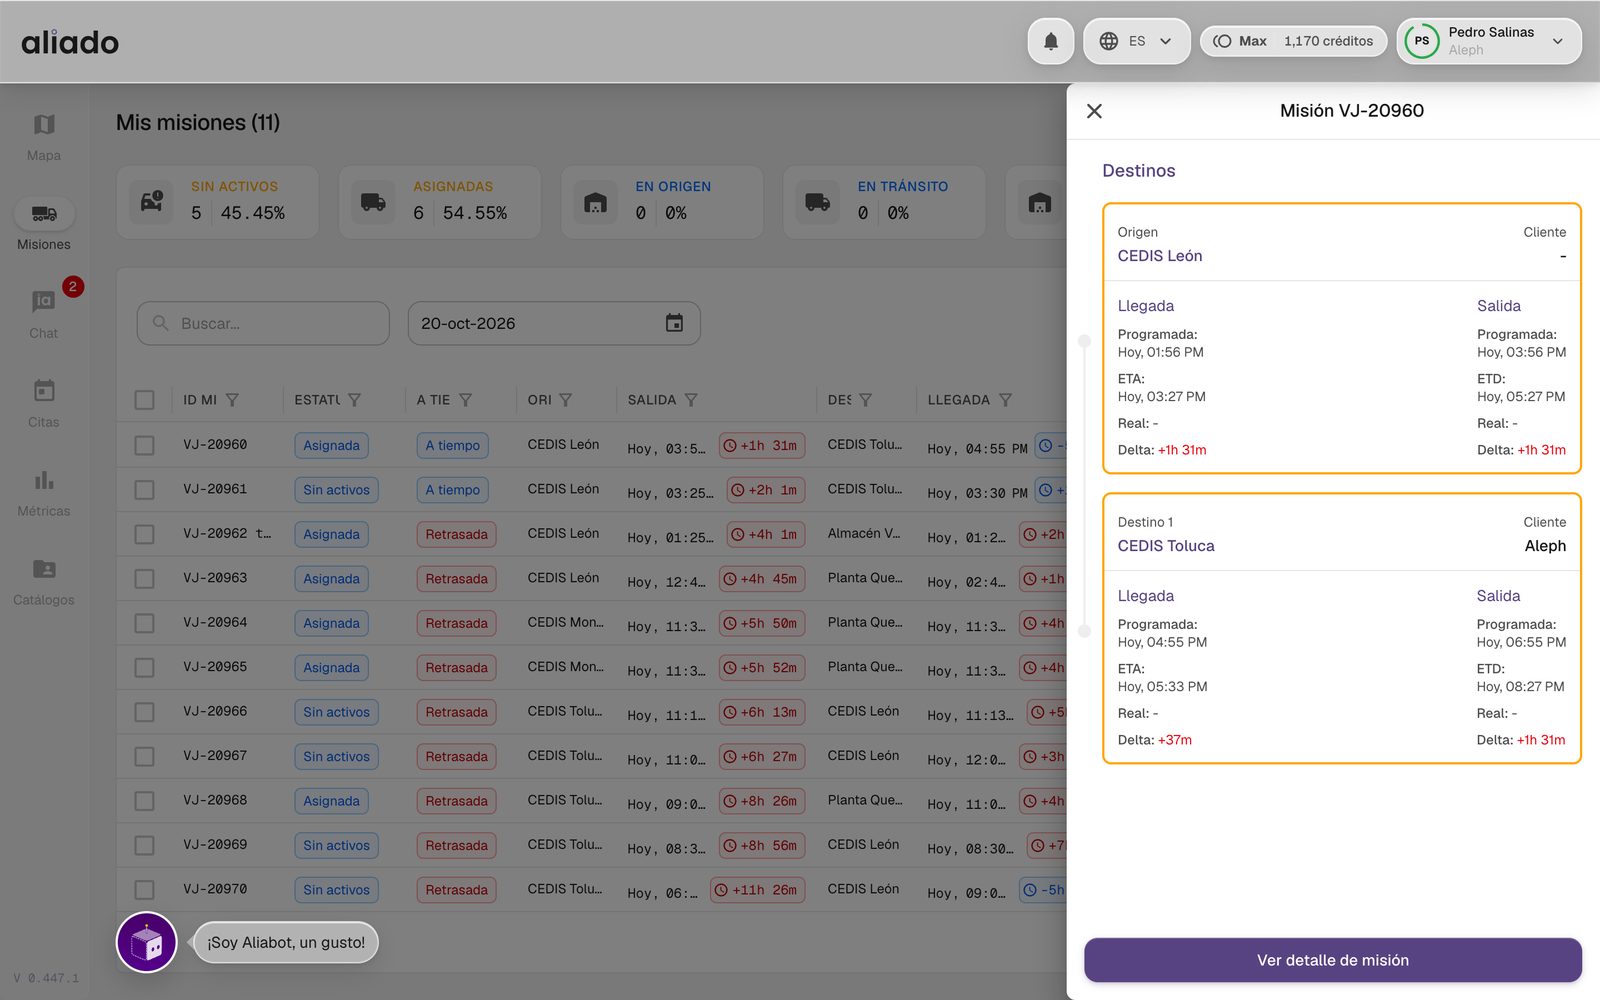
Click a mission's ID to open its detail drawer: origin and destinations with Scheduled, ETA/ETD, Actual and Delta per stop, the tasks and the See mission detail button that takes you to the map with the log.
You may also be interested in: Detail of a mission | Create the appointment from the mission | Controlled visibility
Why are closed or canceled missions still on the board and how do I take them out of view?
The My missions board shows, by default, all the missions of the chosen dates (today) with any status. The Closed and Canceled ones stay so you see the whole day: closing a mission does not delete it or take it off the board. To hide them:
- In the header of the Status column open the filter (the funnel).
- Uncheck Closed and Canceled, or uncheck (Select all) and check only the statuses you want to see (for example Assigned, At origin, In transit and At destination).
- Press Apply. The filter appears as a chip above the table.
- To see them all again, open the filter and press Clear, or use Clear filters.
You can also narrow the dates with the board's calendar. The cards at the top (Closed, In transit…) only count: they do not hide or filter.
You may also be interested in: Status of a mission | Table filters | End or cancel
How and where do I assign the carrier of a mission?
The mission has no "carrier" field: the carrier is the organization that owns the unit you assign. If the unit belongs to an allied carrier, that carrier becomes the mission's carrier.
- Open Missions › Create mission or, on an existing mission, Show actions › Edit mission.
- In the assets section press Add asset. In Organization choose the carrier (or your own organization) and in Asset the unit of that organization. Press Save asset.
- In Add driver you also choose the Organization first and then the Driver; press Save driver.
- Press Create mission or Update mission.
On the board, the Carrier column (Who completes the trip) shows the organization of the assigned units, and the board's search box also finds missions by carrier.
You may also be interested in: Authorize an ally | Invite an organization | Create an appointment
Tracking and log
A mission's detail opens over the map with the planned route, the actual path and a panel with four views: Mission log, Assets and statistics, Detailed log and Driving times.
How do I open a mission's detail?
- From the Missions board, click the mission's ID and press See mission detail; or use the row's Detail action. You can also choose it in the Map's Missions view.
- The map shows the planned geo-route, the actual path and the unit's position. The controls on the right center the unit and show or hide the planned route and the incidents.
- Switch between Mission log and Assets and statistics; inside the log, between Detailed log and Driving times.
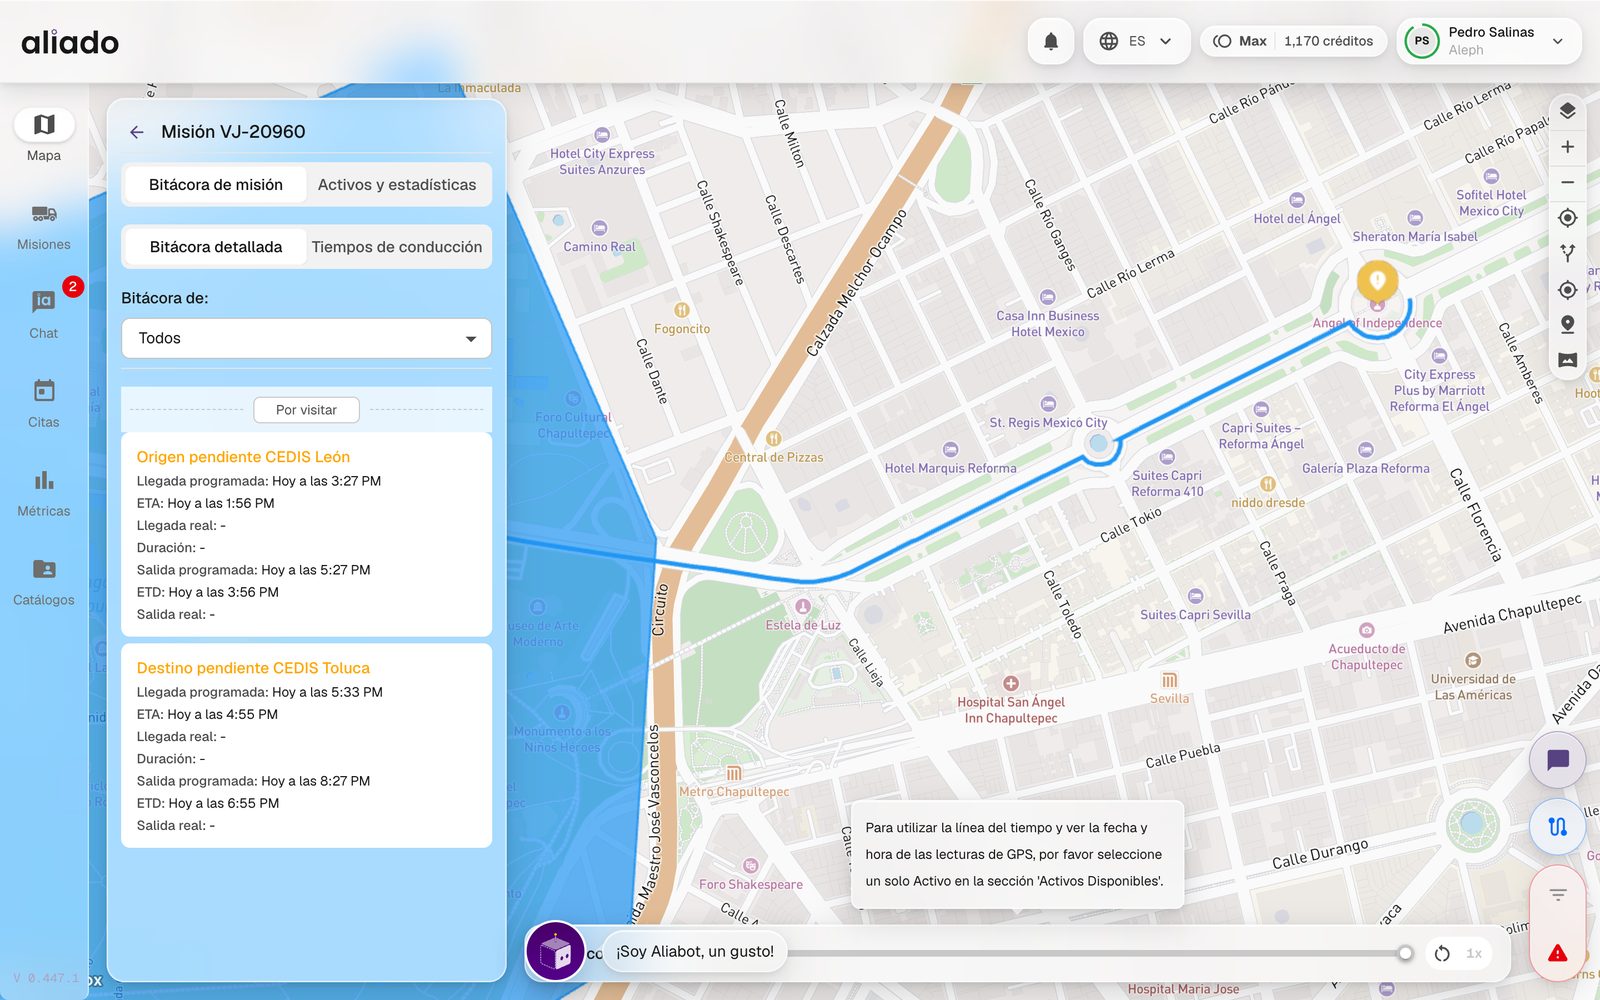
The Log for selector filters the events by unit or driver when the mission has several. The chat button in the bottom right corner opens the mission's conversation without leaving the map.
You may also be interested in: What the log records | Replay the path
What does the log record?
The log is the automatic, chronological record of everything that happened in the mission; it needs no manual entry. Each event carries time, description, position and, when it applies, who performed it:
- Start and end of the mission, with the platform and the method (manual, app, automatic).
- Arrivals at and departures from each stop, with Scheduled, ETA/ETD, Actual and Duration; stops close live without reloading.
- Completed tasks, with the validation type and the evidence (photo or signature thumbnail).
- Entry and exit scans recorded by the guard in Aliado Seguridad and in appointments.
- Entries into and exits from zones of interest, unauthorized stops, stops on the road, at an informal roadside stop or in a risk zone, route deviations and extended stays.
- Chat messages, including audios with their transcription, synchronized with the map.
- Driver safety events sent by telemetry providers (Geotab, Widetech, APV…), crossings with active incidents and loss of GPS signal.
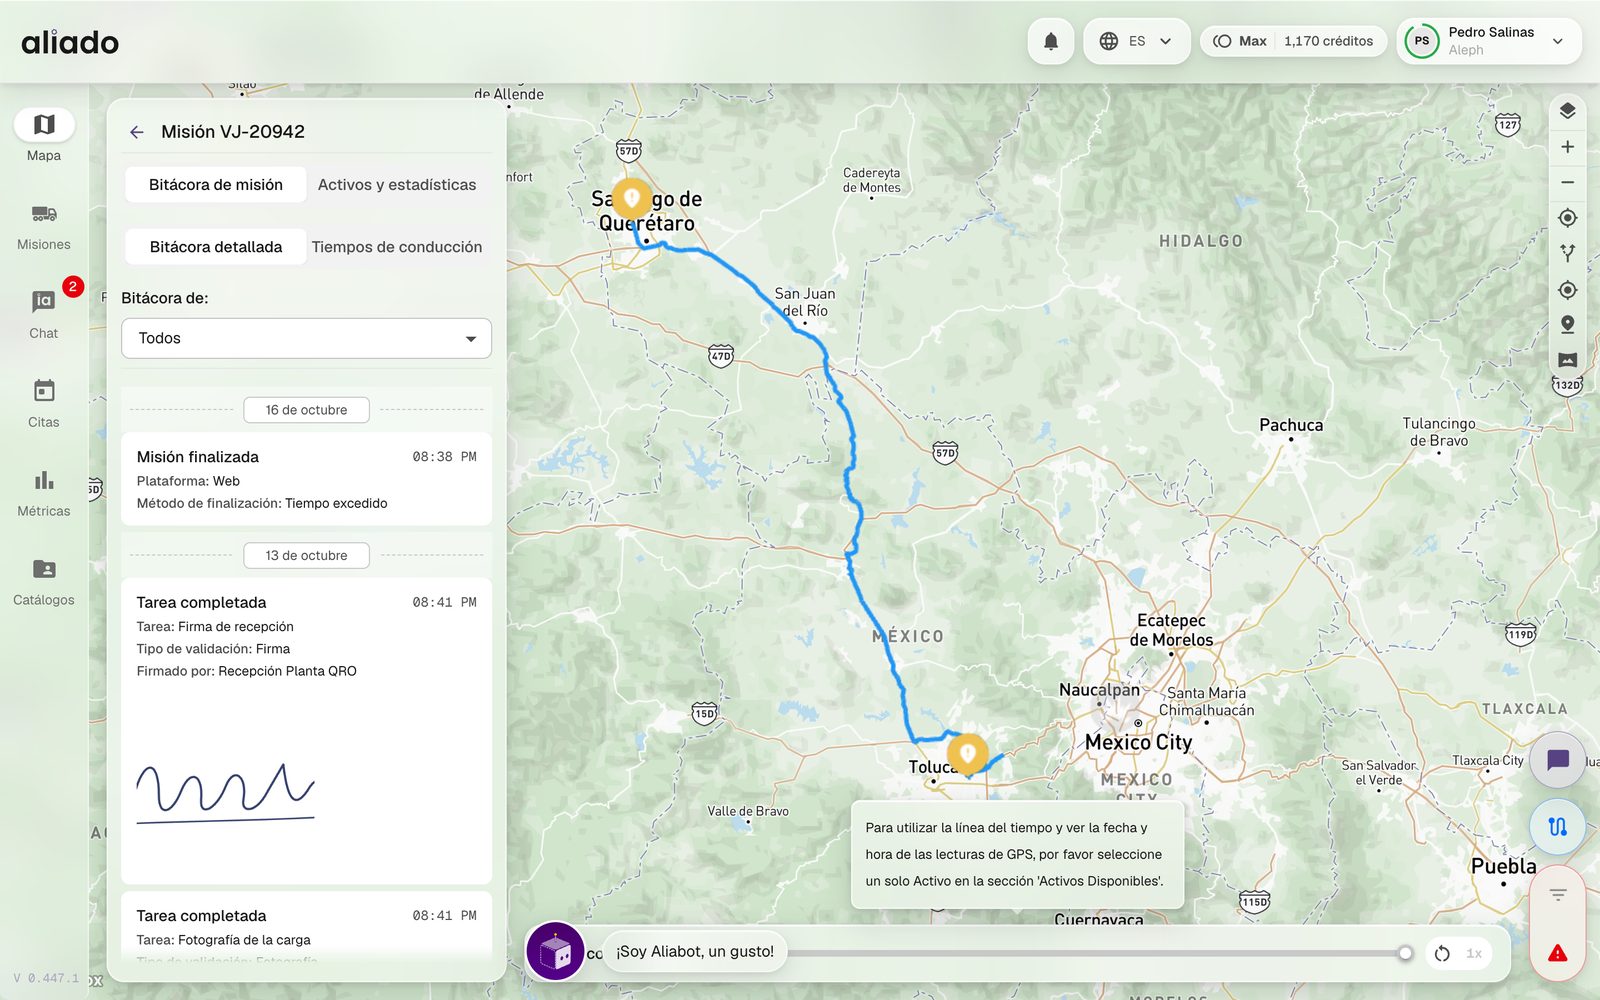
When you select an event, the map zooms to the point and highlights it; if the event has a geofence, it is drawn too. The URL keeps the selected event, so you can share the link.
You may also be interested in: Tasks per stop | Notices each event generates
What do I see in Assets and statistics?
The Assets and statistics tab lists the mission's drivers and assets. Expand an asset to see its type, its last GPS reading and the telemetry available (speed, readings per hour, charts over the map).
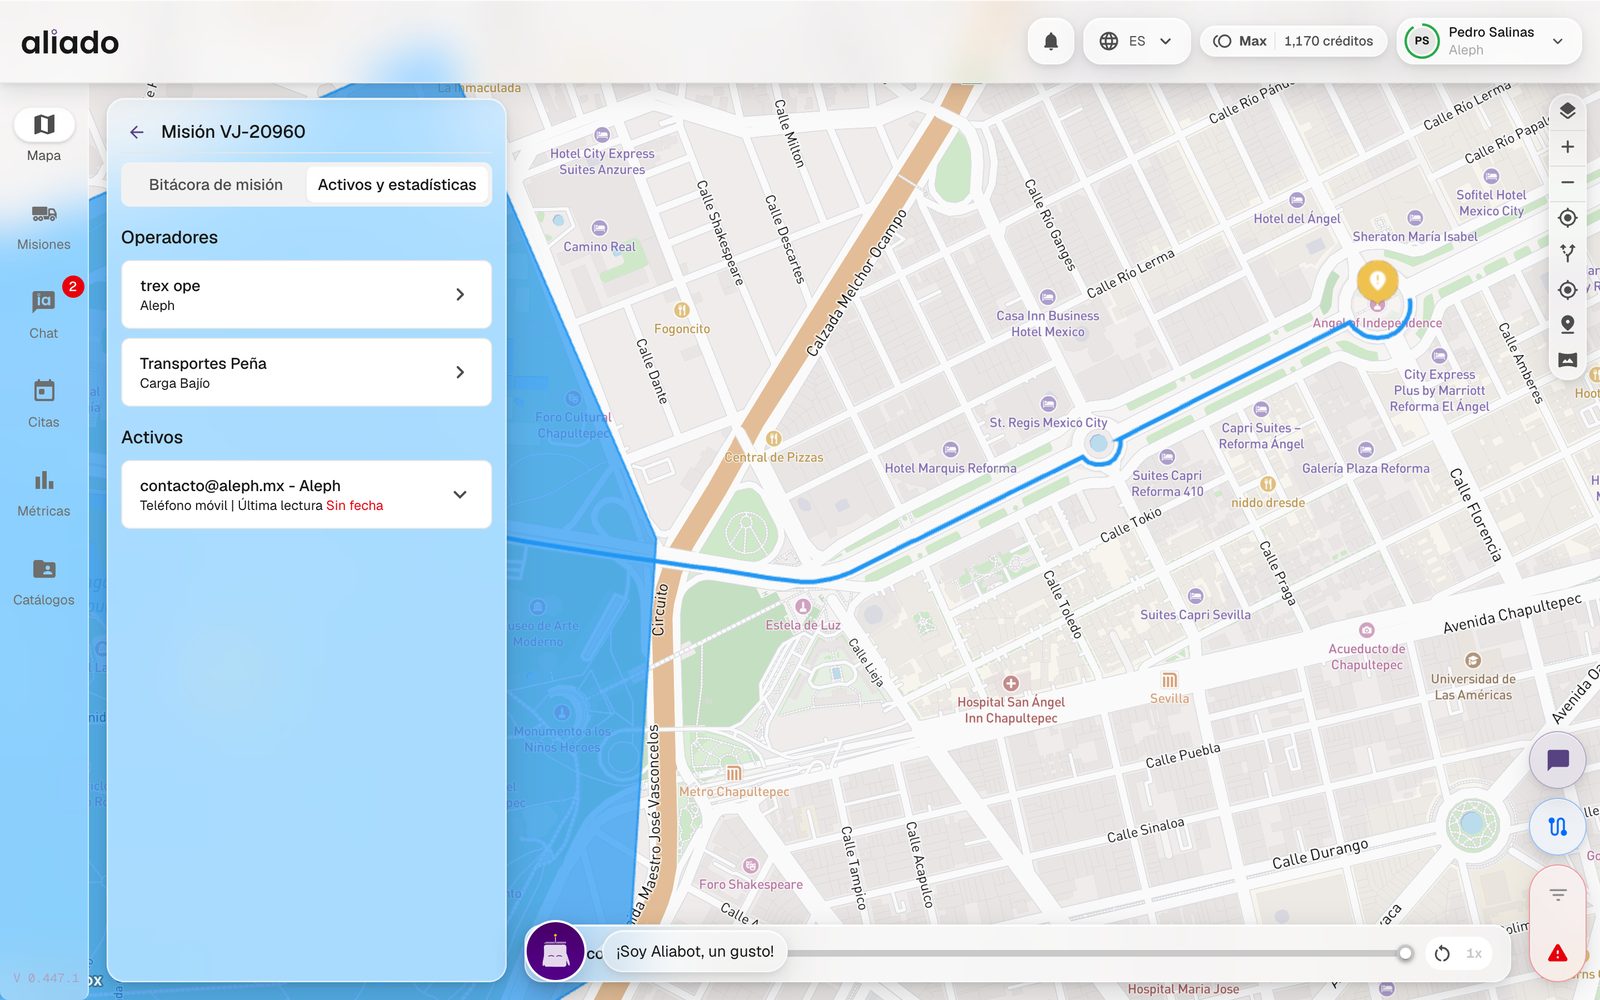
If the mission has several units, choose a single one to use the timeline and see the date and time of each GPS reading.
What are Driving times?
The Driving times view summarizes, from the GPS, how long the driver has driven and how long they have rested during the mission: periods of continuous driving, short rests and long rests. It helps detect fatigue and follow up on the Driving without rest alert.
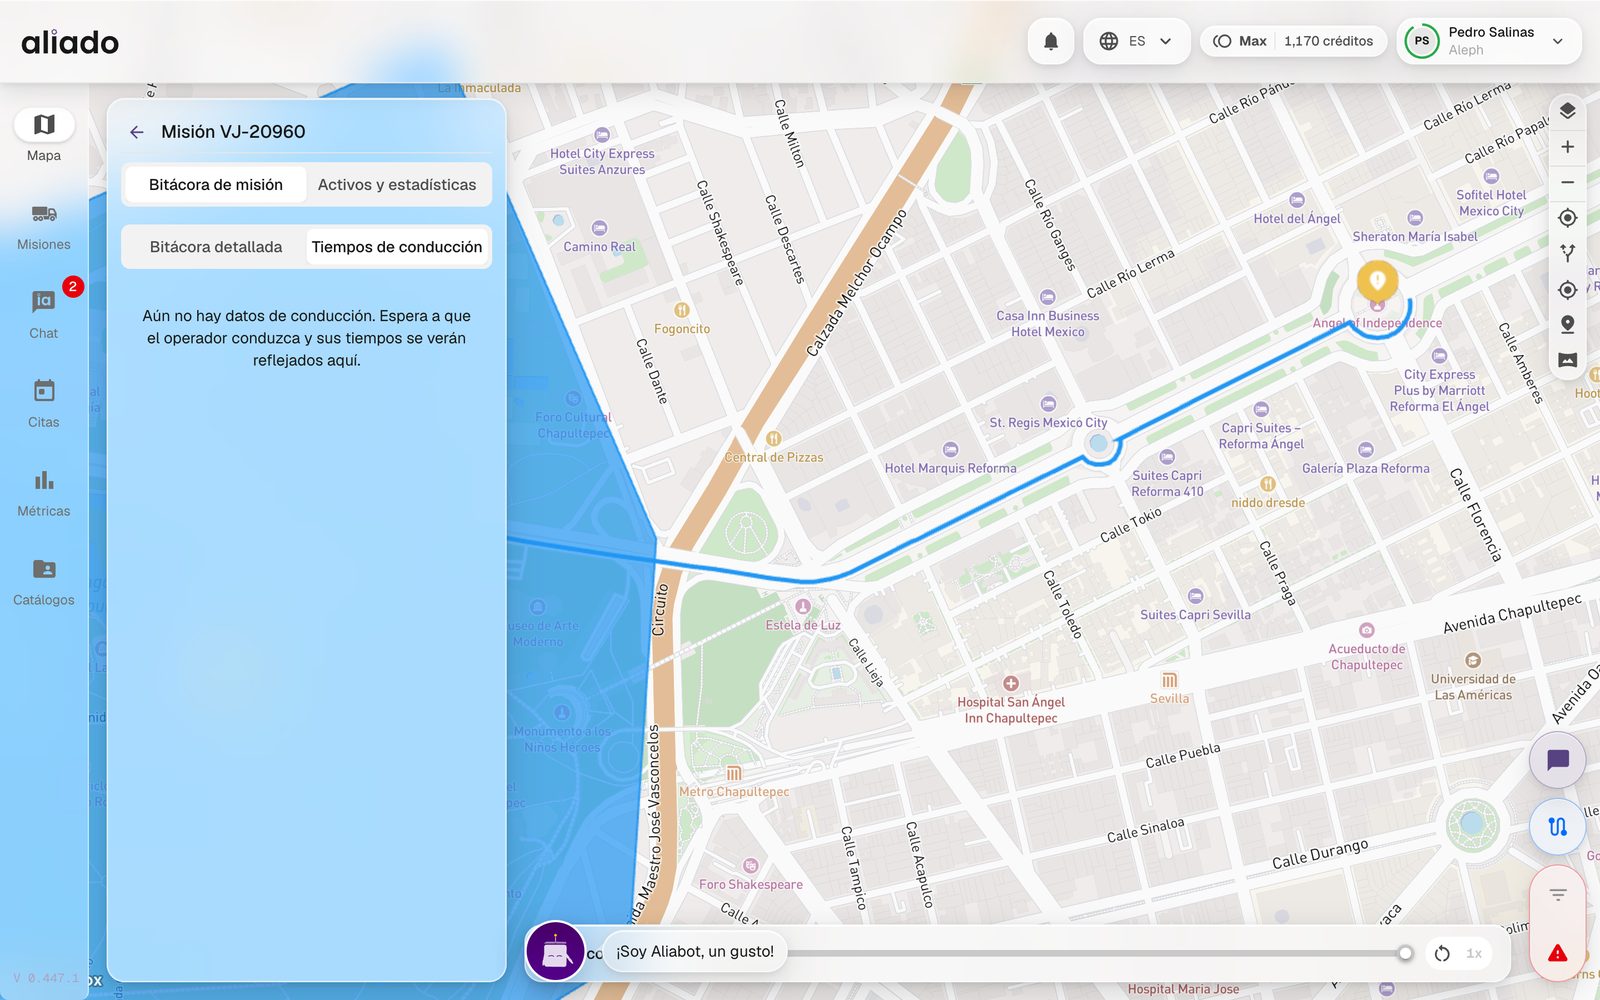
The data appears as the driver drives; while there are no readings you will see the notice There is no driving data yet. The driver also sees their driving log in the app and can mark rests.
You may also be interested in: Driving without rest alert
How do I replay the path?
Below the map there is a player with play / pause, speed (1x) and a time bar. When playing, the line of the path is drawn as time advances and the marks on the bar show where each event happened; drag the bar to go to an exact moment.
It is the fastest way to reconstruct what happened between two events, for example an unauthorized stop before a deviation.
How do I see a unit's log?
Besides the log per mission, each unit has its own: on the Map, Assets view, select the unit and open its detail. Events are grouped by mission and crossings are nested under their stop. A period selector with shortcuts changes the range; the Statistics tab shows the telemetry.
The unit's events stay here when it has no started mission, for example the loss of GPS signal or a stop in a risk zone outside a trip.
You may also be interested in: See my units
Documents and Carta Porte
Each mission has a file of documents. Aliado reads them with artificial intelligence to propose the data to you, generates the driver's instruction letter and walks you through issuing the Carta Porte.
Where are a trip's documents?
- On the Missions board open Show actions › Documents.
- The screen has two tabs: Trip documents and Stop documents. Each document shows its state: Complete Document, Missing Document or Expired Document.
- With Search and add document you choose the type (delivery note, invoice, insurance policy…) and upload the file (PDF, JPG or PNG). Select a document to see it in the central viewer and edit its fields in Document information.
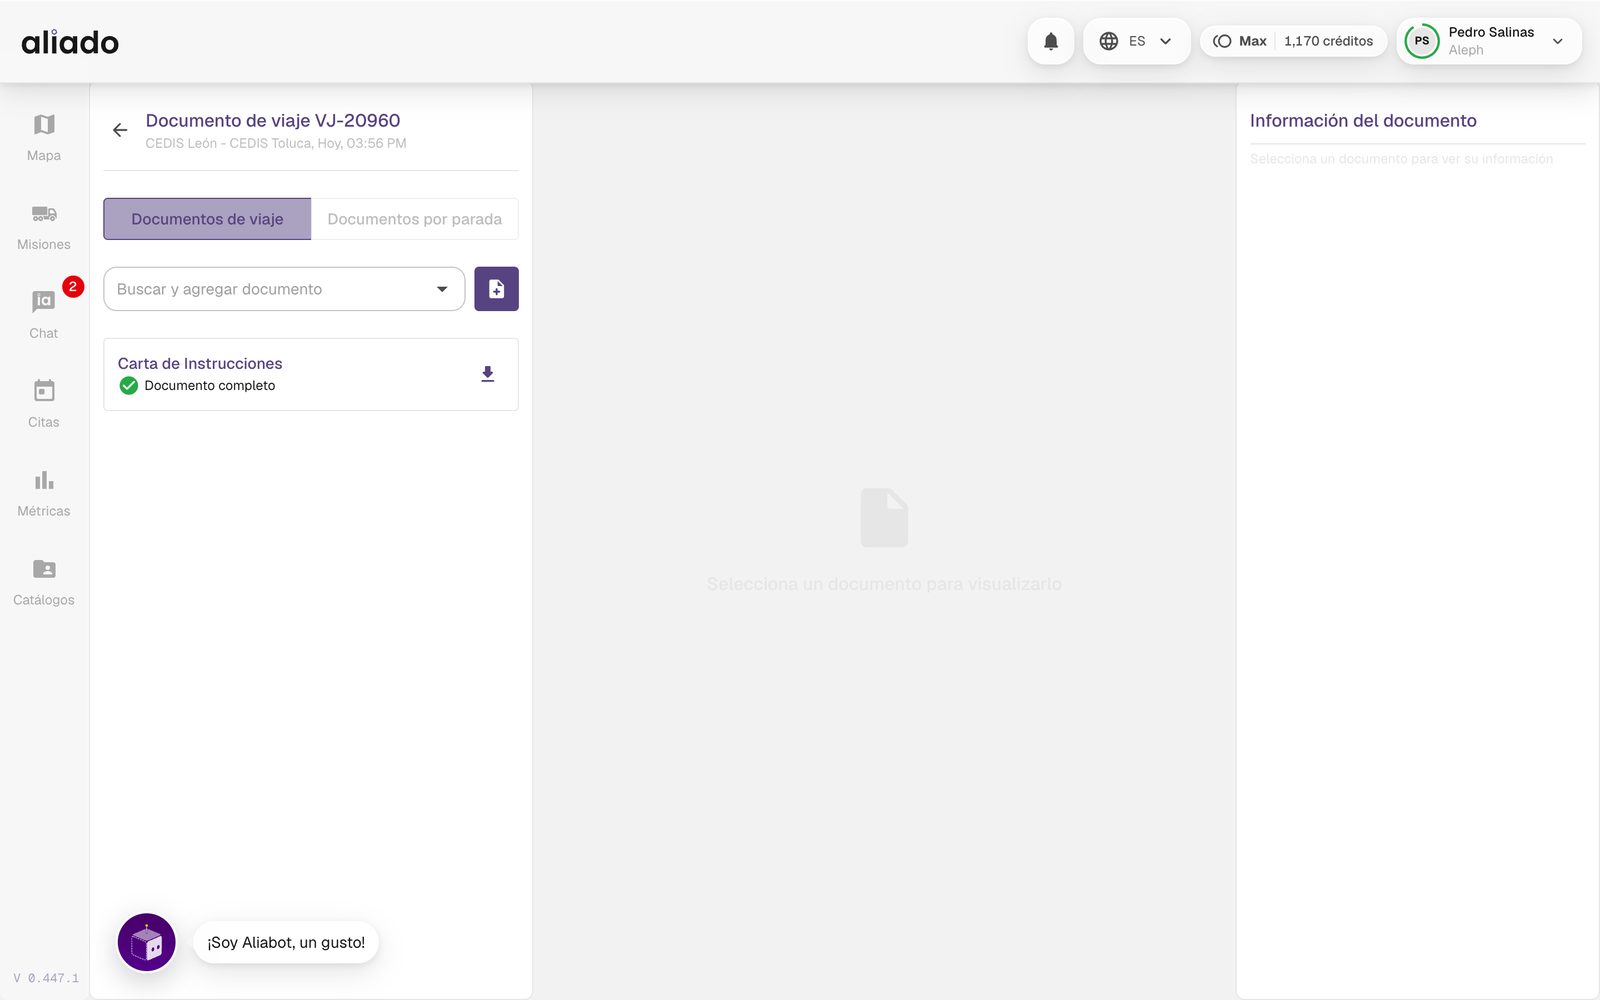
Document types and their fields are defined in Catalogs › My organization › Documents (Create document type). The documents a carrier uploads to an appointment are also saved in its profile to be reused.
You may also be interested in: AI reading | Instruction letter | Organization documents
How does AI document reading work?
When you open a document, Aliado analyzes it and proposes the values of its fields (folio, plates, weight, origin, destination…) with a confidence level and the evidence of where it read them (Page 1: …). It works on trip, appointment and catalog documents and on chat attachments.
- Upload and save the document. The analysis runs separately: it does not block saving.
- Select the document; while it runs you will see Analyzing document…. If it does not start by itself, press Analyze.
- In Document analysis review each suggestion and press Apply or Dismiss. Applying only fills in the form.
- Press Save changes to confirm. Nothing is saved without your confirmation.
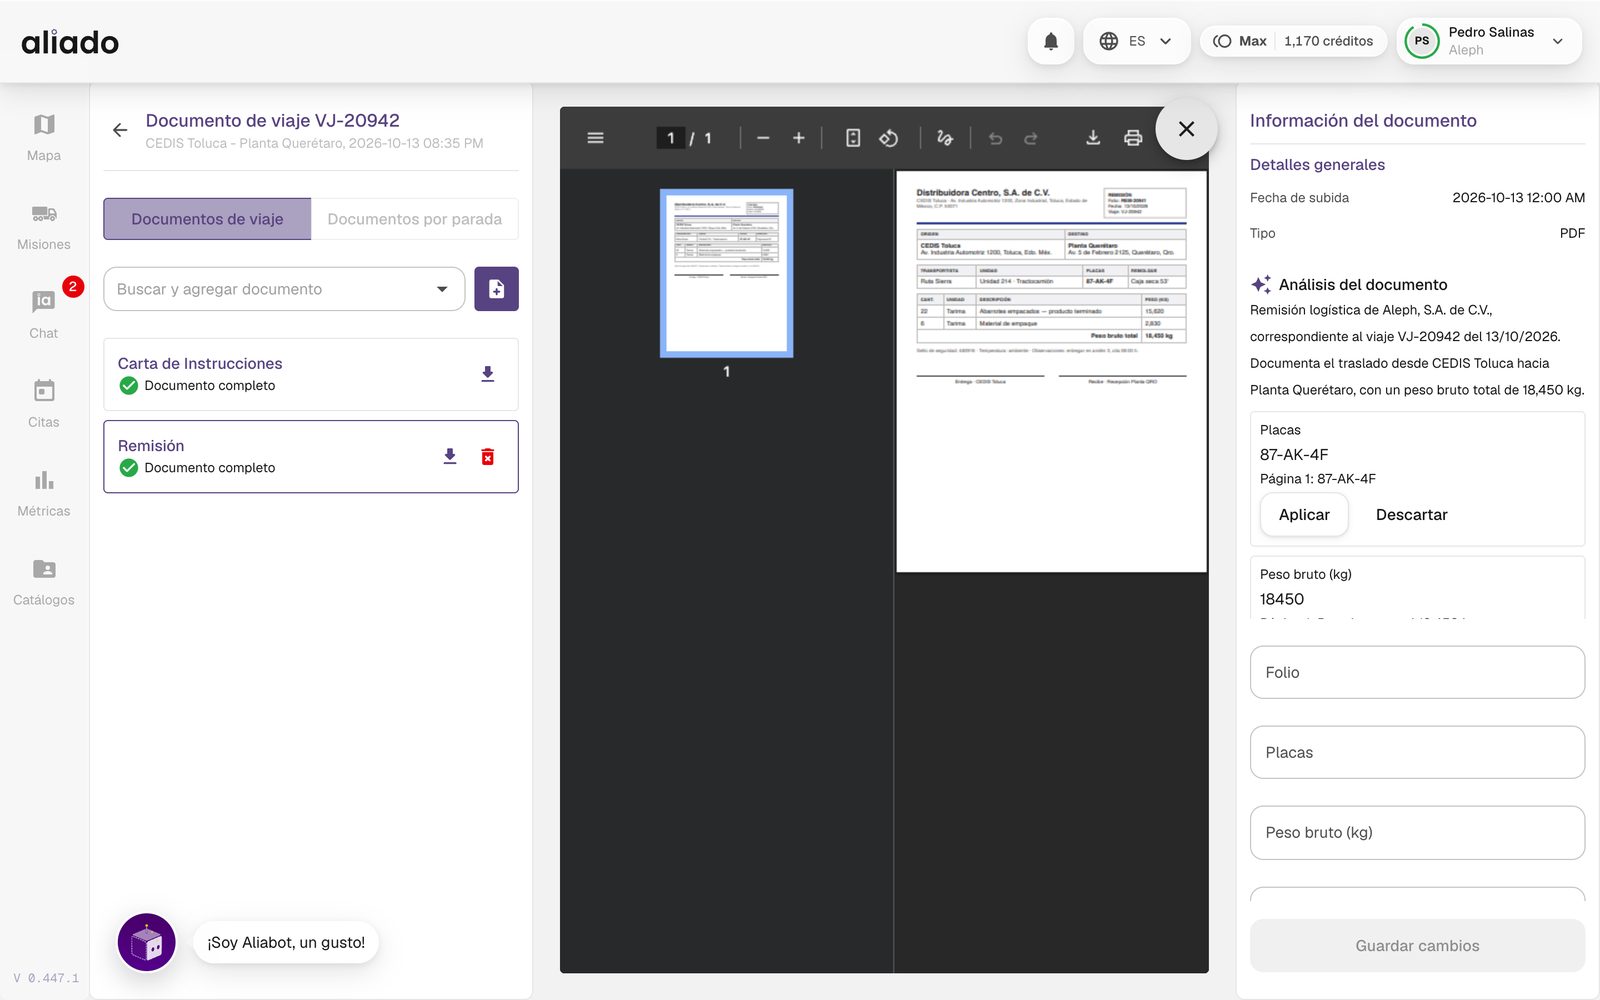
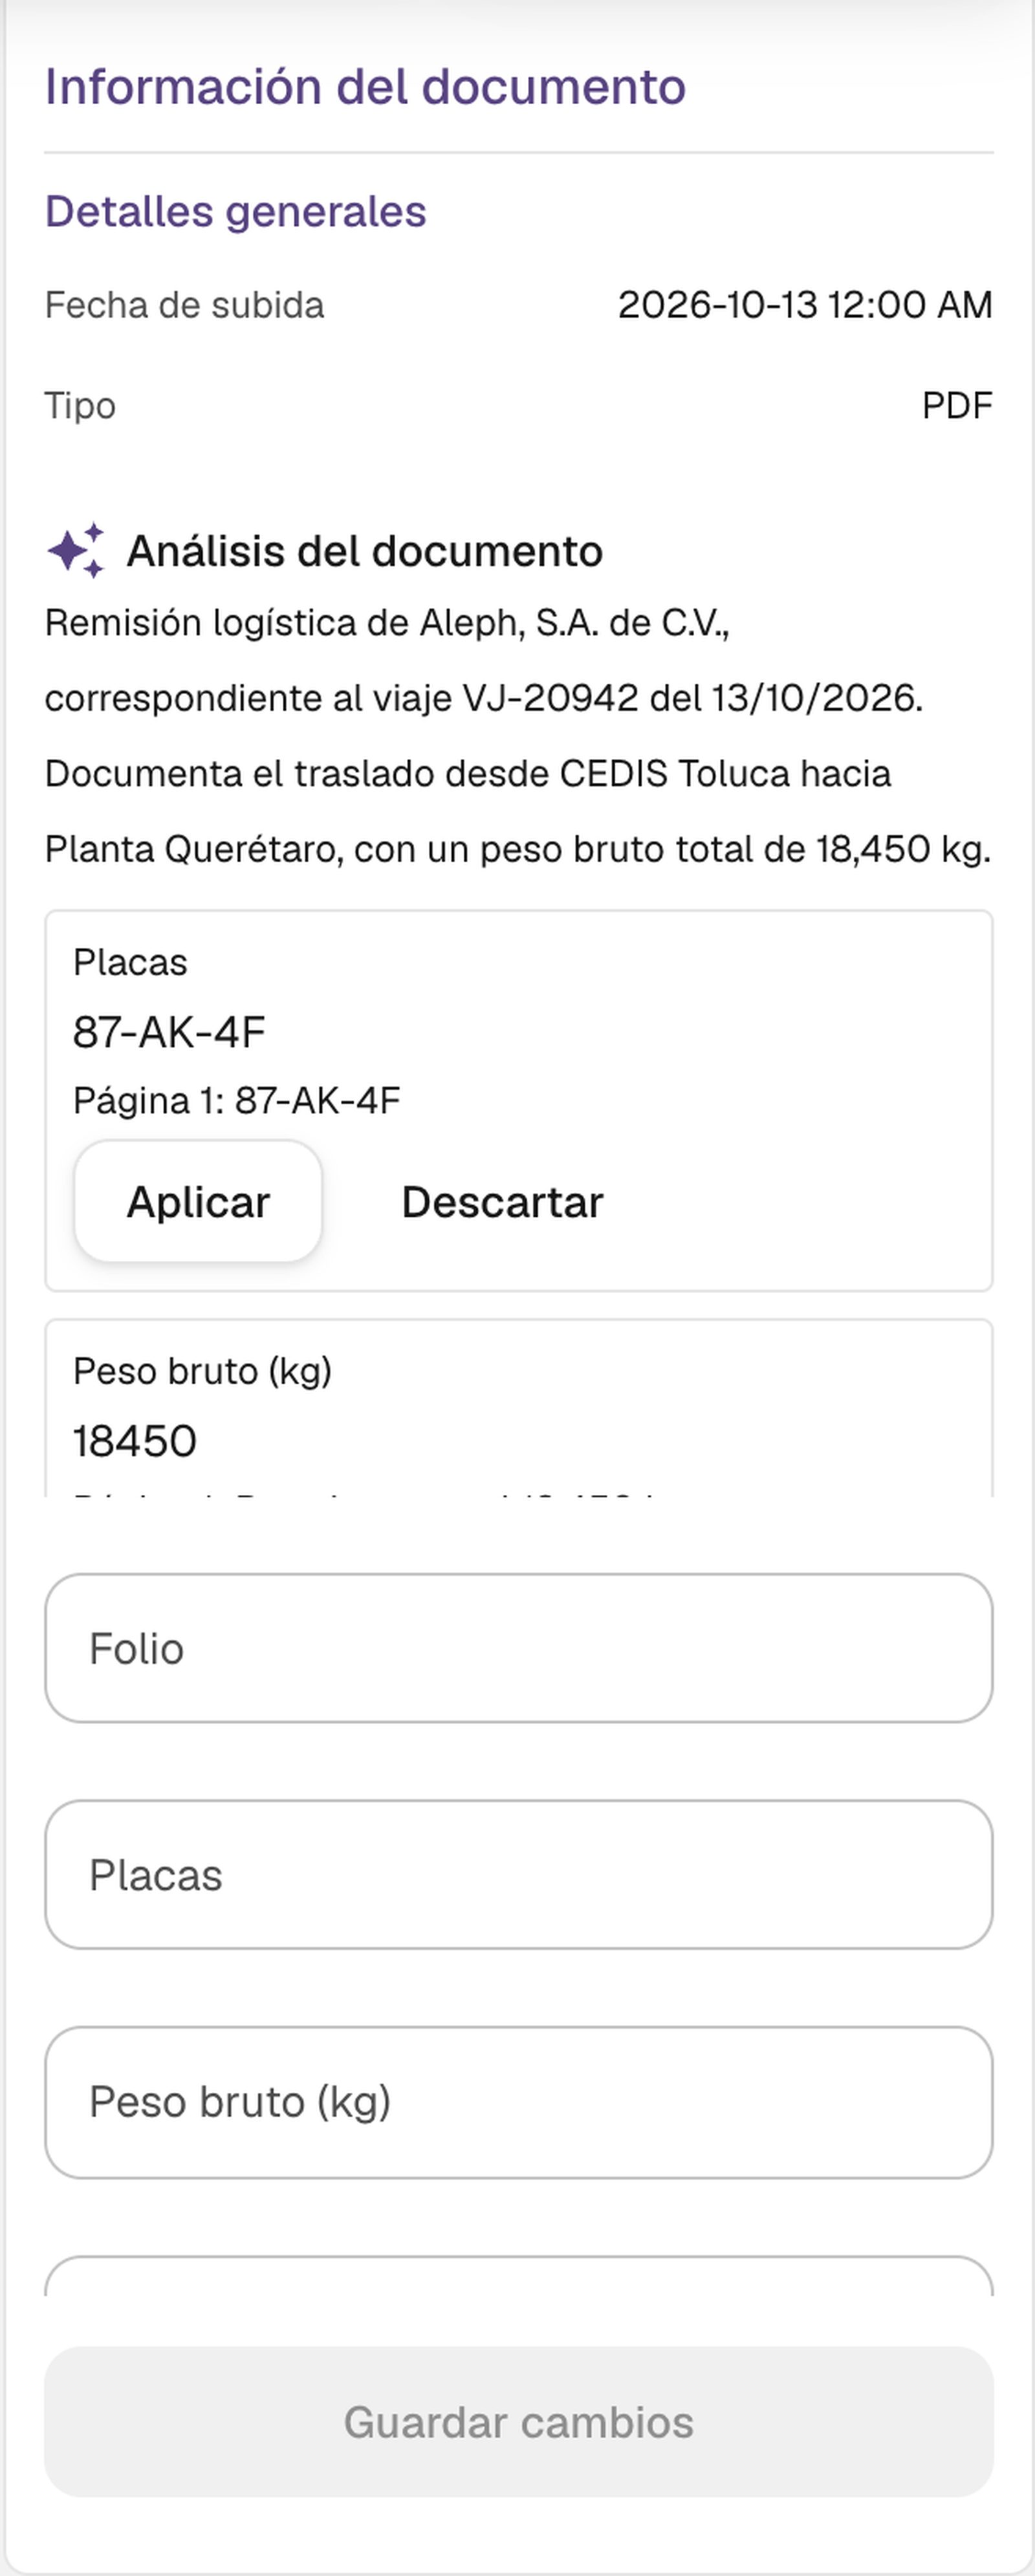
If the file is not what is being asked for (you uploaded an invoice where a delivery note was expected), the panel tells you: This is not the “Delivery note” being requested. If it cannot be read, Retry appears.
You may also be interested in: AI attachments in the chat
What is the instruction letter?
The instruction letter (Carta de Instrucciones) is a PDF Aliado generates for each mission with the route map, the stops, the turn-by-turn directions and a QR code with the mission's folio for the guard to scan at dispatch. It lives in Trip documents as a document managed by Aliado.
- It can be viewed and downloaded with the download icon; the file cannot be deleted or replaced.
- The observations for the driver are edited in Document information and saved with Save; the letter is regenerated with them.
- It includes the highway stretches of the route when they are configured.
The driver receives it in the app and the guard can scan its QR in Aliado Seguridad to open the dispatch without typing the folio.
You may also be interested in: Dispatch in Aliado Seguridad
How do I issue the Carta Porte?
Aliado issues the CFDI with the Carta Porte complement (the Mexican tax waybill) through Facturapi, with a seven-step wizard that preloads the mission's data: Issuer, Recipient, Service, Trip, Goods, Unit & operator and Summary.
- Assign the mission an asset and a driver; without them the wizard cannot generate the invoice.
- In the row actions press Generate Carta Porte / invoice.
- Complete each step. The SAT catalogs (tax regime, product keys, permit type…) are chosen from lists. You can Save draft at any time; if one already existed, it is reused.
- To stamp, upload your Digital seal certificate (CSD) (.cer, .key and password). Aliado does not store it; it is registered in Facturapi. You will receive notices when the CSD is about to expire.
- Press Stamp. Afterwards you can Download PDF and Download XML, or Cancel Carta Porte stating the SAT reason.
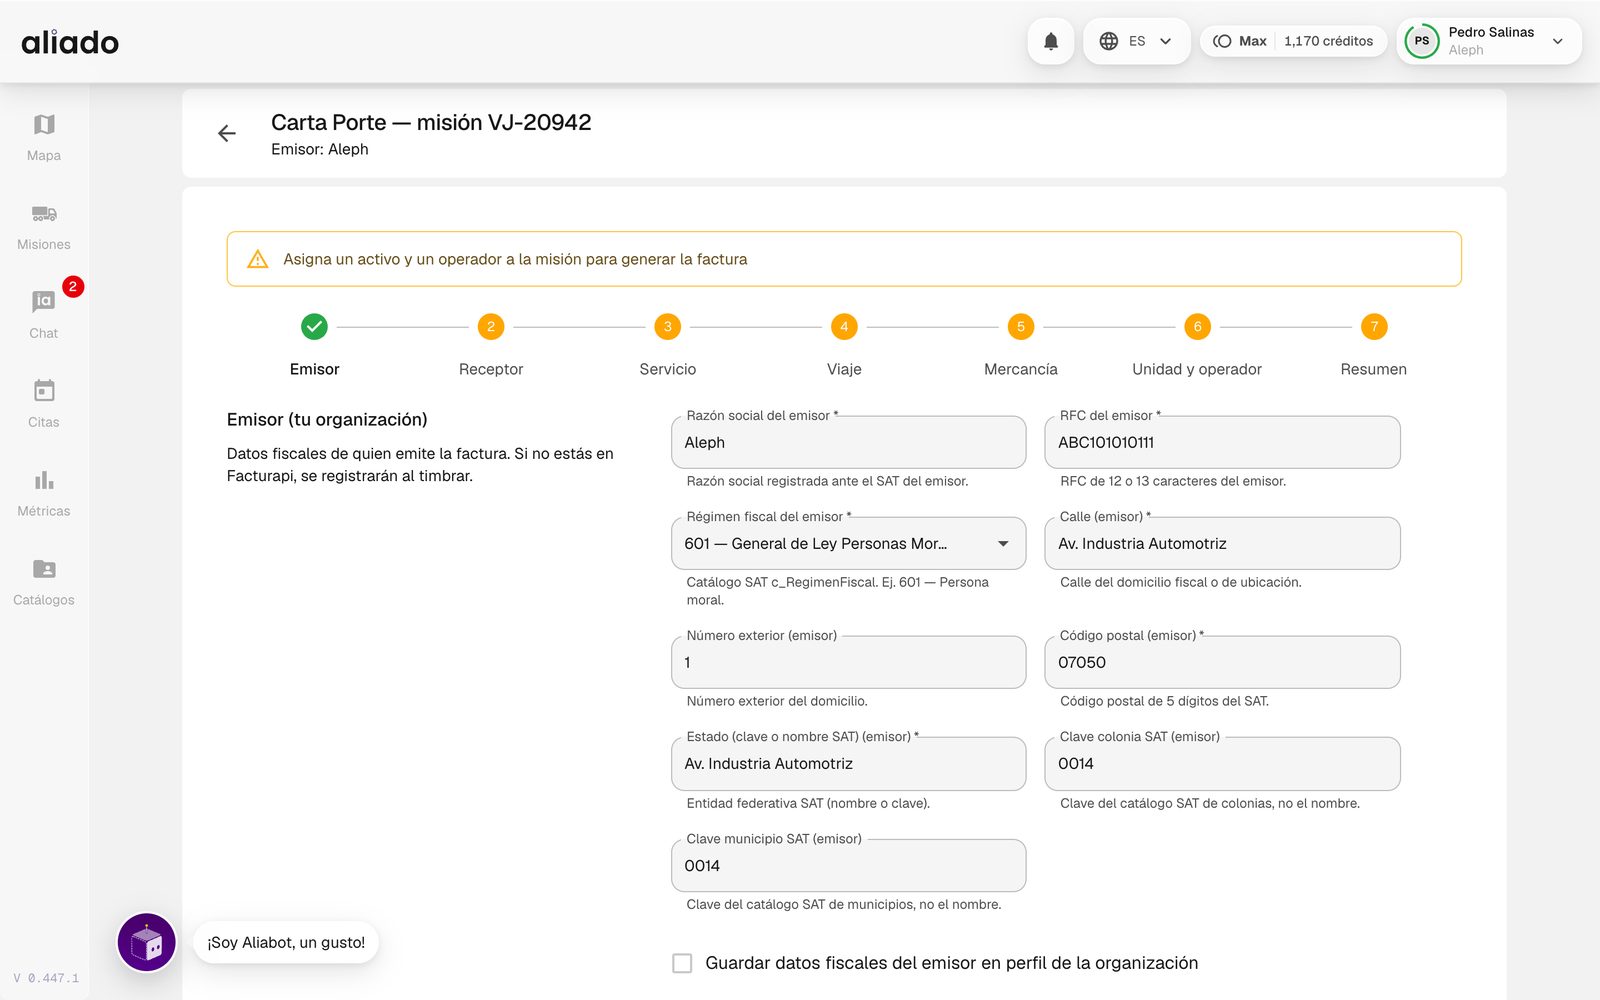
If the carrier is another organization, only it can enter the data of the recipient, the unit and the driver: those fields are marked as pending from the other organization and both receive notifications (information pending, information completed, document stamped, document canceled).
You may also be interested in: The organization's fiscal data | Carta Porte notices
How do I manage the documents of my organization and of my users?
In Catalogs › My organization › Documents you upload your company's documents (articles of incorporation, tax status certificate, CTPAT, REPSE, insurance policies…) and create new types with Create document type. Below, Documents required from my allies defines what you will ask your carriers for in order to authorize them.
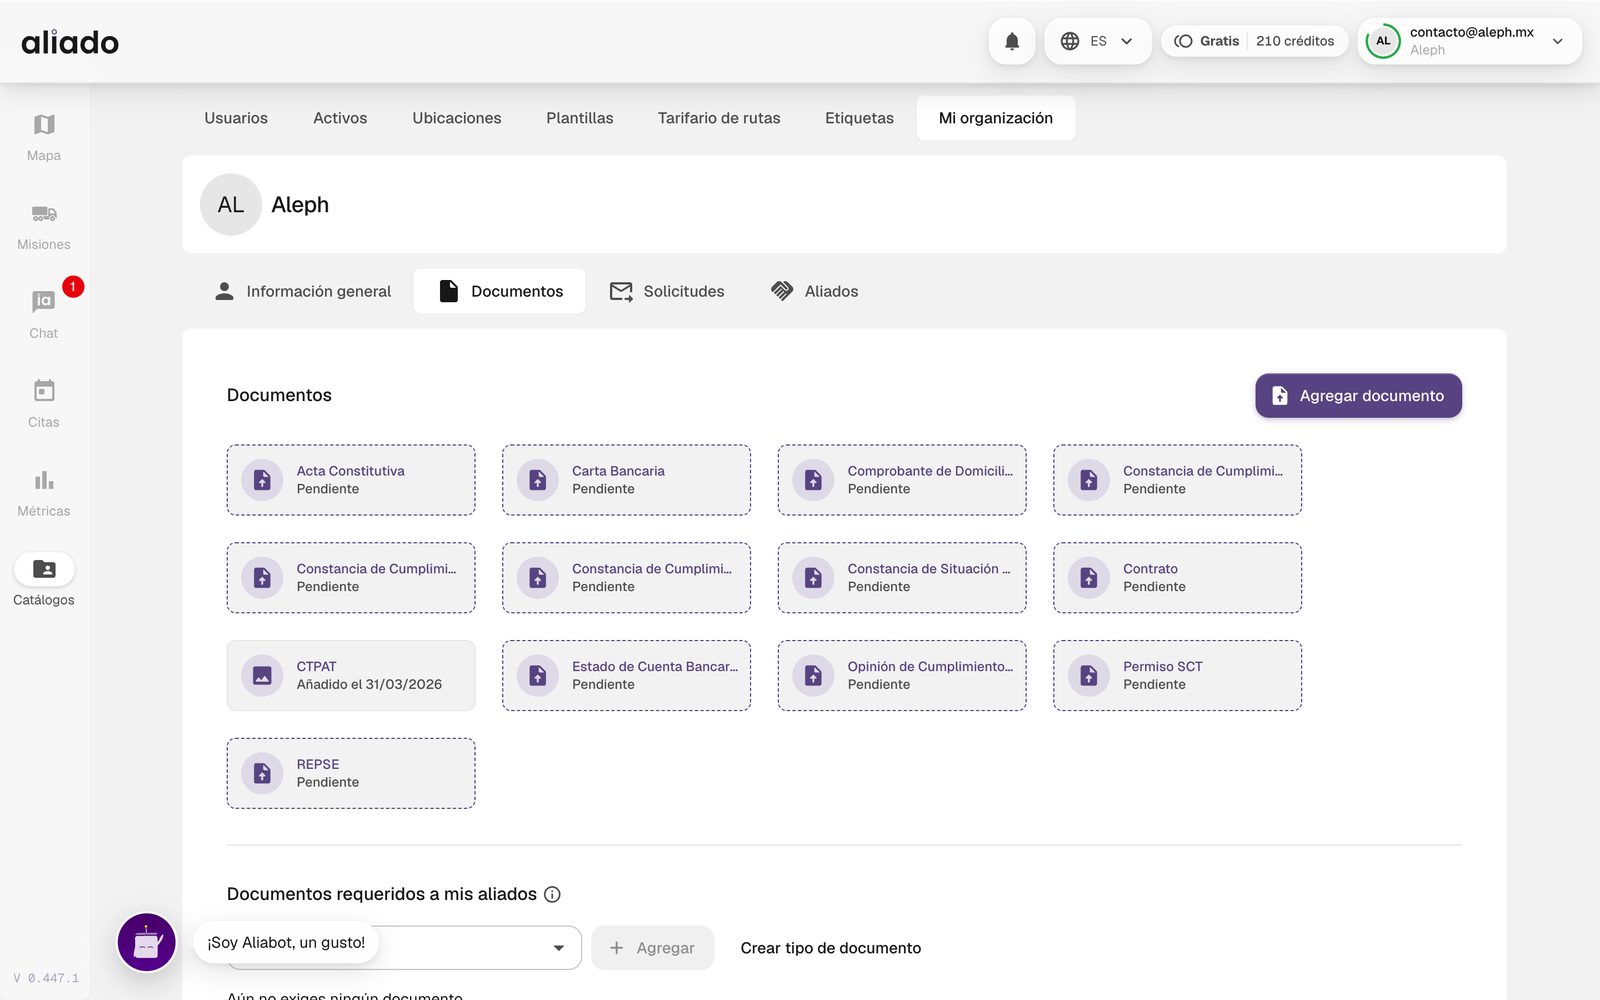
Each user and each asset has its own Documents tab (license, INE voter ID, vehicle registration card, insurance policy). Aliado notifies you 10 days before a document expires and when it has already expired (Configure alerts, catalogs section).
You may also be interested in: Users | Assets | Documents of drivers and assets
Where do I upload the documents of a driver or of an asset?
The documents of each person (license, INE voter ID, IMSS social security registration…) and of each unit (vehicle registration card, insurance policy…) live in their catalog profile. From there they are reused in appointments, without uploading them again.
- Go to Catalogs › Users (or Catalogs › Assets) and, in the row of the driver or the unit, press the Details icon.
- Open the Documents tab. There is a card per document type with its state: Pending, Added on … or Expired on ….
- Click the document's card. Drag the file to the upload area or click it to choose the file (jpeg, jpg, png or pdf formats).
- Fill in the fields that document type asks for (folio, validity…) and press Upload document. You will see Document saved successfully.
The Add document button on that tab does not upload files: it creates a new document type (New document) for your organization.
If you are the carrier invited to an appointment, you can also upload the documents of the driver and of the unit from the appointment, in the Guests and Assets tabs; what you upload there is also saved in their profile.
You may also be interested in: Replace a document | INE on both sides | Documents of an appointment
How do I replace a document I already uploaded (for example, the IMSS one)?
It depends on where the document is.
In the profile of the driver or the unit
- Open Catalogs › Users (or Assets) › Details › Documents tab and click the document's card (for example, IMSS).
- Press Replace document, upload the new file and review its fields.
- Press Upload document. The new file replaces the previous one.
Delete document deletes it without replacing it: Aliado asks Delete this document? and you confirm with Delete.
Inside an appointment (if you are the invited carrier)
- Open the appointment in Appointments received with View details and go to the tab where the requirement is: Guests (the driver's documents), Assets (the unit's) or Documents (your organization's).
- Take out the current file with Delete file (the trash can) or Remove file (the X on the preview) and upload the new one.
- Save with Save guest, Save vehicle or Save documents, depending on the tab.
The document returns to In validation and the host has to approve it again. If the appointment was already Confirmed, it goes back to validation and its QR stops being valid until it is approved. What you upload in the appointment also updates the document in the profile of the driver or the unit.
You may also be interested in: Documents of drivers and assets | Document rejected in an appointment | When the QR is generated
How do I upload the INE voter ID on both sides (front and back)?
Each Aliado document keeps a single file: if you upload another, it replaces the previous one. For the INE to carry front and back, upload them together in one file:
- A two-page PDF (front on the first, back on the second). It is the clearest option: Aliado's viewer shows all the pages.
- Or a single image (jpeg, jpg or png) with both sides, one next to the other.
Upload it where the INE goes: in the driver's Documents tab (Catalogs › Users › Details) or in the appointment's requirement, in the Guests tab.
You may also be interested in: Documents of drivers and assets | Replace a document
Appointments
An appointment coordinates a carrier's visit to a facility: who invites, whom, when, with what equipment and with which documents. Everything is recorded in the appointment's log, from the invitation to the exit scan.
How does the Appointments module work?
The module has two tabs: Appointments sent (those your organization created as host) and Appointments received (those another organization sent you as carrier). The date filter, the status and the column filters narrow the list; Download exports the report as CSV.
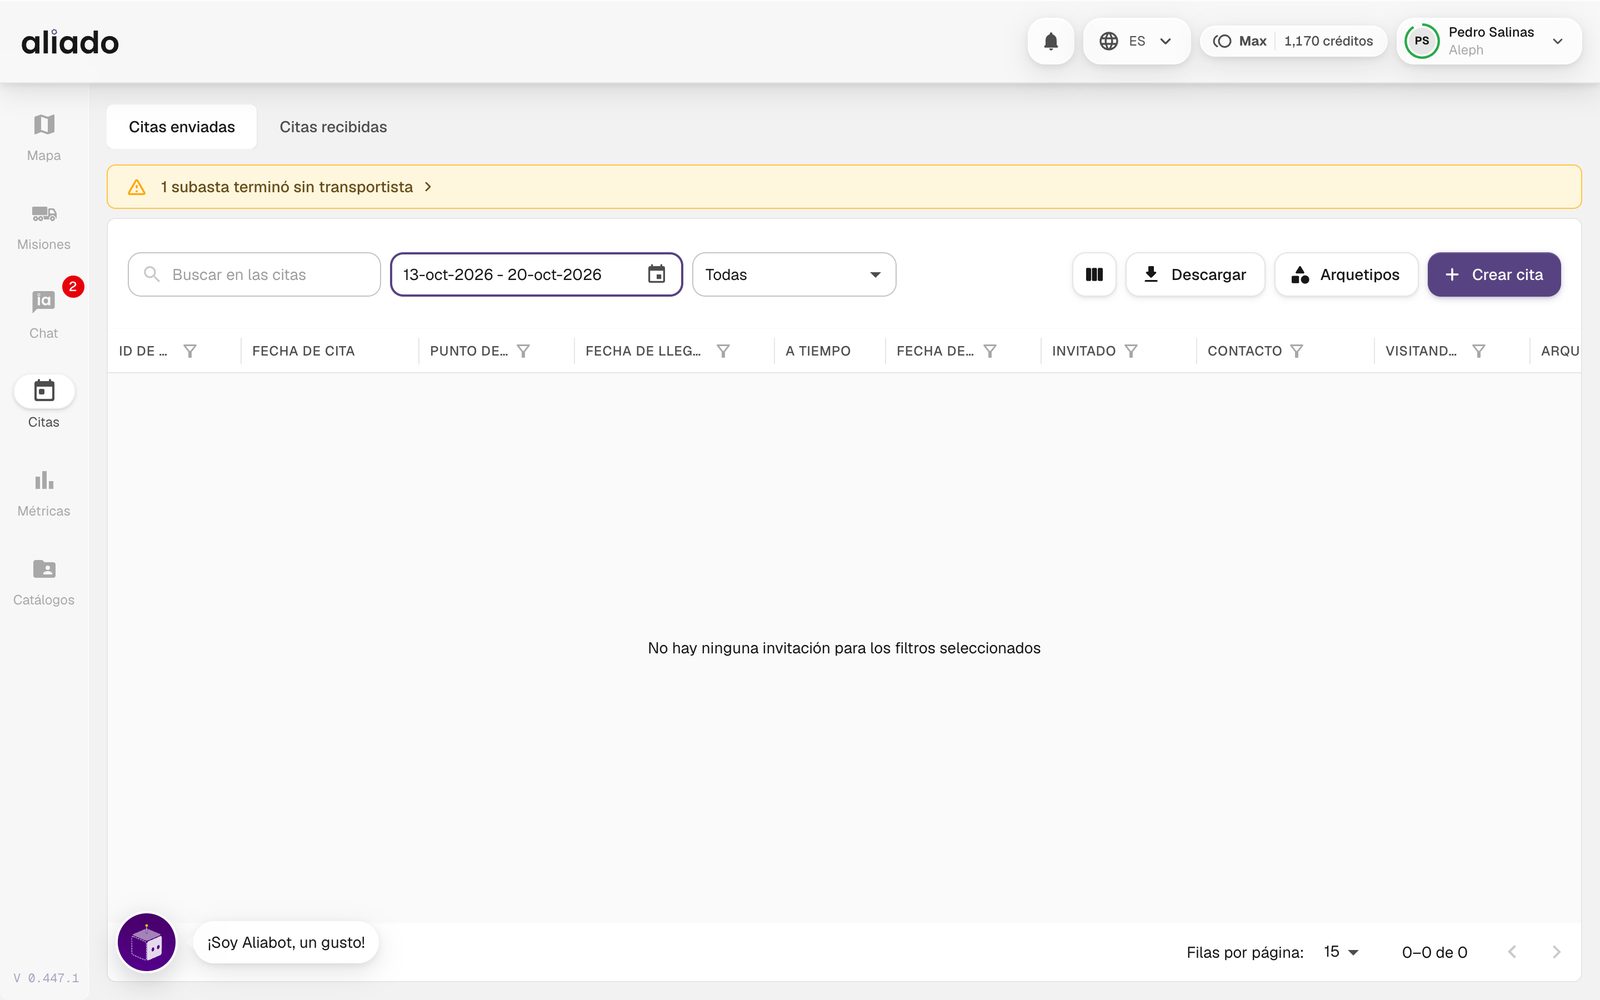
Statuses of an appointment (hover over the label in the detail to see its description):
| Status | What it means |
|---|---|
| Invitation sent | The appointment was created and the carrier was notified. |
| Invitation read | The carrier already opened the invitation. |
| Pending assignment | It accepted; a driver or assets still have to be assigned, or documents uploaded. |
| Documents pending validation | The host is reviewing the documents. |
| Confirmed | Everything validated; the access QR code is now available. |
| Completed | The guard already recorded the first scan of the QR in Aliado Seguridad (normally the entry). The exit is recorded later with the same QR. |
| Rejected | The carrier cannot attend (it stated the reason). |
| Cancelled | The host cancelled the appointment. |
| In tendering / Your turn | The appointment is being offered by tendering (see the Tendering section). |
The Arrival date, On time and Departure date columns are filled in with the scans and the unit's position, just as in Missions.
You may also be interested in: Create an appointment | Answer an invitation | The access QR
How do I create an appointment?
- In Appointments press Create appointment › Create from scratch.
- Enter the Appointment ID (required) and choose the Appointment archetype, which defines which drivers, assets and documents will be asked for.
- Choose the Mission ID if the appointment belongs to a trip already created, or check the box that says you do not have the mission ID yet.
- Set Date, Time and Origin point (an active location in your catalog). Add Notes and Tags if they apply, and press Add guests.
- In Whom do you want to invite? choose the carrier organization (it must be your ally) or + Invite new organization to send it the link by WhatsApp, email or another channel. Press Send invitation.
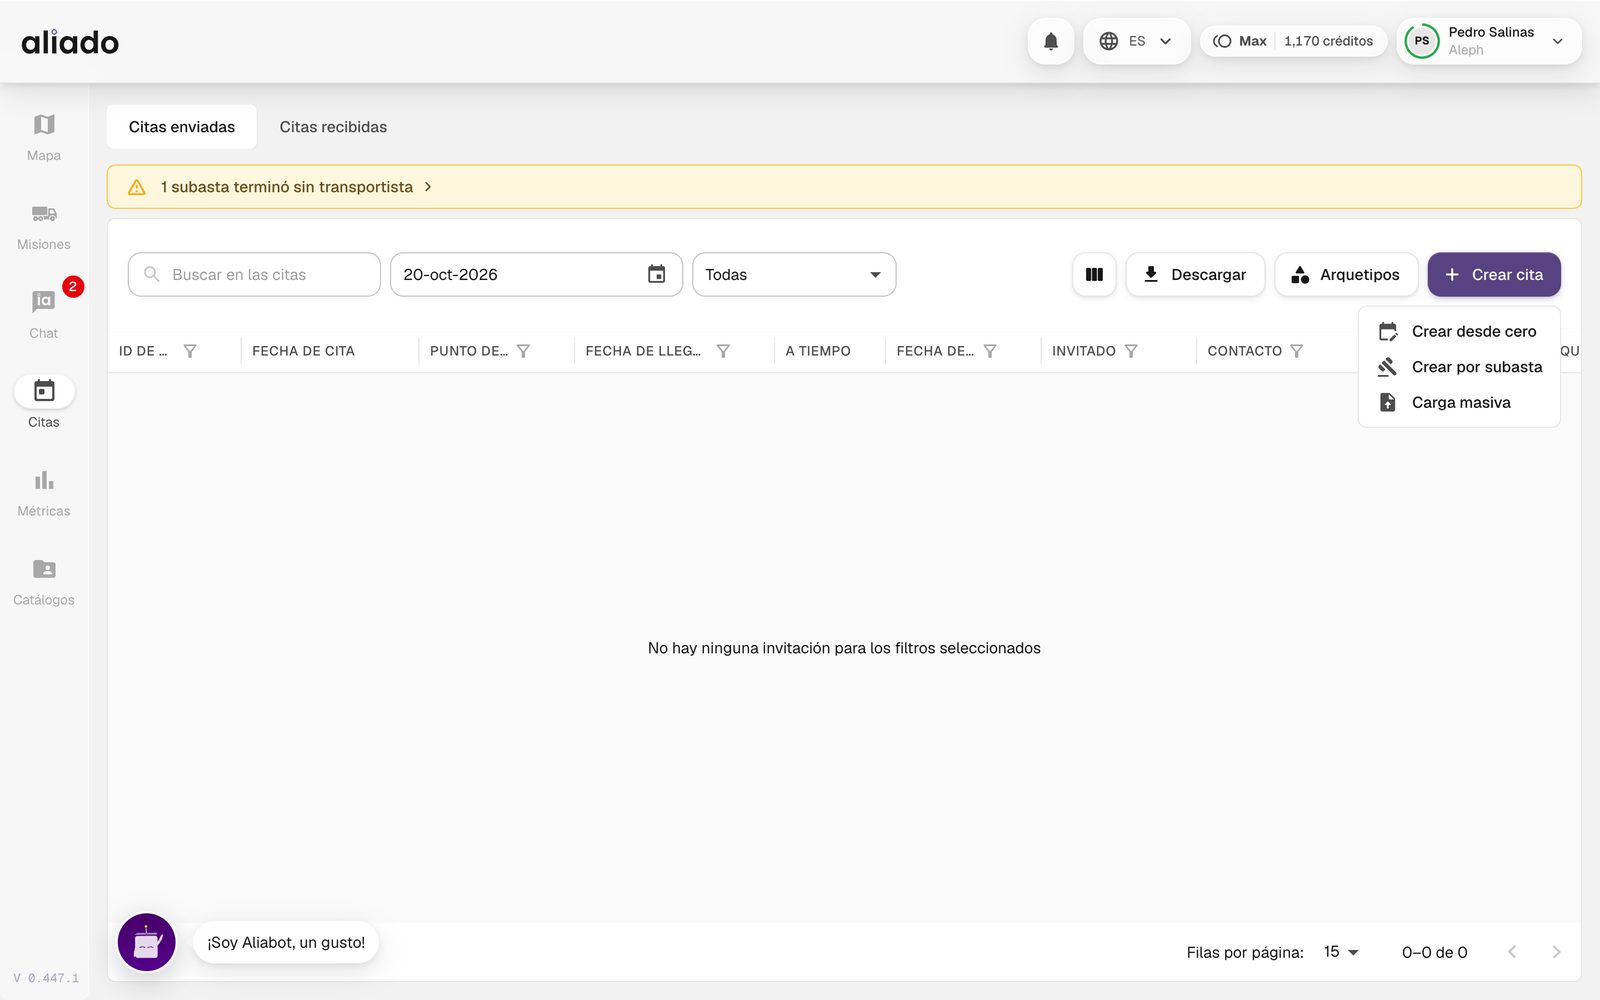
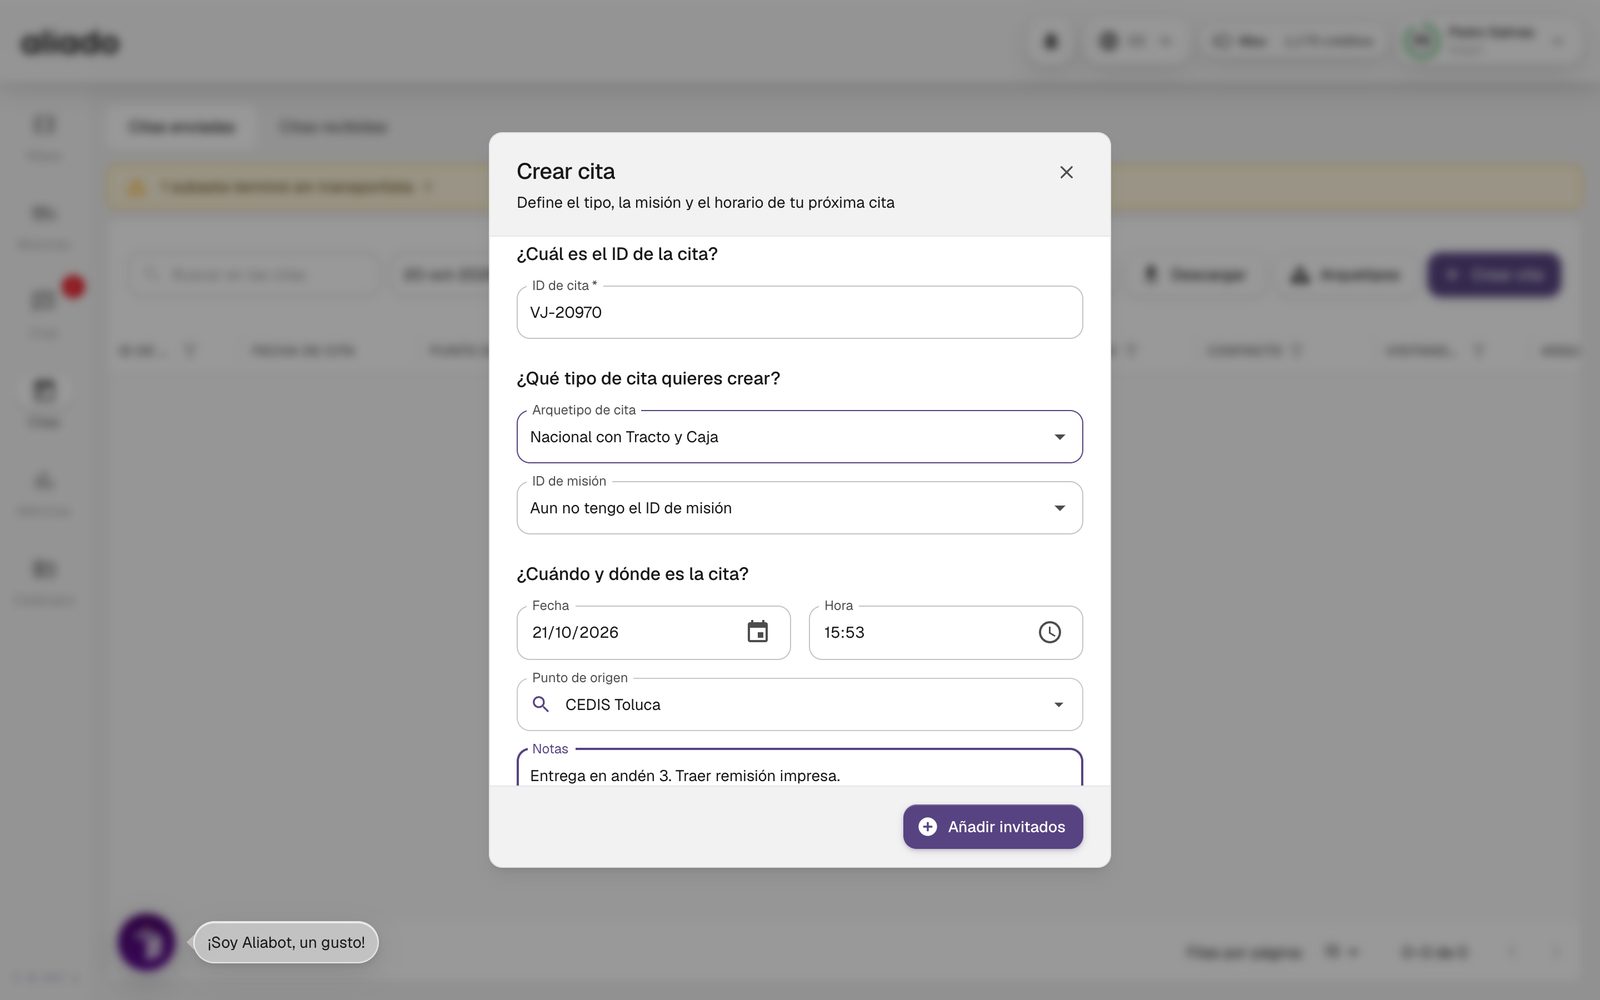
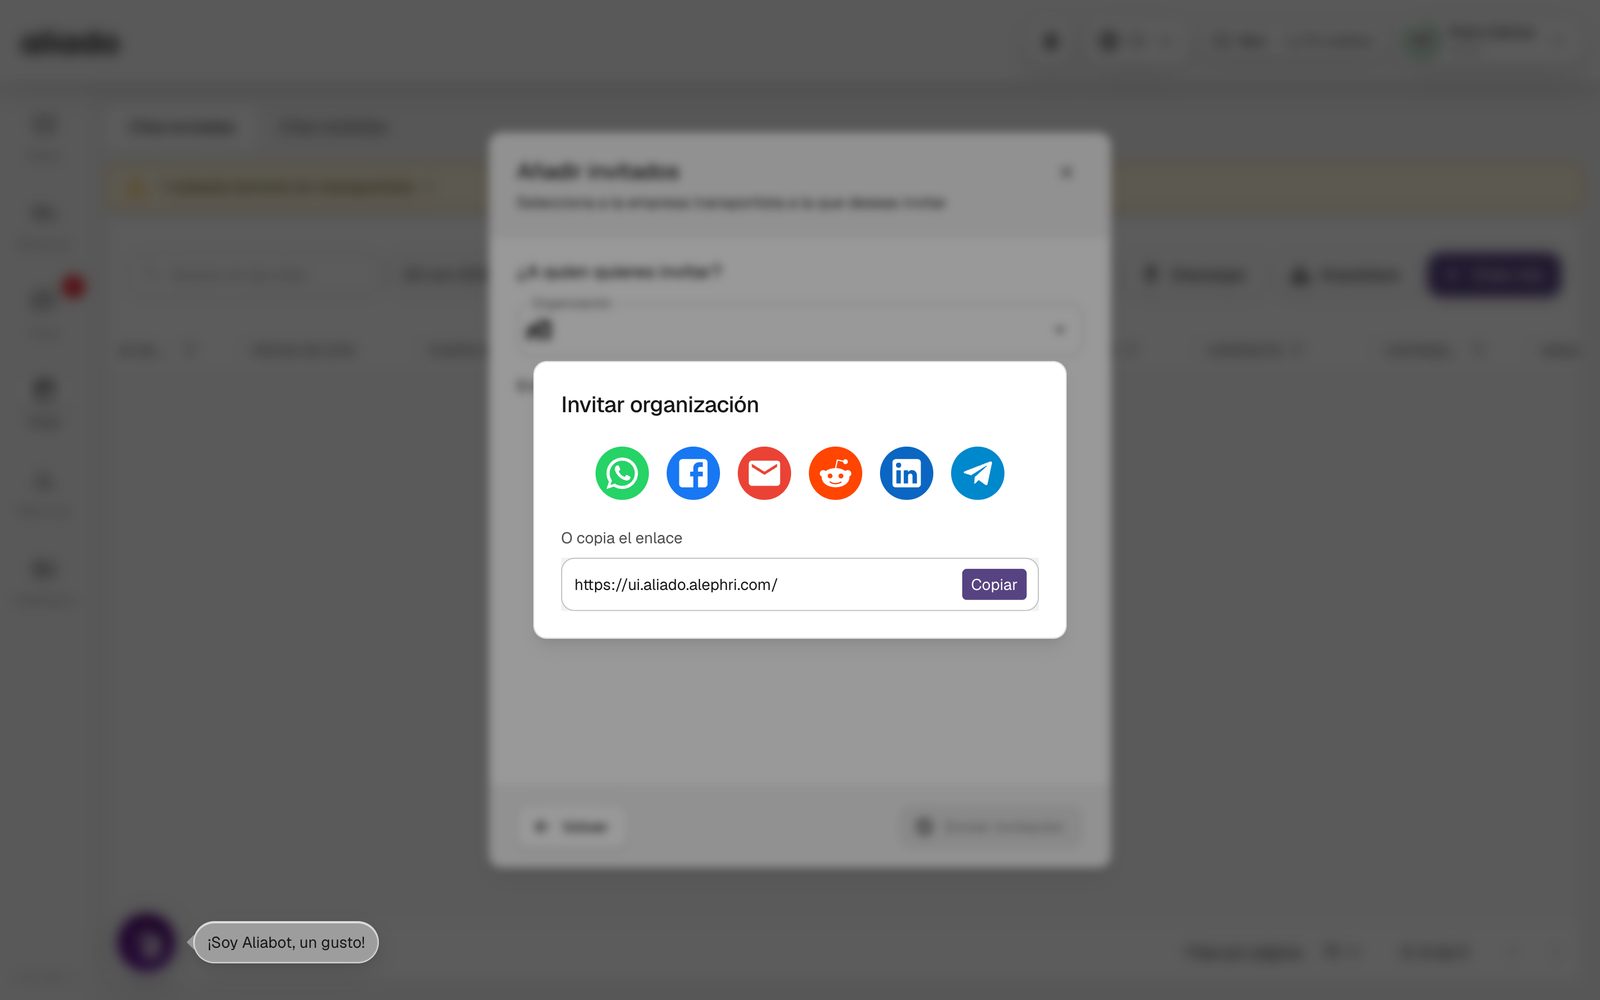
The carrier receives the notification in the platform, in the app and through the channels it has configured. From there it assigns driver and assets and uploads the documents; you validate them.
You may also be interested in: Create by tendering | Archetypes | Bulk upload of appointments
How does the carrier accept or reject an invitation?
When another organization invites you, the appointment appears in Appointments received. When you open it you will see the appointment's data, its log and two buttons: Accept invitation and Reject invitation.
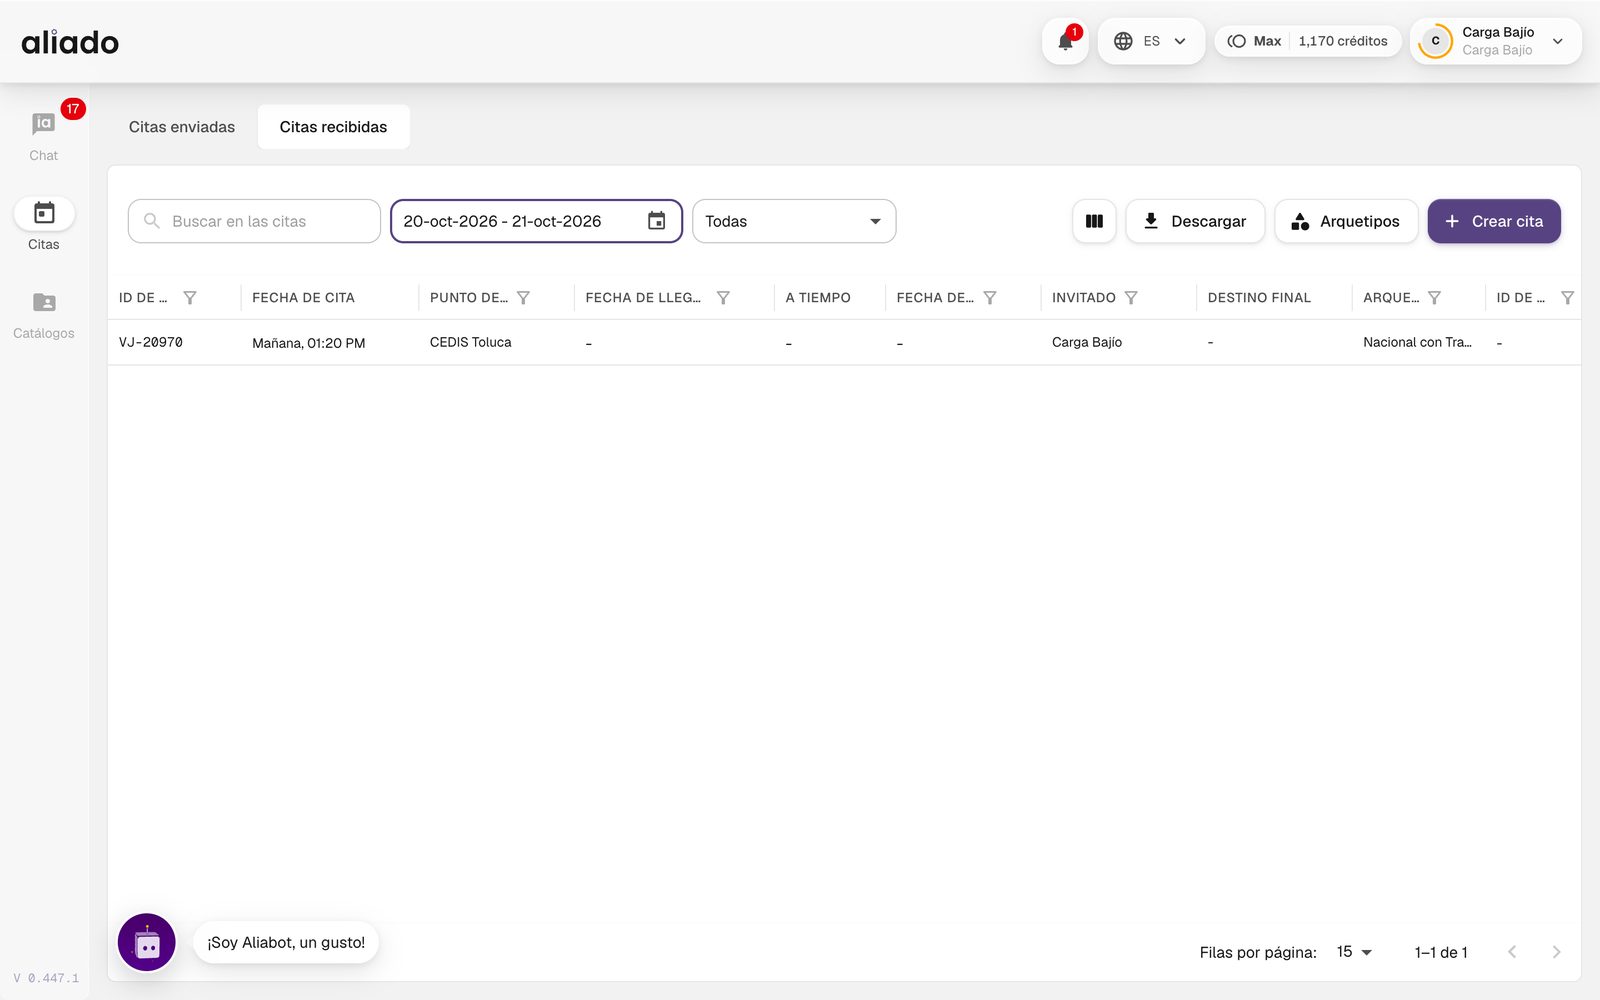
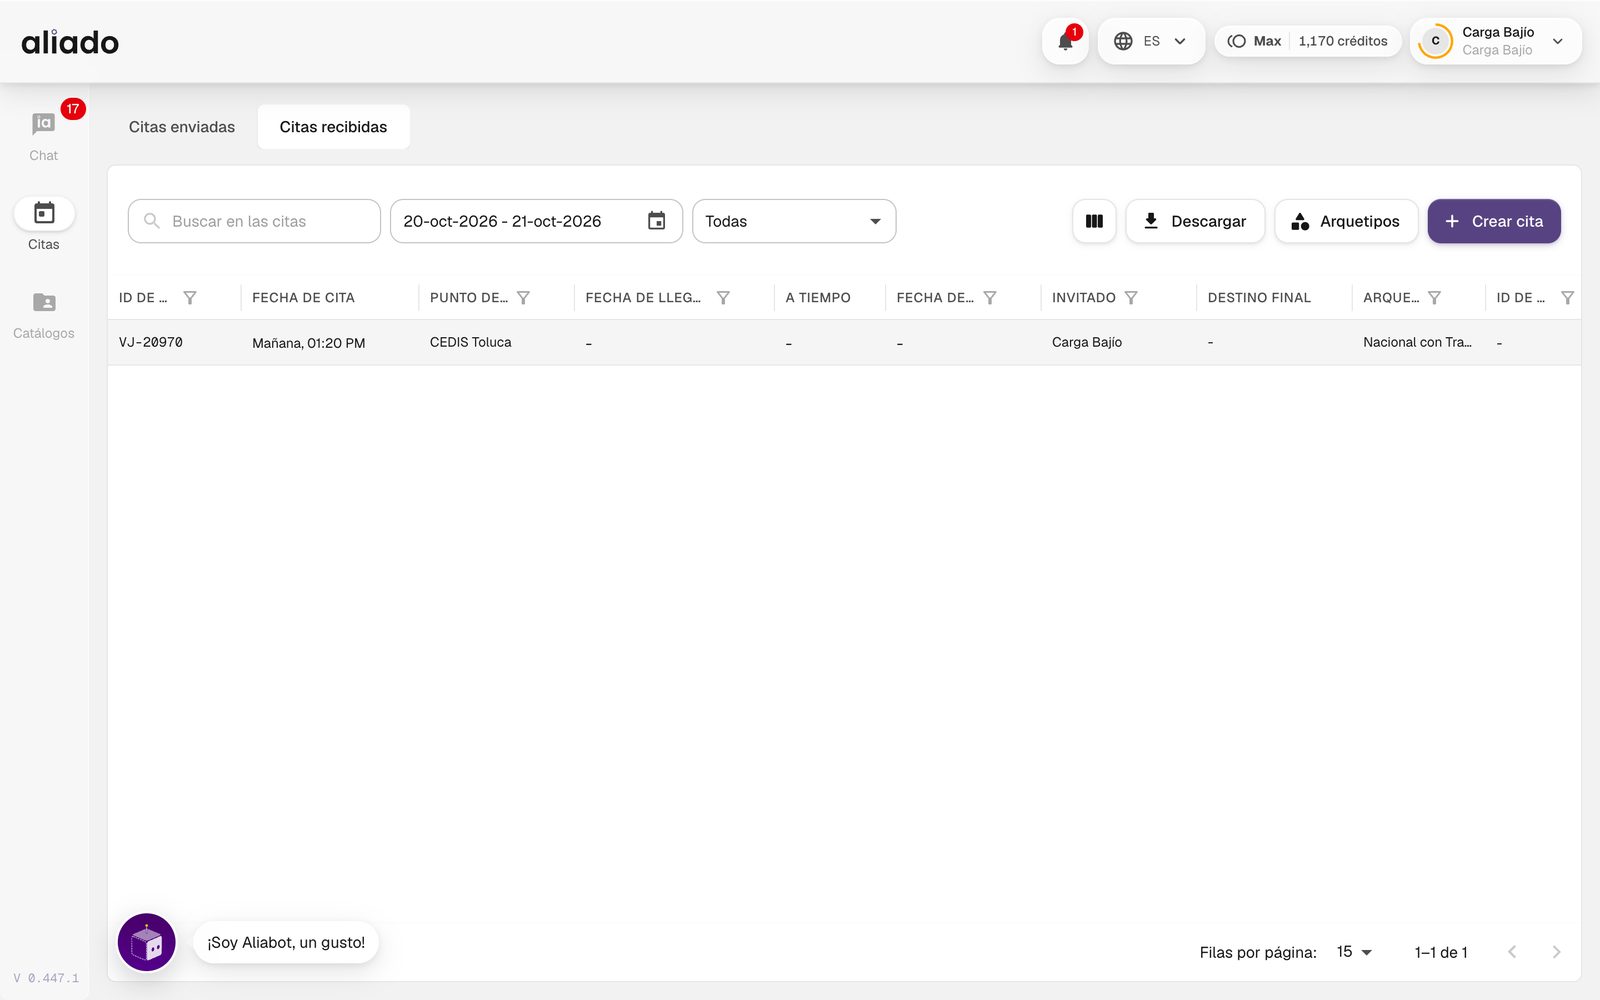
- Press Accept invitation. The appointment moves to Pending assignment.
- In the Guests tab use Assign guest to choose the driver; in Assets, Assign vehicle for each type of unit the archetype asks for (for example Truck and Trailer). Assigning staff or an asset counts as implicit acceptance.
- In Documents upload what the archetype requires. When you finish, the host validates.
If you cannot attend, Reject invitation asks for the reason for rejecting; the host receives it in its notification.
You may also be interested in: Document validation | Appointments in the driver's app
Where do I upload an appointment's documents and how are they validated?
The archetype defines which documents the invited carrier must present: the driver's, each unit's and the organization's. The guest uploads them and the host validates them, all from the appointment's detail (View details):
| Documents of… | Where they are uploaded |
|---|---|
| The driver | Guests tab, on the card of the assigned driver. |
| Each unit | Assets tab, on each unit's card. |
| The organization | Documents tab (Appointment documents); it only exists if the archetype asks for them. |
If you are the guest (carrier)
- Open the appointment in Appointments received with View details. First assign the driver (Assign guest) and the units (Assign vehicle): their documents are uploaded on their card.
- For each requirement choose a document already in the profile (Select a document...) or upload a new one (jpeg, jpg, png or pdf) and fill in its fields.
- Save with Save guest, Save vehicle or Save documents, depending on the tab.
If you are the host
- Open the appointment in Appointments sent with View details and go to the card of the driver, of the unit or of Appointment documents.
- Review each file and press Approve document or Reject document; to reject you have to write the Rejection reason.
- Press Save validations.
Each requirement shows its state: Document missing, In validation, Approved or Rejected (with the reason). When the host approves the last one, the appointment moves by itself to Confirmed and the QR is generated. If a document already exists in the profile of the driver or the unit, it is reused without uploading it again, and documents are analyzed with AI to propose their fields.
You may also be interested in: Document rejected or blocked | When the QR is generated | AI document reading
Why can't I upload or validate an appointment document, and who corrects it if validation fails?
The roles are split like this: the invited carrier uploads and corrects the documents; the host (who created the appointment and hires the service) only approves or rejects them. The host cannot upload documents on the guest's behalf: its view shows No document uploaded.
If the host rejected a document
- The carrier receives the notice and sees Rejection reason: … on the requirement.
- It uploads the corrected file (or chooses another from the profile) and saves. The document returns to In validation.
- The host reviews it again and presses Approve document › Save validations.
Why it will not let you upload (guest)
- You have not yet assigned the driver or the unit: their documents are uploaded inside their card, in Guests or Assets.
- The file is not jpeg, jpg, png or pdf.
- A required field is missing (… is required) or a date that must be in the future (Date cannot be in the past), for example an expired validity: get the current document. On saving, the form takes you to the first requirement with problems.
- You have a profile document chosen for that requirement: remove it to be able to upload a new one.
- You do not have edit permission on Appointments.
Why it will not let you validate (host)
- The card says Waiting for a guest to be assigned, Wait for the guest to assign an asset or Wait for the guest to upload the certification: the guest has not yet completed its part.
- Save validations stays off if you rejected a document without writing the reason (Provide a rejection reason for each rejected document).
- A document you already approved is not validated again.
- You do not have edit permission on Appointments.
You may also be interested in: Appointment documents | Replace a document | The QR does not appear
How does the access QR code work and what is missing for it to be generated?
The access QR is generated only at the moment the appointment moves to Confirmed. There is no button to generate it or to confirm the appointment by hand. The path is this:
| Step | Who | Appointment status |
|---|---|---|
| Creates the appointment and invites | Host | Invitation sent / Invitation read |
| Presses Accept invitation (or directly assigns a driver or a unit) | Carrier | Pending assignment (To assign filter) |
| Assigns all the drivers and units the archetype asks for and uploads all the documents | Carrier | Documents pending validation (To validate filter) |
| Approves all the documents: the appointment's, the drivers' and the units' | Host | Confirmed: the QR is generated |
If the archetype asks for no documents, the appointment is confirmed as soon as drivers and units are assigned. When the QR is generated, the carrier and the assigned drivers receive a notice.
- The guard scans the QR in Aliado Seguridad on entry and on exit. The first scan recorded moves the appointment to Completed, even if the unit has not left yet: it is almost always the entry, but if the first one is an exit it completes it too, and the scan of any of the drivers counts. The following scans are recorded with the same QR. All of them stay in the appointment's log and, if the appointment is linked to a mission, in the mission's log too.
- The QR is valid for Confirmed and Completed appointments.
You may also be interested in: See or download the QR | The QR does not appear | Scanning in Aliado Seguridad
How do I see or download an appointment's QR?
The QR exists when the appointment is Confirmed (or Completed). Both the host and the invited carrier see it:
- In Appointments open Appointments sent (if you are the host) or Appointments received (if you are the guest).
- In the appointment's row press the QR icon (QR code). You can also open the appointment with View details and press Show access QR in the left panel.
- Invitation to appointment … opens with the code. Depending on your browser, the button says Download (saves the image) or Share (opens the options to send it).
The assigned driver sees it in the Aliado app, in their appointments, next to their personal QR. At the entrance they show it and the guard scans it in Aliado Seguridad.
You may also be interested in: When the QR is generated | Appointments and QR in the app
Why does the QR (or its tab) not appear in my appointment?
The QR has no tab of its own: it is an icon in the appointment's row and the Show access QR button in the detail. If you do not see it, it is almost always because the appointment is not yet Confirmed. Look at its status:
| Status you see | What is missing | Who does it |
|---|---|---|
| Invitation sent or Invitation read | Accepting the invitation | Invited carrier |
| In tendering | An ally in the queue accepting the appointment; then the normal flow follows | Ally whose turn it is |
| Pending assignment | Assigning the drivers and units the archetype asks for and, if it asks for them, uploading their documents | Invited carrier |
| Documents pending validation | Approving all the documents and pressing Save validations | Host |
| Cancelled or Rejected | Nothing: the appointment does not continue and will have no QR | — |
Other cases:
- The appointment asks for documents, it was Confirmed and the carrier changed the driver, the unit or a document: the QR was deleted and the appointment returned to validation. A new one is generated when the host approves again.
- The appointment asks for no documents and a driver or a unit was left unassigned: the appointment returned to Pending assignment. As soon as the carrier assigns everyone, it confirms itself and a new QR comes out; the host has nothing to approve.
- The Show access QR button in the detail only appears on Confirmed or Completed appointments.
- You do not see the Appointments module: ask your administrator for the Appointments permission.
- The driver does not see the QR in the app: they have to be assigned in the appointment's Guests tab and have the app up to date.
You may also be interested in: When the QR is generated | Document rejected or blocked | See or download the QR
What are appointment archetypes?
An archetype is an access template: how many drivers and which types of assets must attend, and which documents are required from each one and from the organization. You manage them from the Archetypes button of the Appointments module.
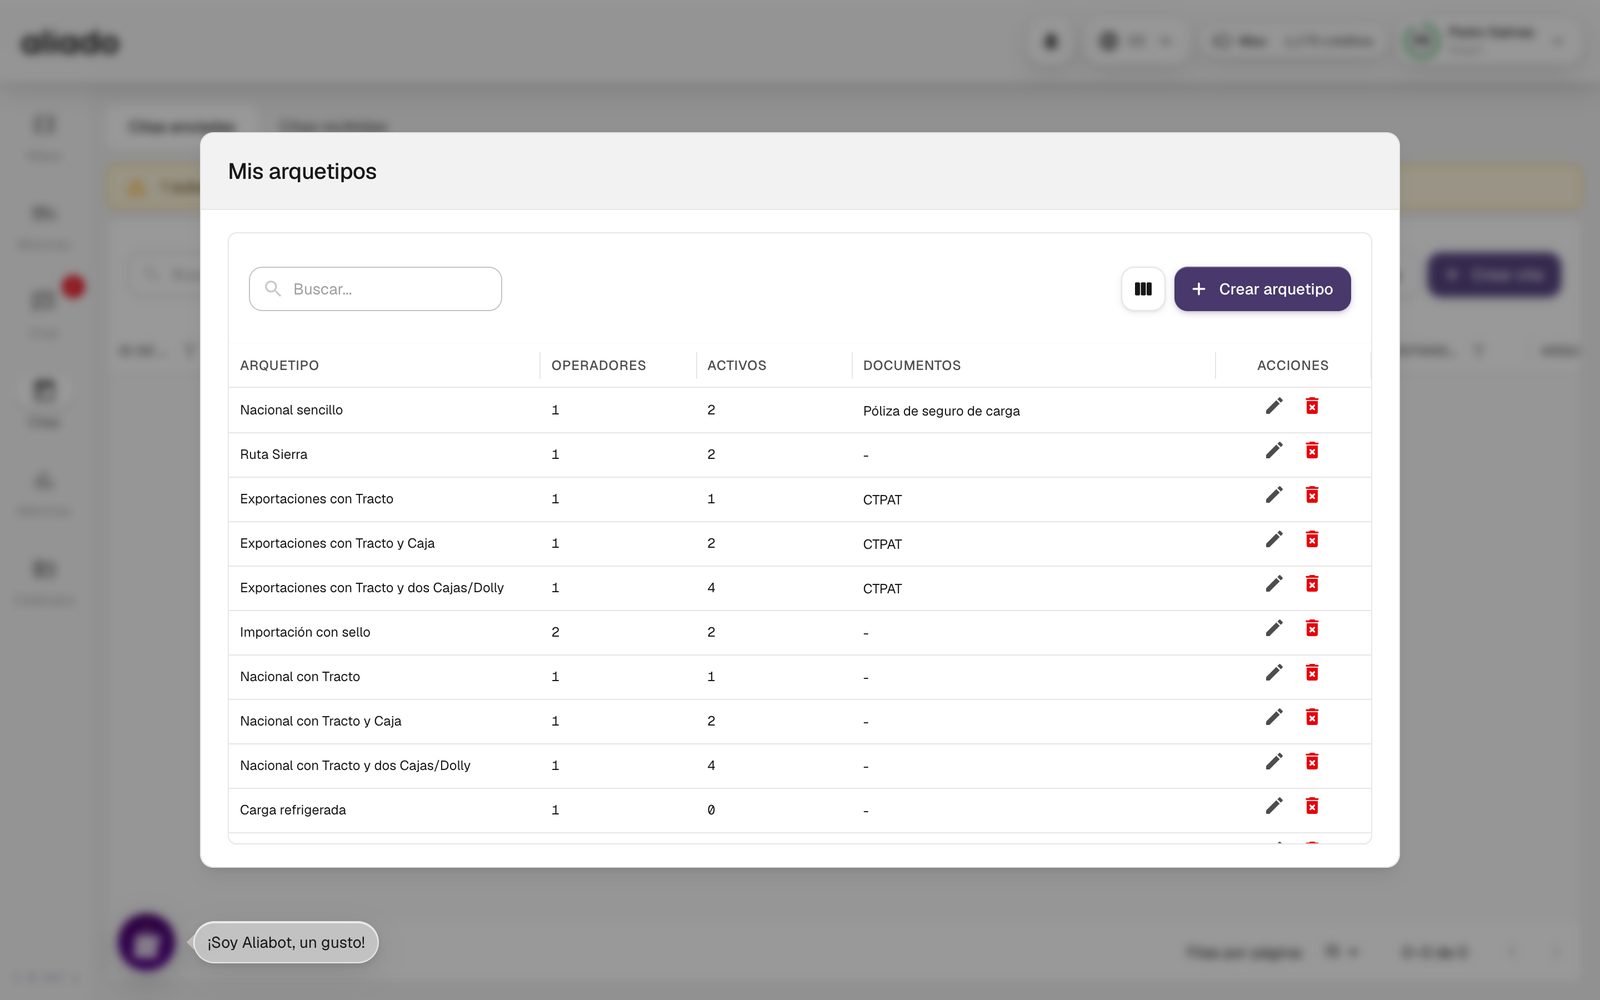
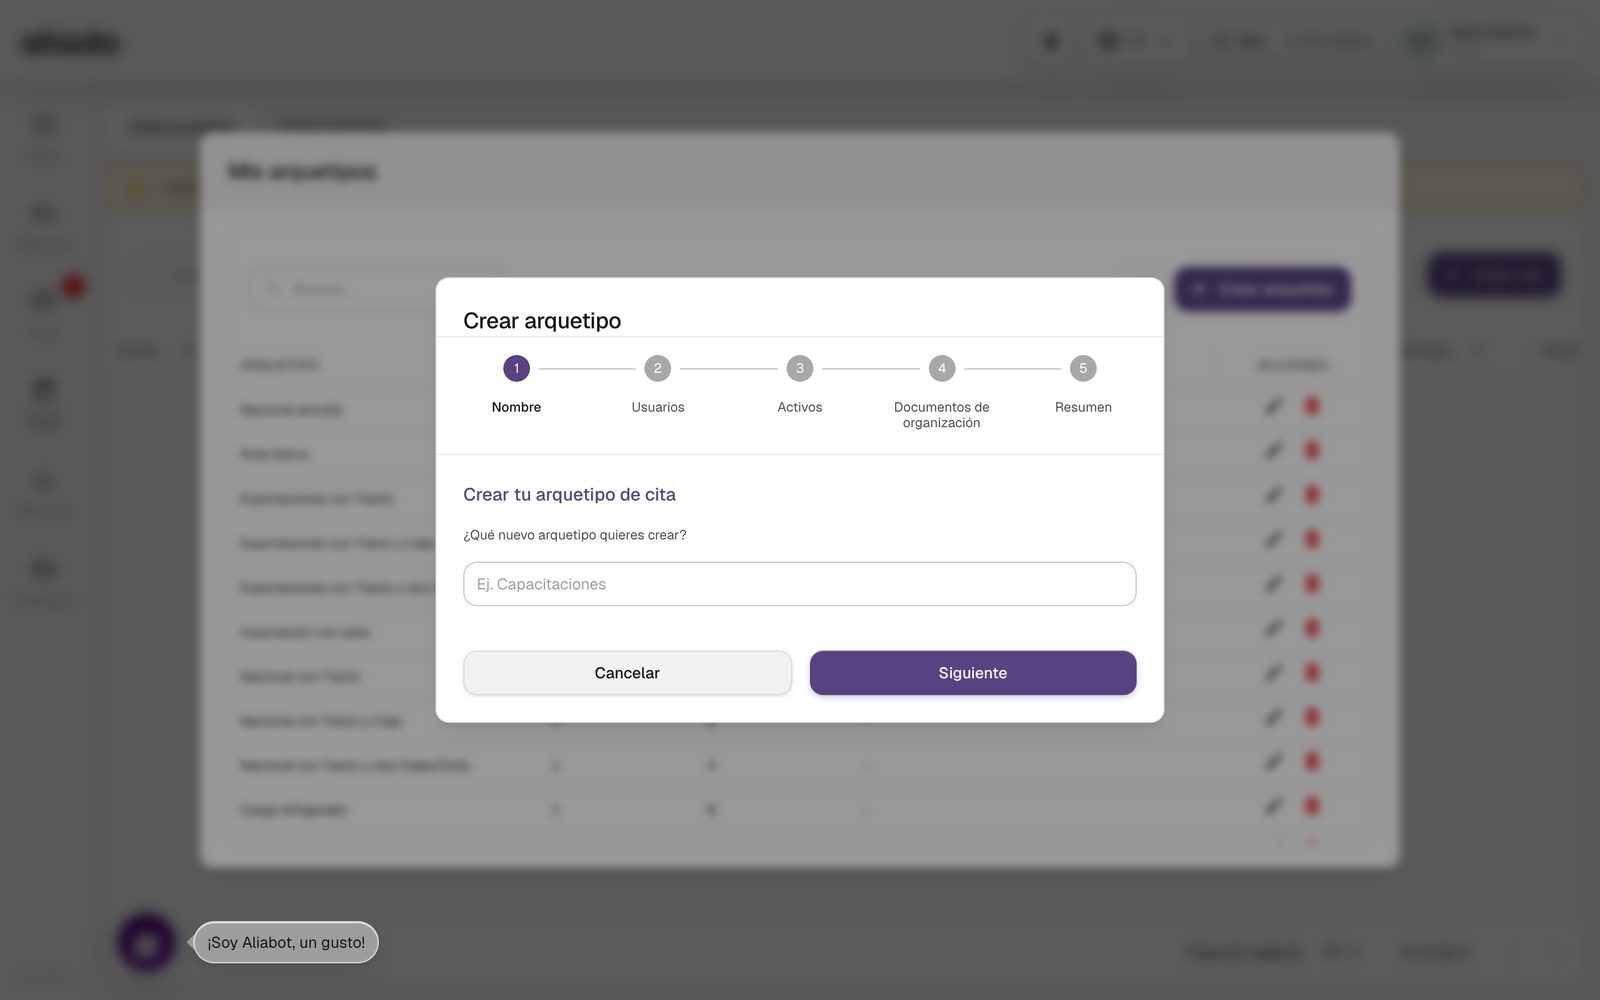
- Press Create archetype. The wizard has five steps: Name, Users, Assets, Organization documents and Summary.
- The name is required and at least one user is needed. If you ask for assets, turn on at least one type (Truck, Trailer, Dolly…) with quantity 1 or more.
- Choose the documents per requirement; you can create a new document type without leaving the wizard.
How do I create appointments with a bulk upload?
- In Appointments press Create appointment › Bulk upload.
- Upload your .xlsx or .csv file and press Process file. The upload's Aliado AI assistant interprets the columns.
- Review the state of each appointment; correct the rows with errors and confirm with Process N appointments.
You may also be interested in: Bulk upload of missions
How do I edit or cancel an appointment?
As long as the appointment is not Confirmed, Completed or Cancelled, the host edits it with the Edit icon (the pencil) in its row in Appointments sent: date, time, notes, origin point, archetype or invited company. On saving, the carrier is notified that the appointment was updated. Changing the invited company or the archetype resets what was assigned and the documents.
To cancel it use Delete (the trash can) in the same row: the appointment becomes Cancelled, the carrier is notified of the cancellation and the action cannot be undone.
You may also be interested in: Status of an appointment | If the transport arrives another day
Is the appointment valid if the transport arrives another day?
Yes. Aliado does not block access by date: the QR of a Confirmed appointment keeps working even if the unit arrives before or after the scheduled day, and the appointment does not expire by itself when the date passes.
- When scanning in Aliado Seguridad what is checked is that the appointment is Confirmed (or Completed) and that the guard belongs to the host organization, not the date. The guard's app shows the appointment's scheduled date, but does not block entry if it is another day.
- The arrival is recorded with its actual time. In Appointments, the On time column marks it On time or Delayed against the scheduled date and time, with your organization's tolerance; before the arrival it shows a dash.
- If your facility does not receive outside the date, that rule is applied by your staff at the gate: Aliado does not impose it.
You may also be interested in: Access QR | Edit or cancel an appointment | Scanning in Aliado Seguridad
Can I create the appointment from the mission?
Yes. On the Missions board, the row actions include Create appointment and Create appointment by tendering. The form opens with the Mission ID, the start date and time and the origin point already filled in; you choose archetype, appointment ID and guest.
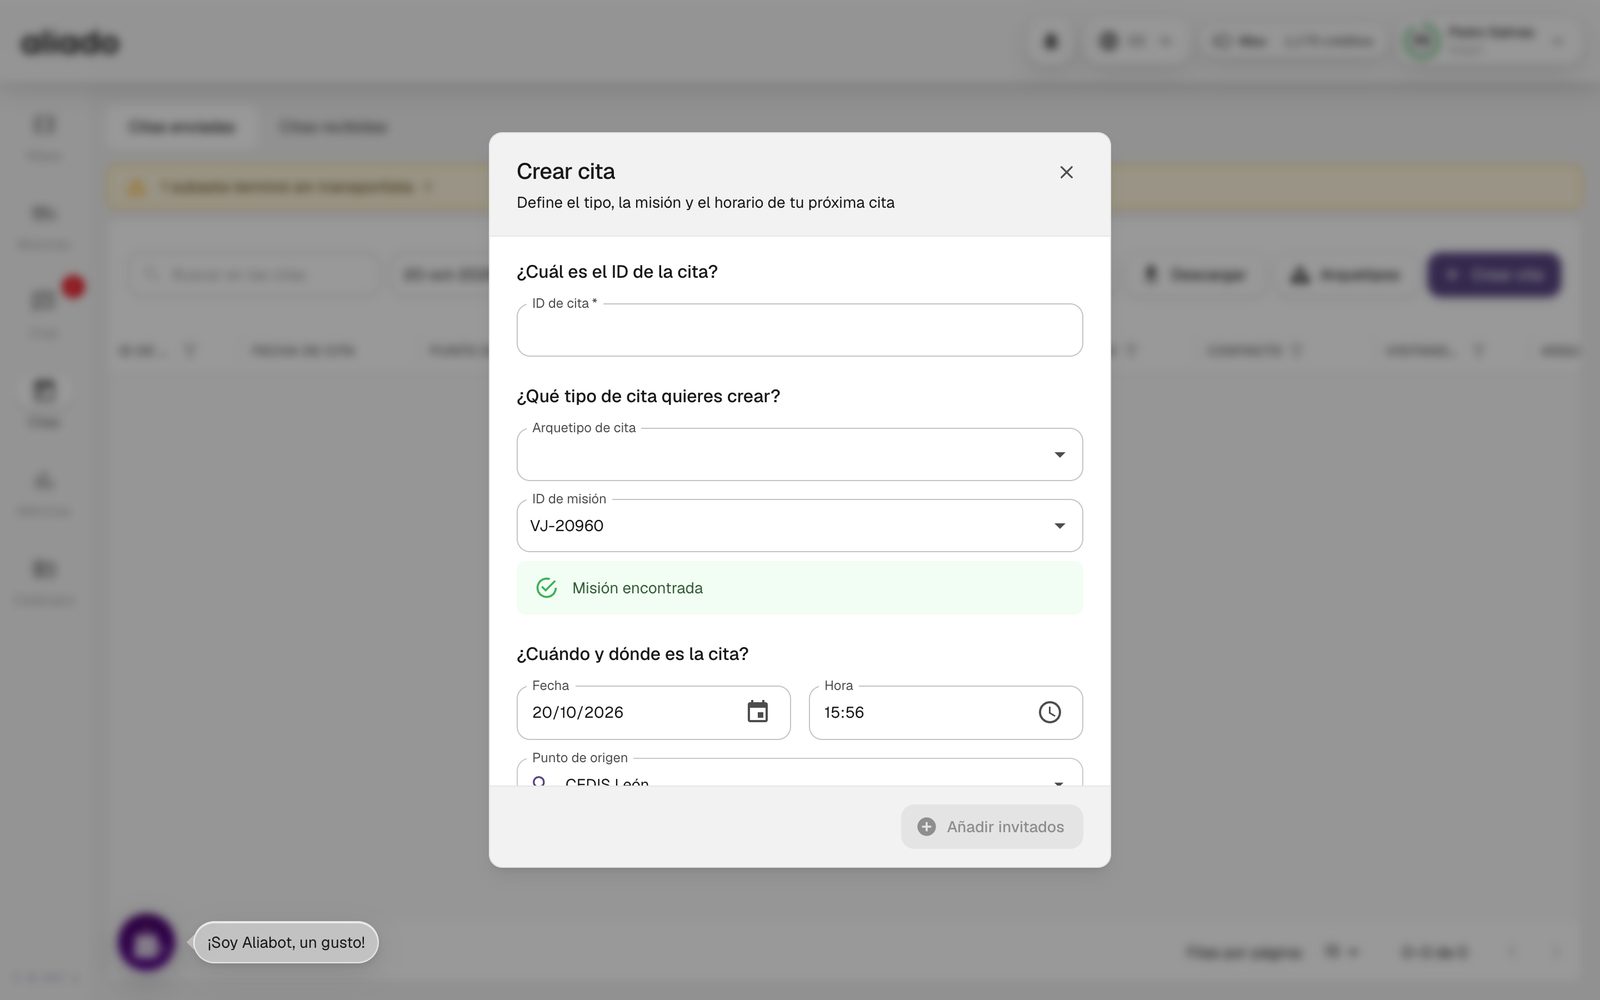
You may also be interested in: Board actions
Tendering and rate card
Tendering offers an appointment to your allies one at a time: if the first does not accept within the set time, it moves to the next. It can be ordered by the current rate of a route in your rate card or by the order you choose.
What is an appointment by tendering?
Instead of inviting a single carrier, tendering builds a queue of authorized allies and offers them the appointment in turns. Each ally sees only its own turn, with a clock and the Accept and Reject buttons; it never sees the queue or the others' rates. As soon as one accepts, the appointment is theirs and follows the normal flow (assign driver and assets, documents, QR).
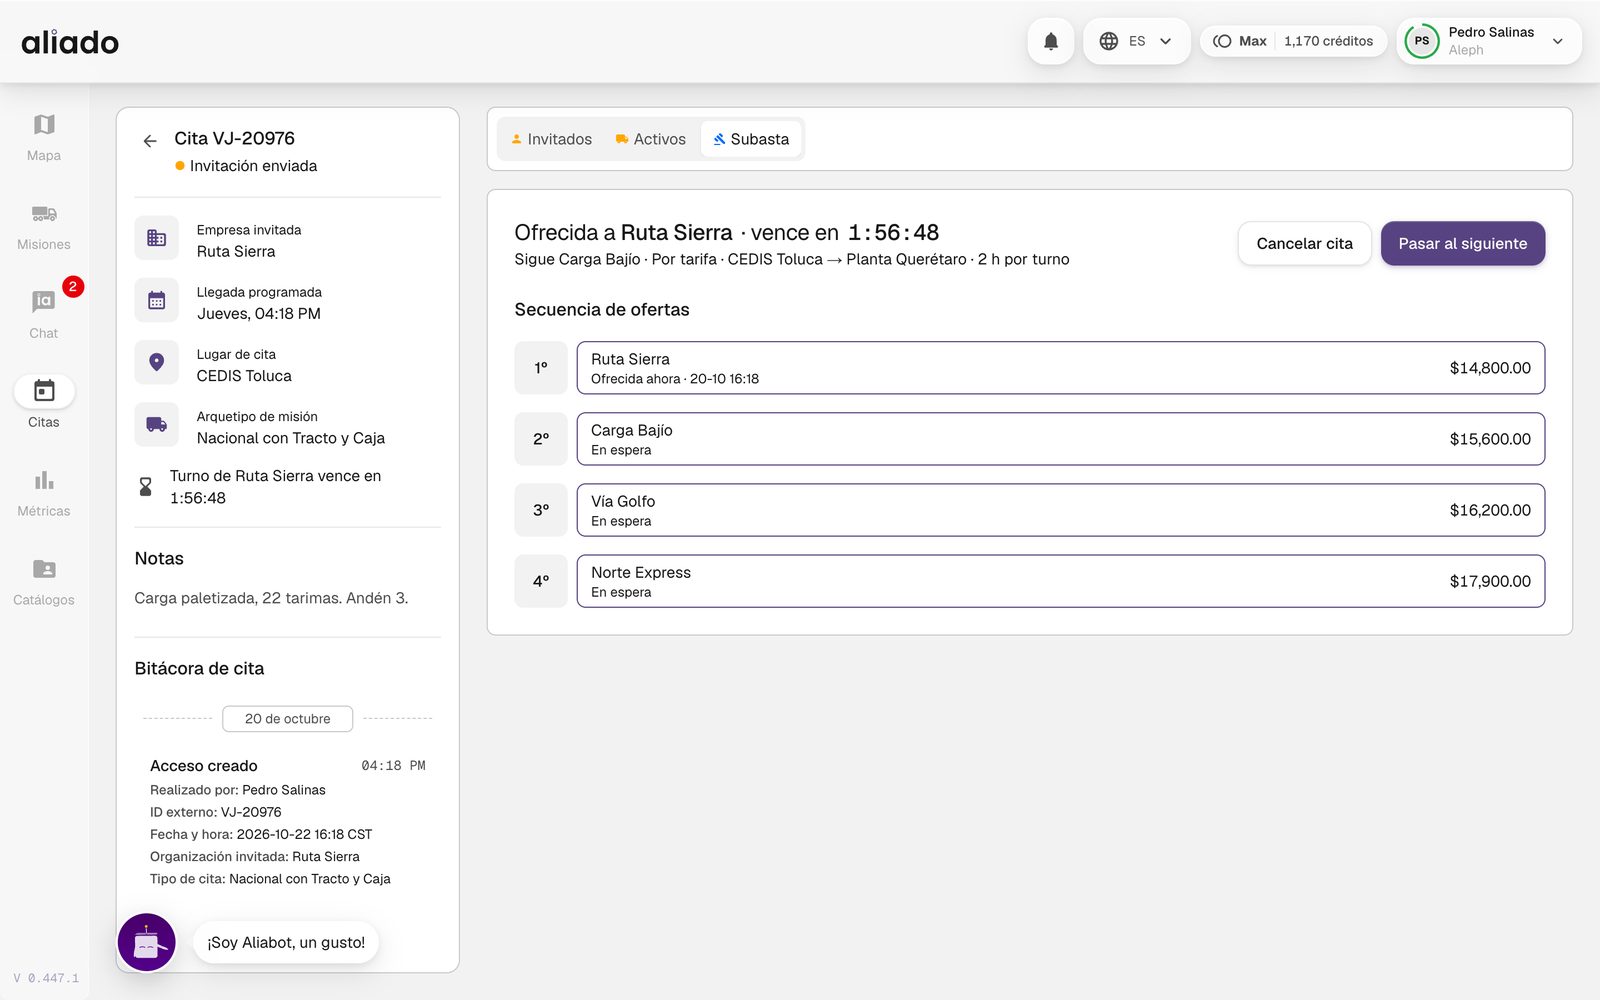
- You need at least two allies in the queue. For a single one use the normal appointment.
- Only allies authorized in Catalogs › My organization › Allies take part.
- The archetype must ask for assets, so Aliado knows which equipment to offer.
You may also be interested in: Create an appointment by tendering | Authorize allies
How do I create an appointment by tendering?
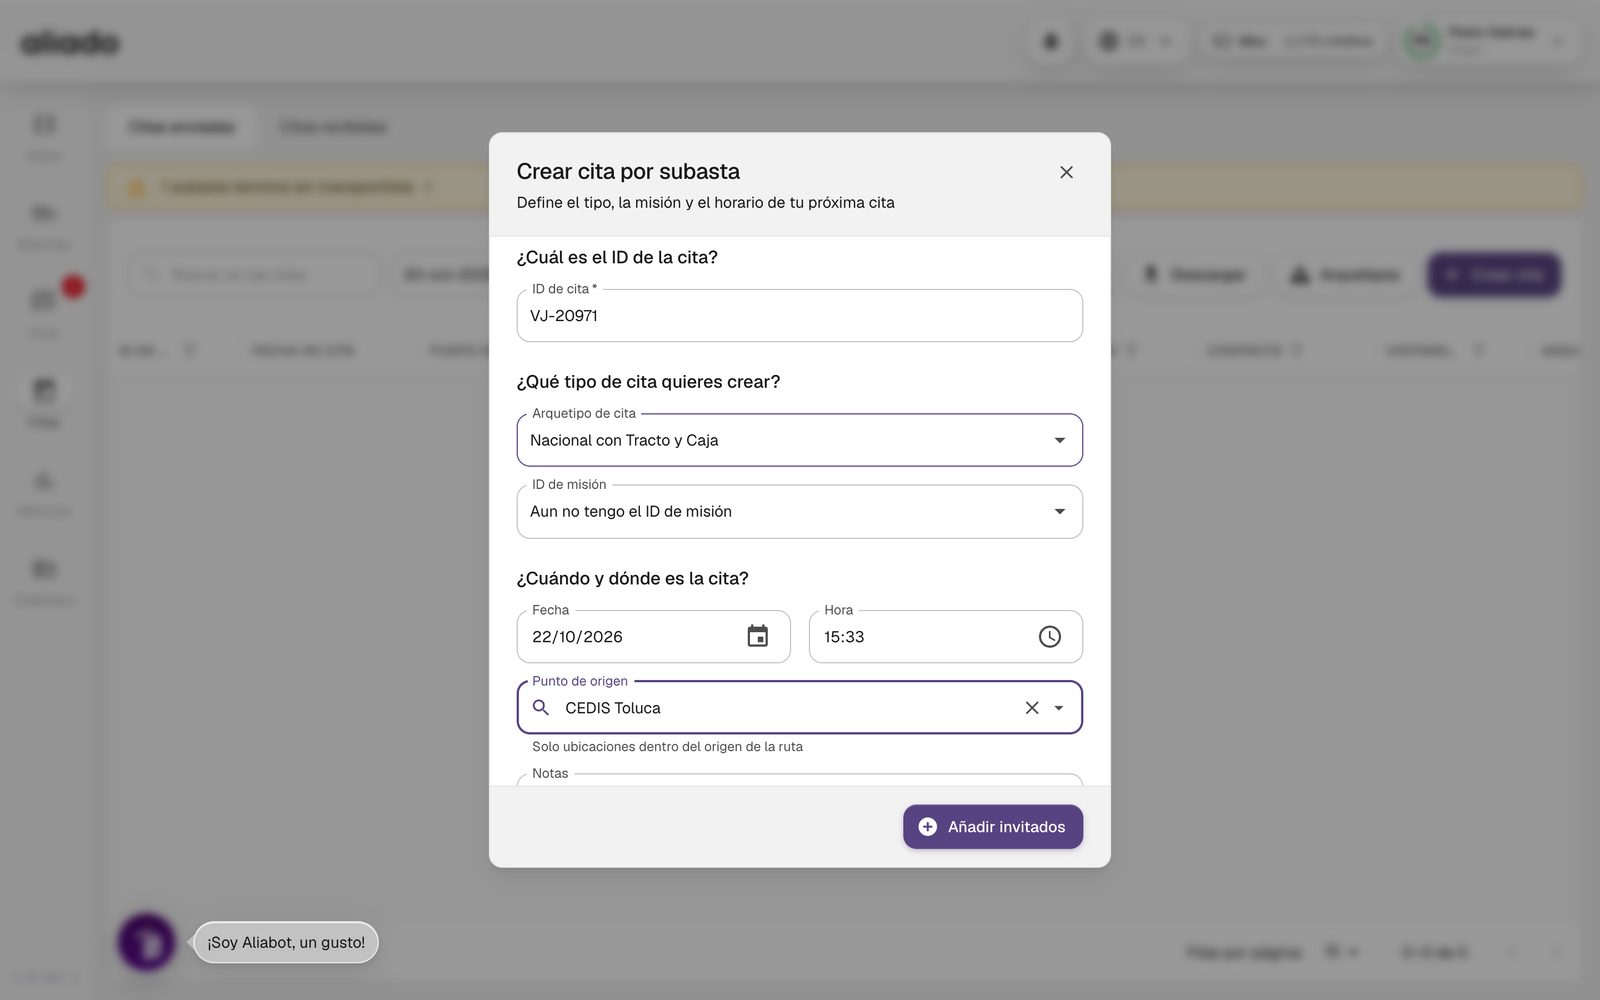
- In Appointments press Create appointment › Create by tendering (or Create appointment by tendering from a mission's row).
- Choose how to offer it in How should the appointment be offered?: By rate (lane), to the allies with a current rate on a route of the rate card, from cheapest to most expensive; or By order, to the allies you add in the order you decide.
- If it is by rate, select the Rate card route (or create it right there with Create rate card route). The appointment's origin point must be inside that route's origin and the archetype must ask for the route's equipment.
- Enter appointment ID, archetype, mission (optional), date, time, origin point and notes, and press Add guests.
- Review We will offer this appointment in this order and set If an ally does not answer within…: 30 min, 1 h, 2 h, 4 h, 8 h or 24 h per turn (2 h by default). Press Start tendering.
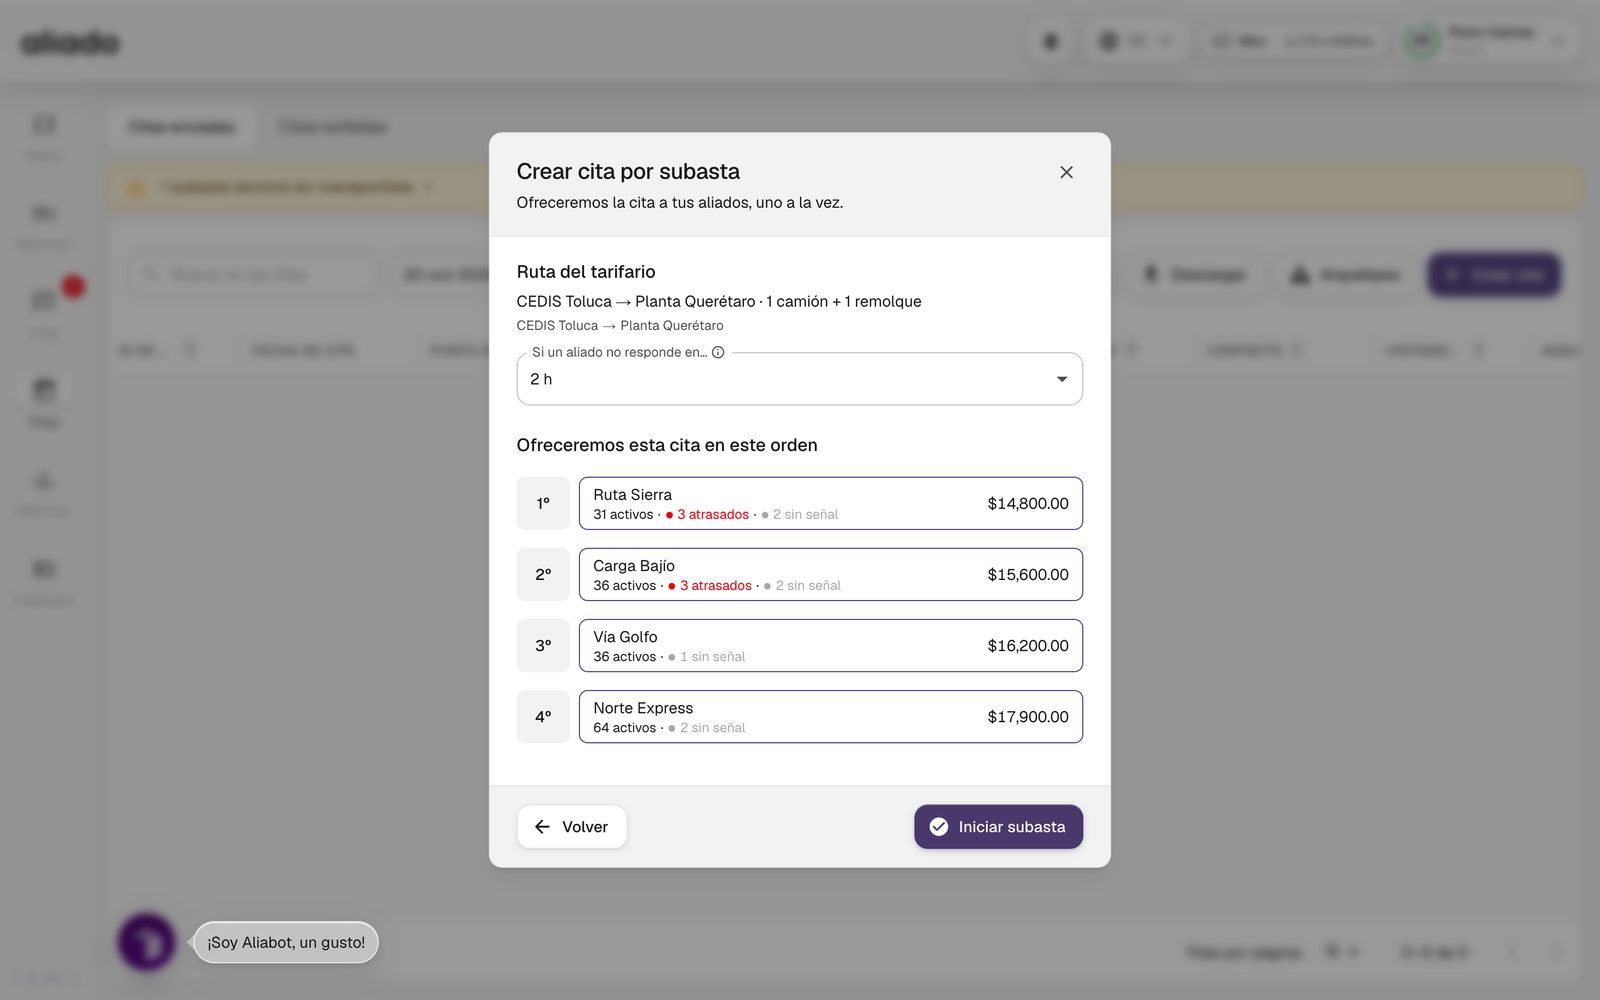
Aliado confirms Tendering started: the appointment was offered to X and notifies the first ally.
You may also be interested in: Route rate card | Following a tendering
How do I follow a tendering?
In Appointments sent, the Status column shows In tendering with the turn's clock live. Open the appointment and go to the Tendering tab:
- At the top: whom it is Offered to, how long until their turn expires and who is next.
- Offer sequence: each ally with its state (Waiting, Offered now, Accepted, Rejected with its reason, Skipped, no answer, Cancelled) and its rate.
- Move to the next one withdraws the offer from the current ally and passes it to the next. If it was the last one, the appointment is cancelled.
- Cancel appointment withdraws the offer from everyone; it cannot be undone.
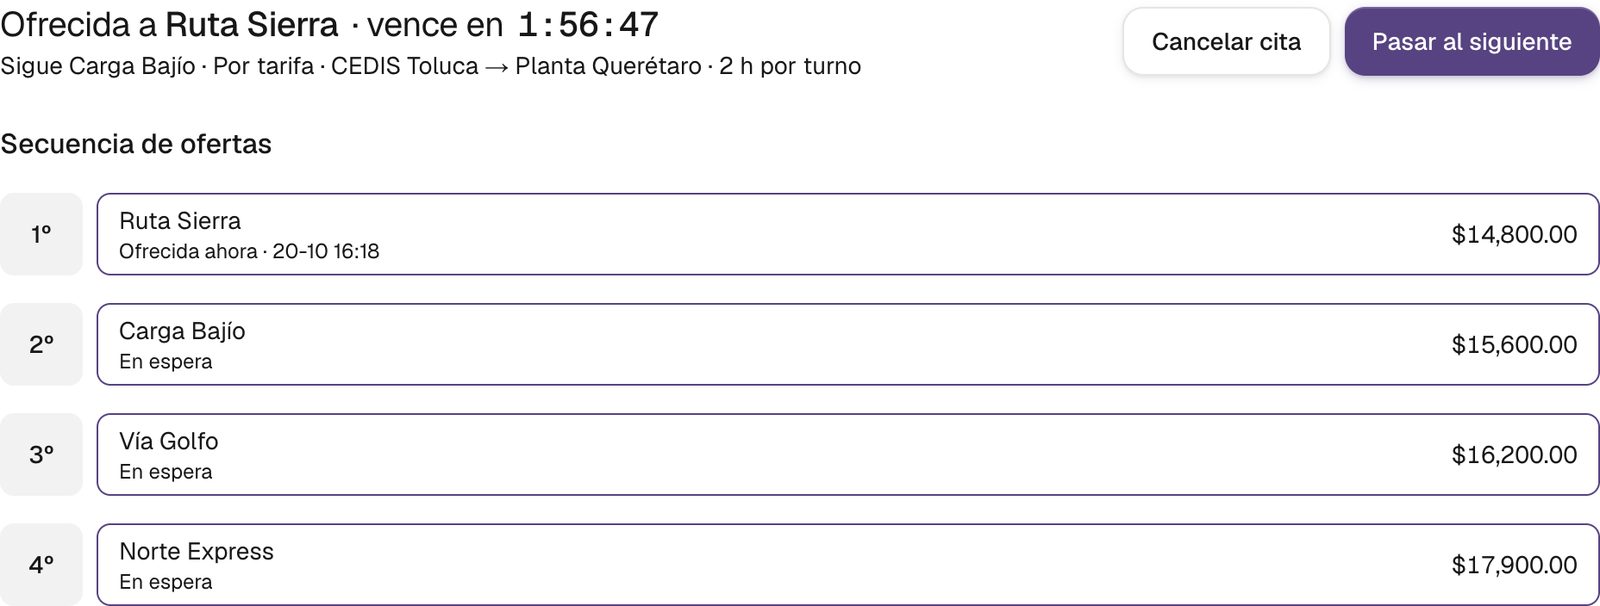

If the queue runs out without anyone accepting, the module shows the Tenderings without a carrier notice. Each step generates a notification (Configure alerts › Tendering): an ally accepted, the appointment moved to the next one, no ally accepted, the tendering was cancelled.
You may also be interested in: Tendering notices
What does the ally invited to a tendering see?
The ally is notified that it was offered an appointment, with the deadline. In its appointment it will see the You were offered this appointment card with the clock (Your turn ends in…), its rate (Your rate: $X) or No rate: offered to you by order, and the Reject and Accept buttons.

- On accepting, it goes into the appointment's detail to assign driver, assets and documents.
- On rejecting, it states the reason; the appointment moves to the next one and disappears from its list.
- If the clock reaches zero it will see Turn expired and is notified that its turn expired. With less than 10 minutes left the clock is marked as urgent.
What is the Route rate card?
Catalogs › Route rate card keeps your sourcing routes with the equipment they require and each ally's rate. It is the basis of tendering By rate.
- In My routes press Create route and enter ID and Name.
- In Equipment add the asset types and quantities (for example 1 truck + 1 trailer) or use Use archetype.
- Set the Origin and the Destination by state, municipality or exact location; you can combine them. They must be different.
- Choose Create and load rates to enter each ally's rate yourself (price, currency MXN/USD/COP and validity from/to), or Request quotes to ask them for a quote.
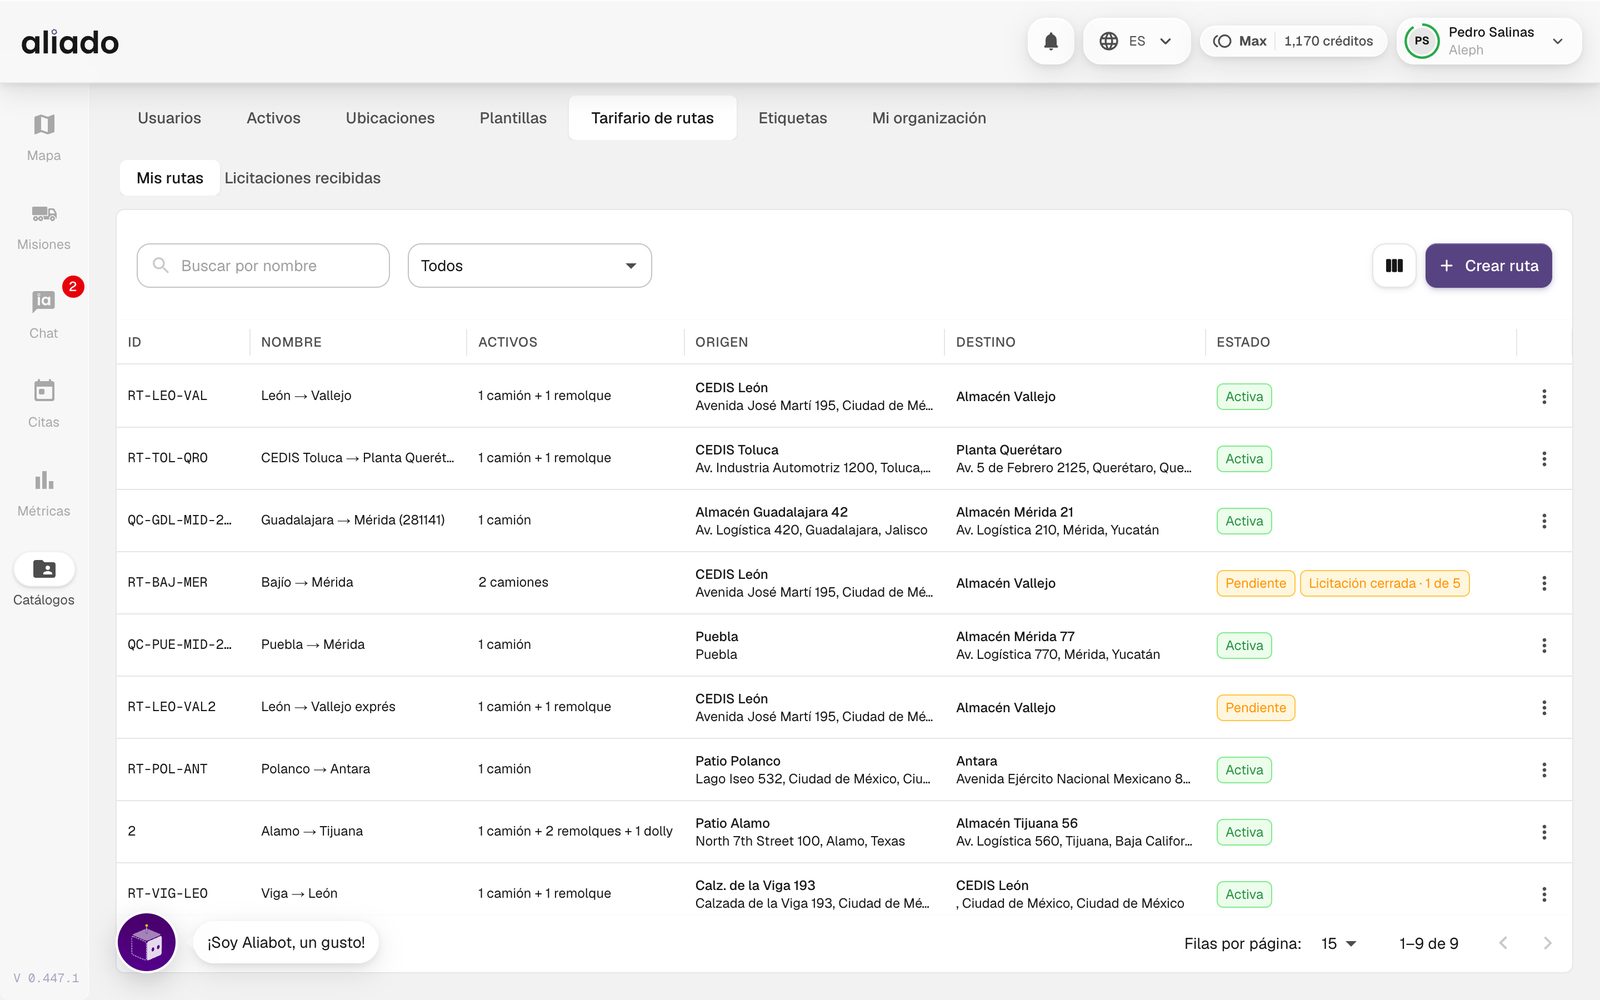
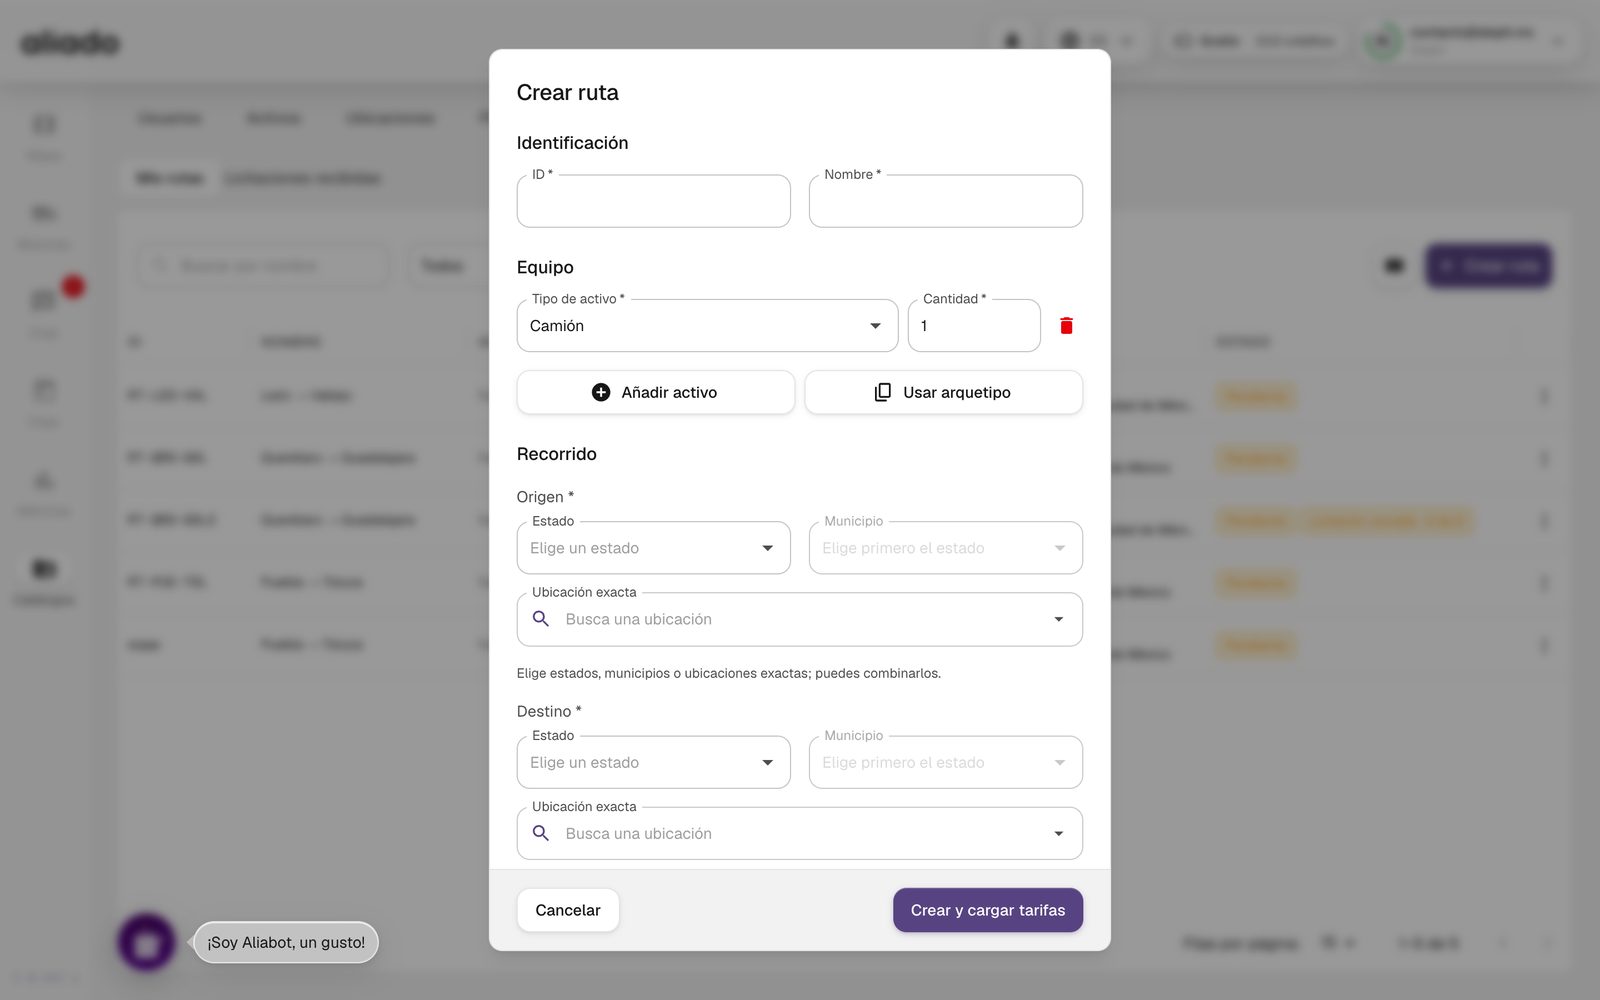
You may also be interested in: Quote requests | Create by tendering
How do I request quotes for a route and how do I answer a quote request?
A quote request asks your allies for their rate on a route of the rate card. When creating or editing a route choose Request quotes, select the allies and wait for their quotes; in the route's row you will see Quotes closed · N of M as they answer.
- When you award a quote, that rate replaces the ally's current one on the route and the others are notified that their quote was not chosen.
- If you are the invited ally, the request arrives as a notice inviting you to quote a route and appears in Route rate card › Requests received, where you quote or decline with a reason.
- Quote request notices are configured in Configure alerts › Tendering.
You may also be interested in: Route rate card
Chat
The Chat connects the control tower with the driver and with everyone involved in a mission. Each conversation is tied to a mission and everything exchanged stays in its log.
How does the Chat work?
In Chat you see your conversations on the left, one per mission, with the last message, who sent it and when. The pin icon pins the important ones and the funnel shows only the unread ones. On the right is the conversation with its members (drivers, administrators and the organizations involved).
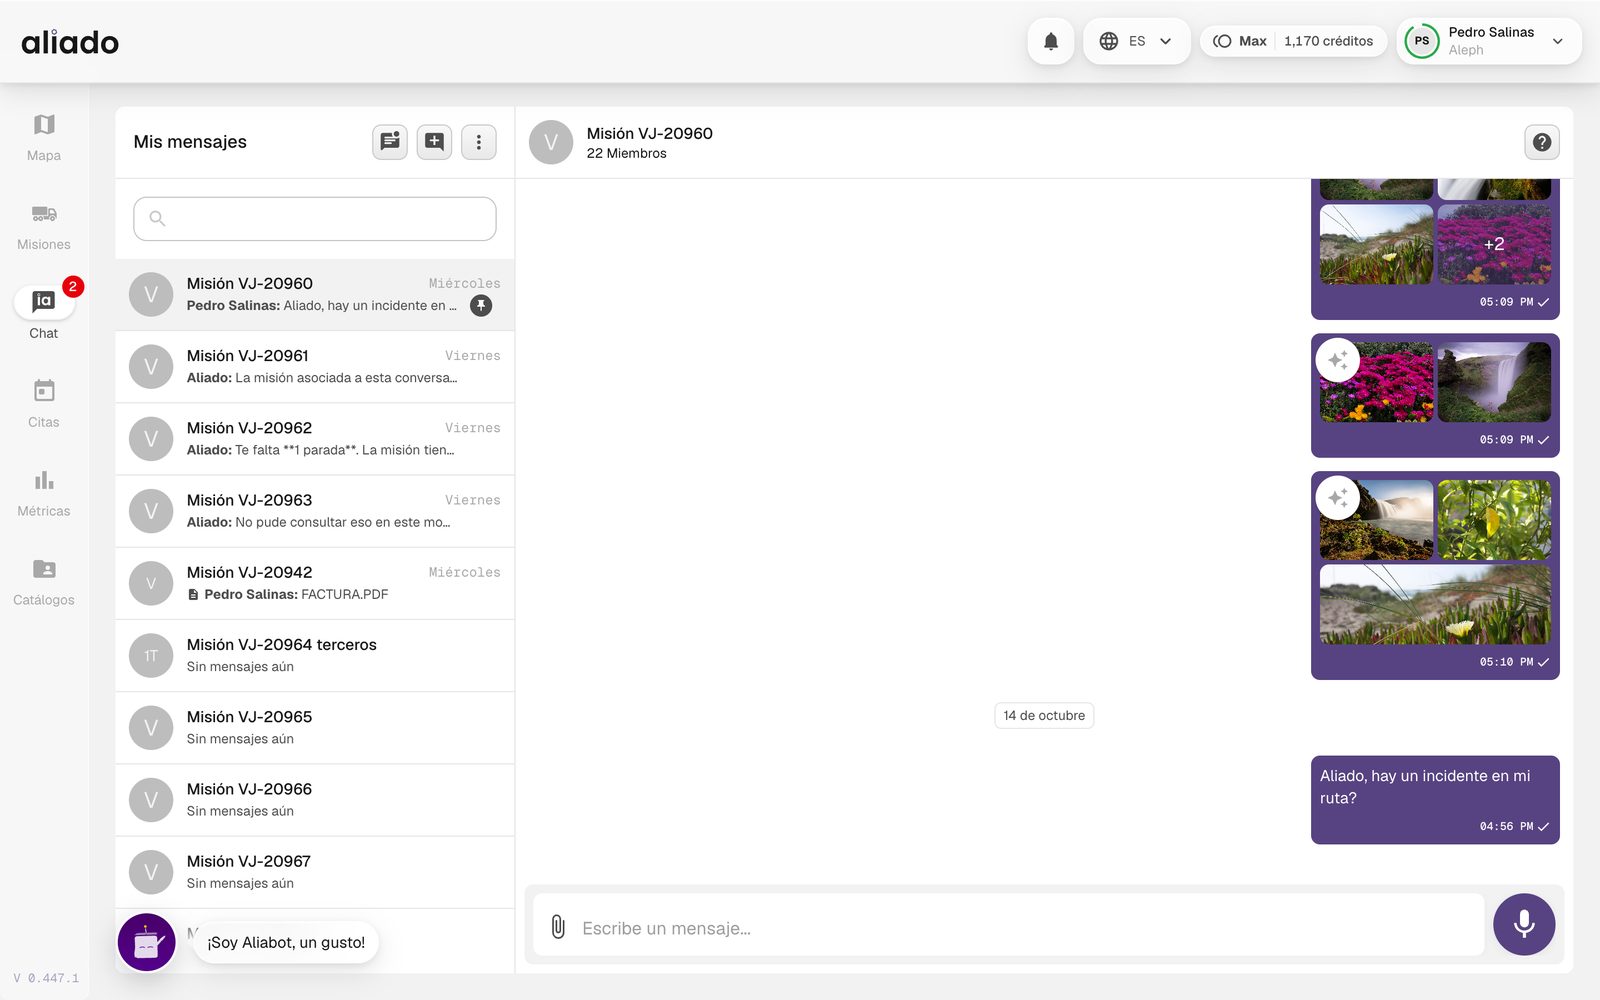
- Write in Write a message..., attach files with the paper clip or record an audio with the microphone.
- The unread counter in the side menu updates live.
- The conversation's ? button opens How to use the chat, the help the driver also sees.
From a mission's detail you can also open its chat with the button in the bottom right corner of the map.
You may also be interested in: Start a conversation | Threads and receipts | The chat from the app
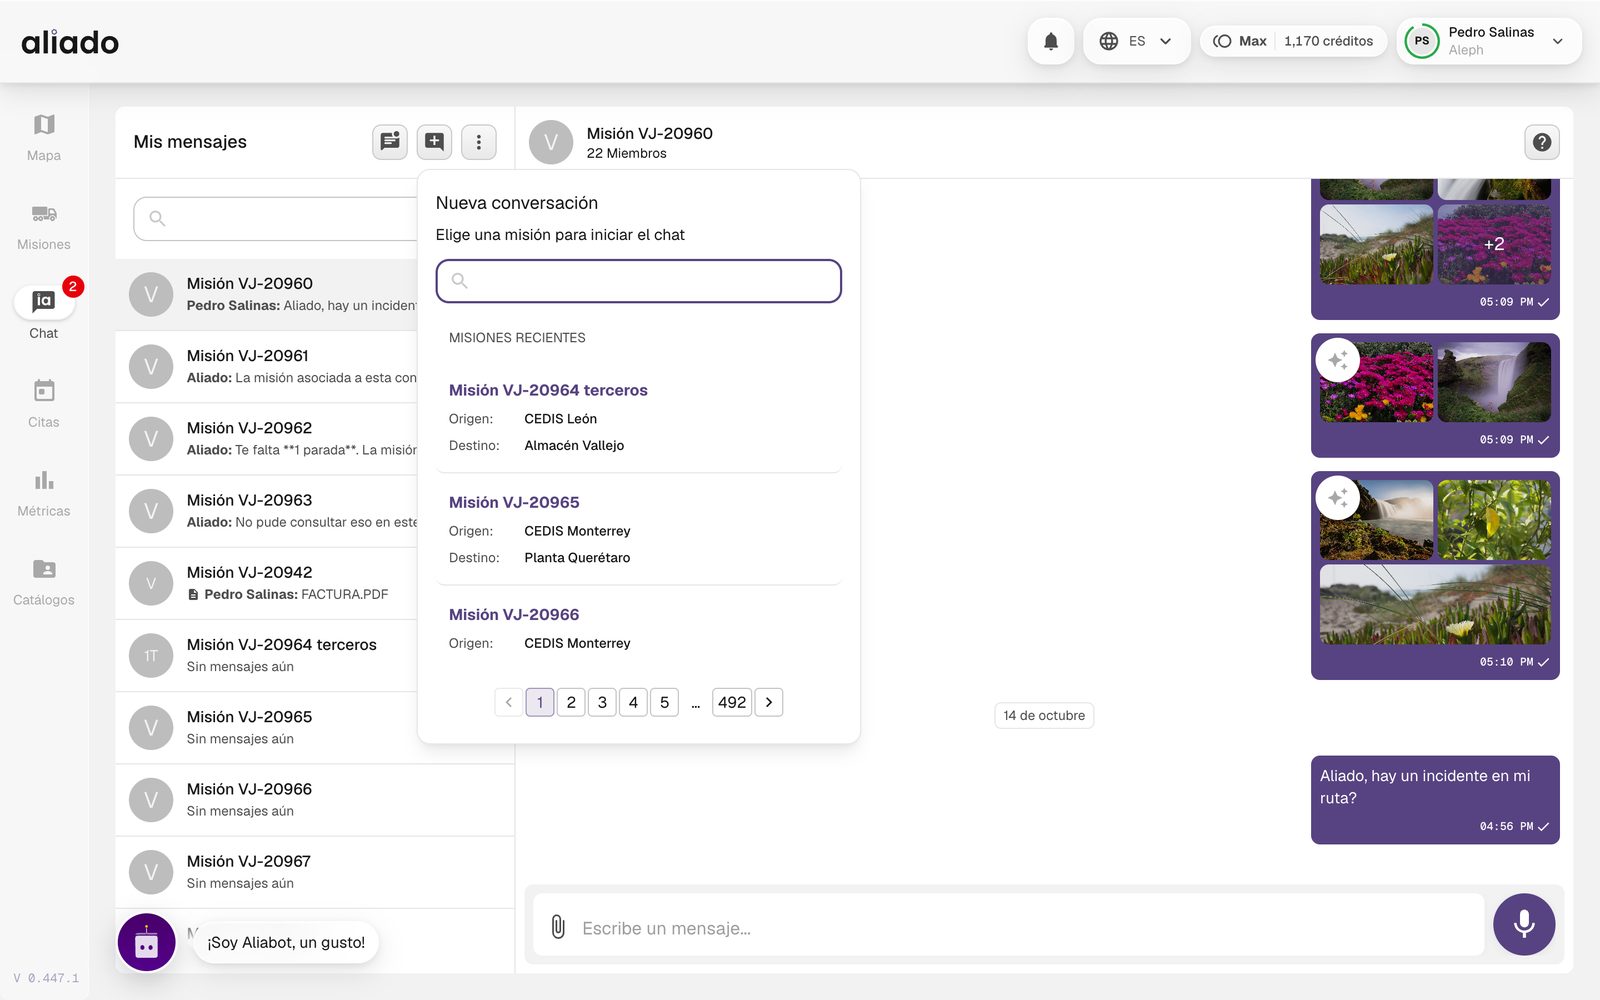
How do I start a conversation?
- Press the Start a new conversation icon in the header of My messages.
- Search for the mission by its ID; the list shows origin and destination so you do not mix it up.
- Select it: that mission's conversation opens with its members.
How do audios and their transcription work?
The audios the driver sends (and yours) are transcribed automatically: below the player you will see the text in italics and in quotation marks; while it is processed animated dots appear. The transcription is also saved in the mission's log, synchronized with the unit's position at that moment.
That way you can read what the driver said without playing the audio, and look for it later in the log.
What are threads and read receipts?
Hover over a message and press Open thread to answer it in a separate thread, as in Slack: the original message is shown whole at the top and the replies do not clutter the main conversation. Conversations show how many replies each thread has.
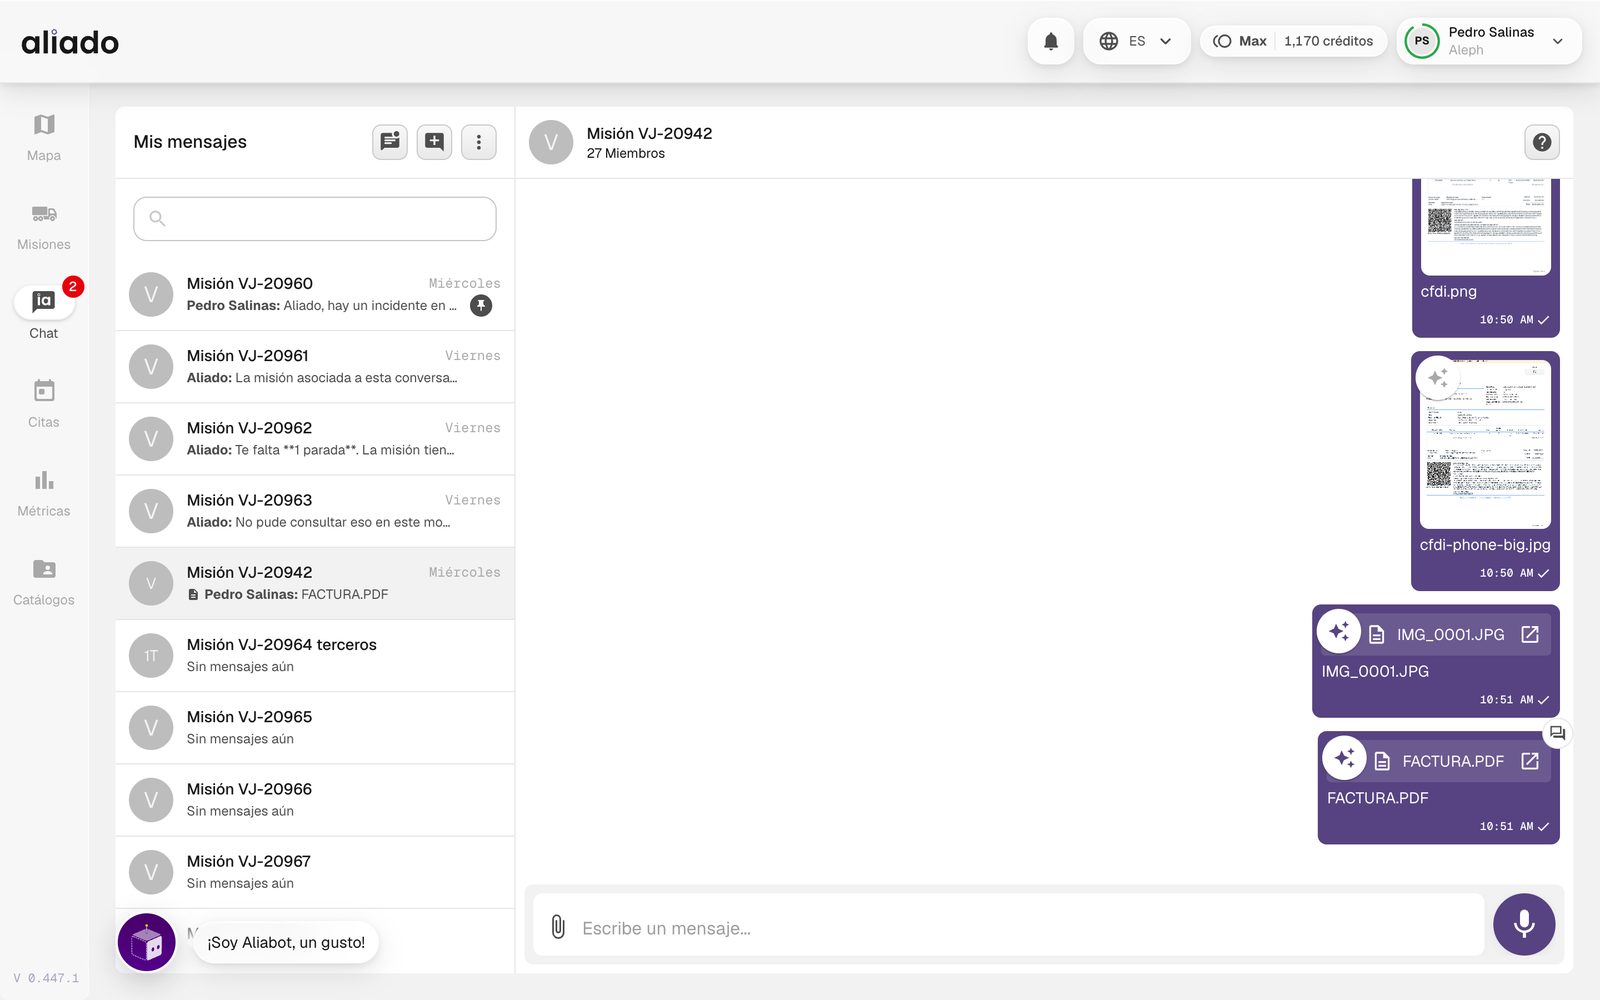
Each of your messages shows whether it was read or is not read yet (one or two check marks). Administrators can open Message info to see who read it and when, with the full list of recipients.
What does the AI do with chat attachments?
When someone sends a photo or a PDF to the chat, Aliado analyzes it as soon as it enters the conversation. The attachment shows a star ✦; tapping it opens Attachment analysis: which document it seems to be (with its confidence percentage), a summary and the fields read with their evidence per page.
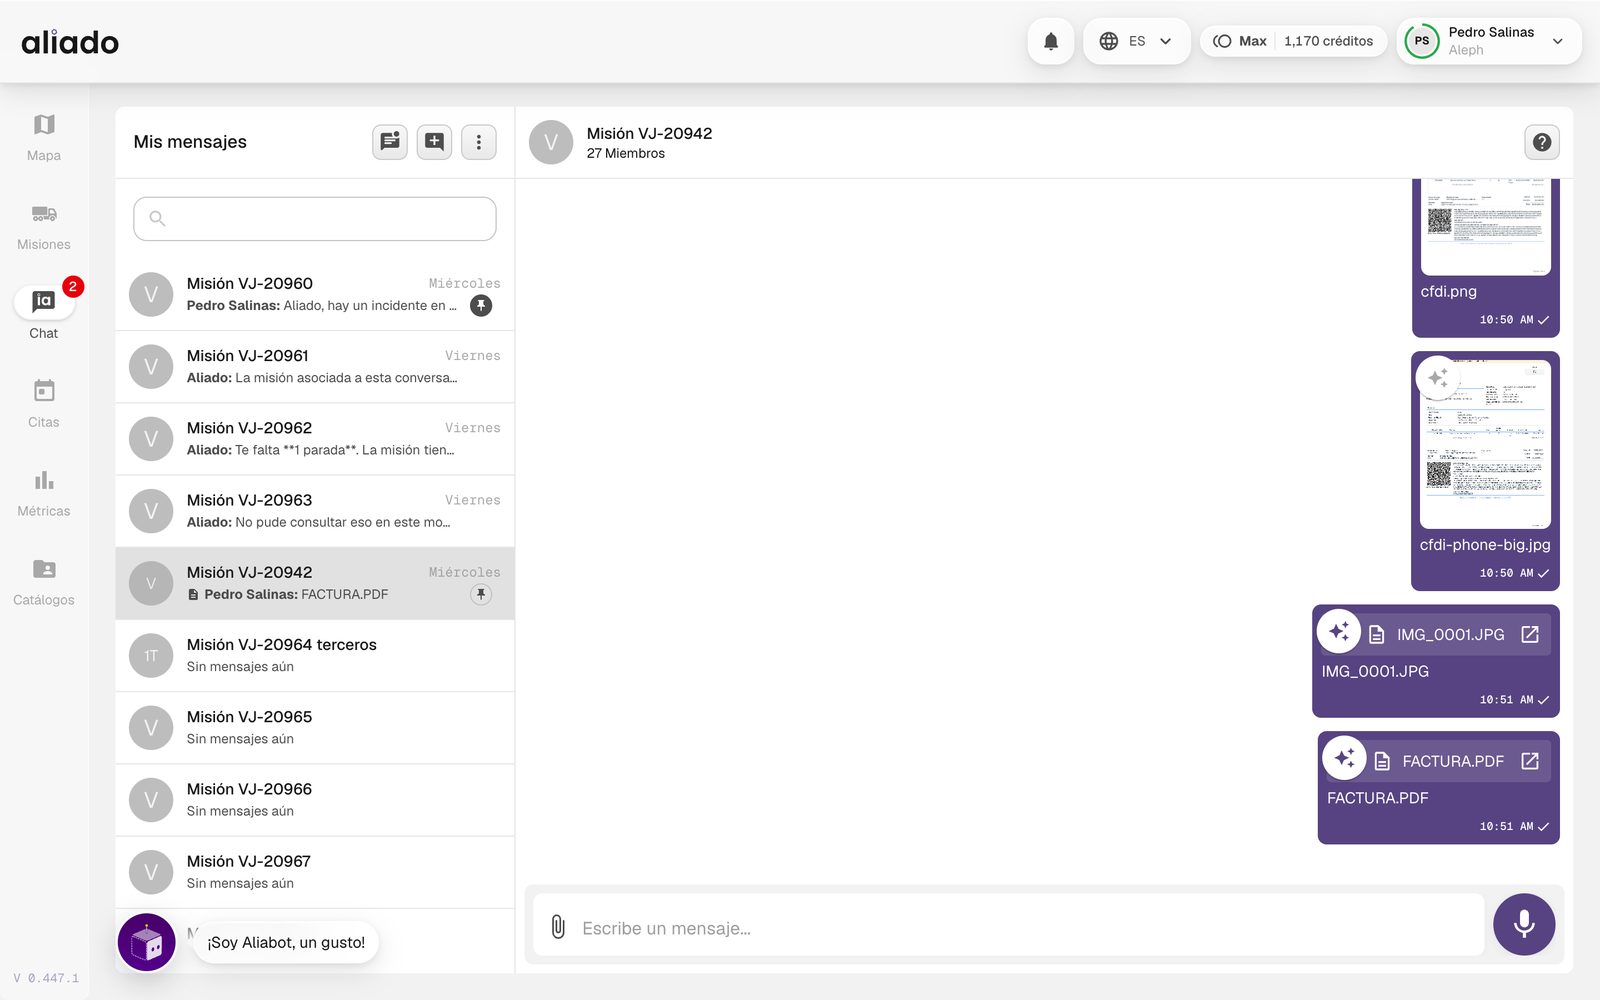
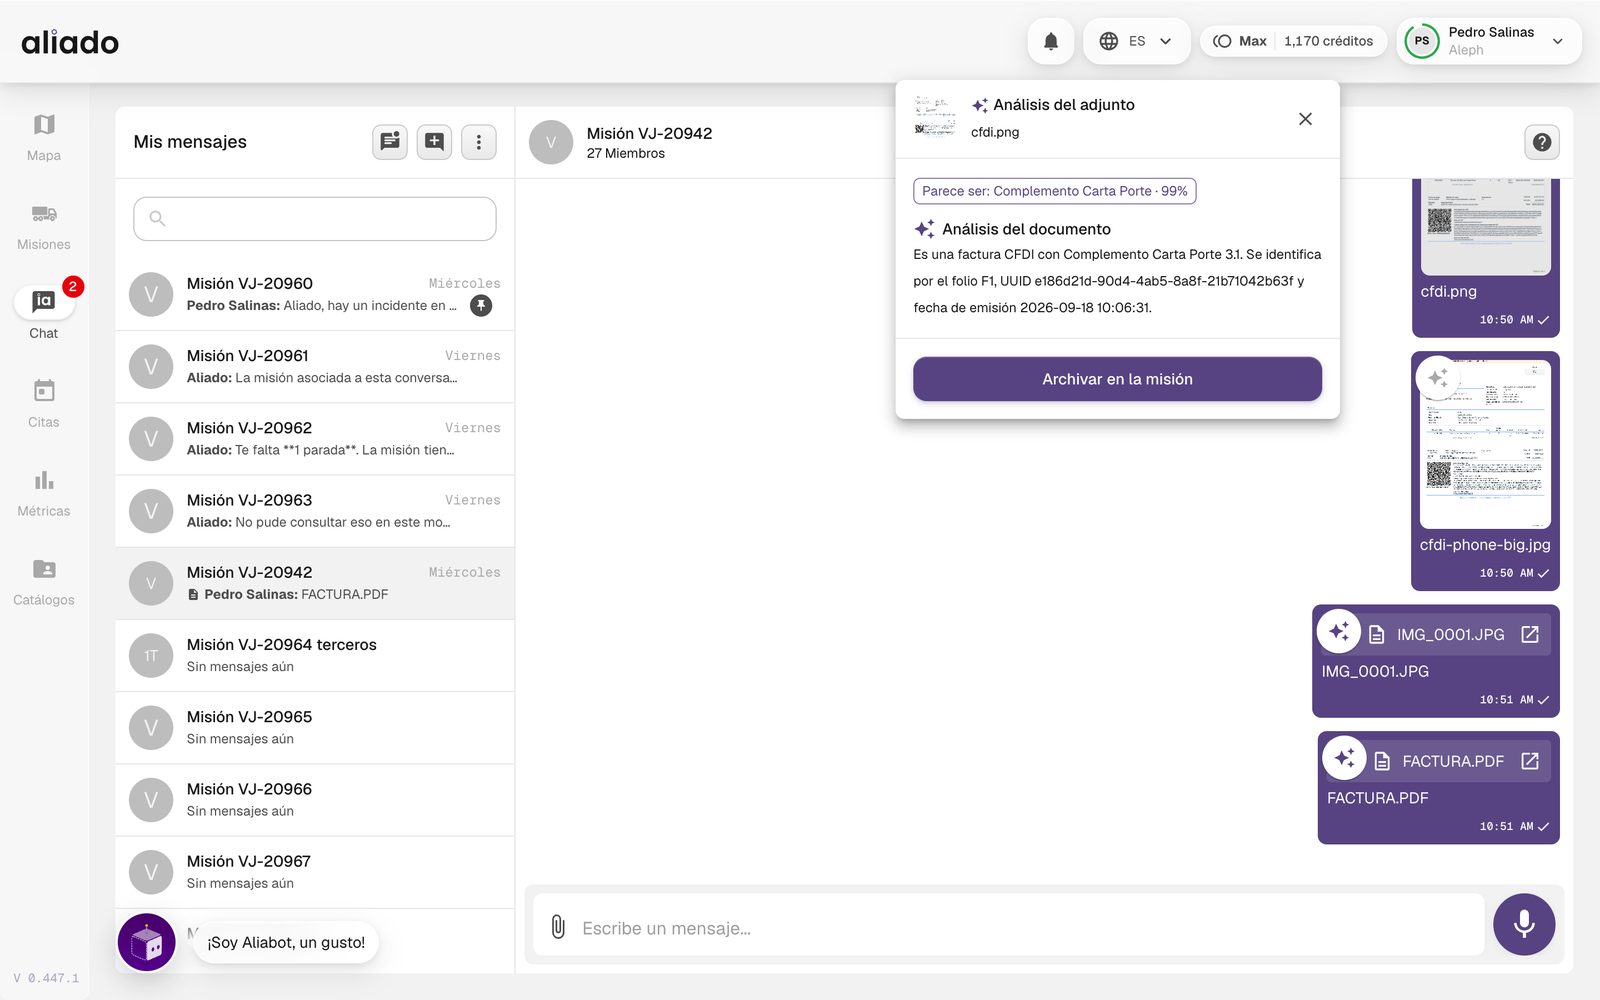
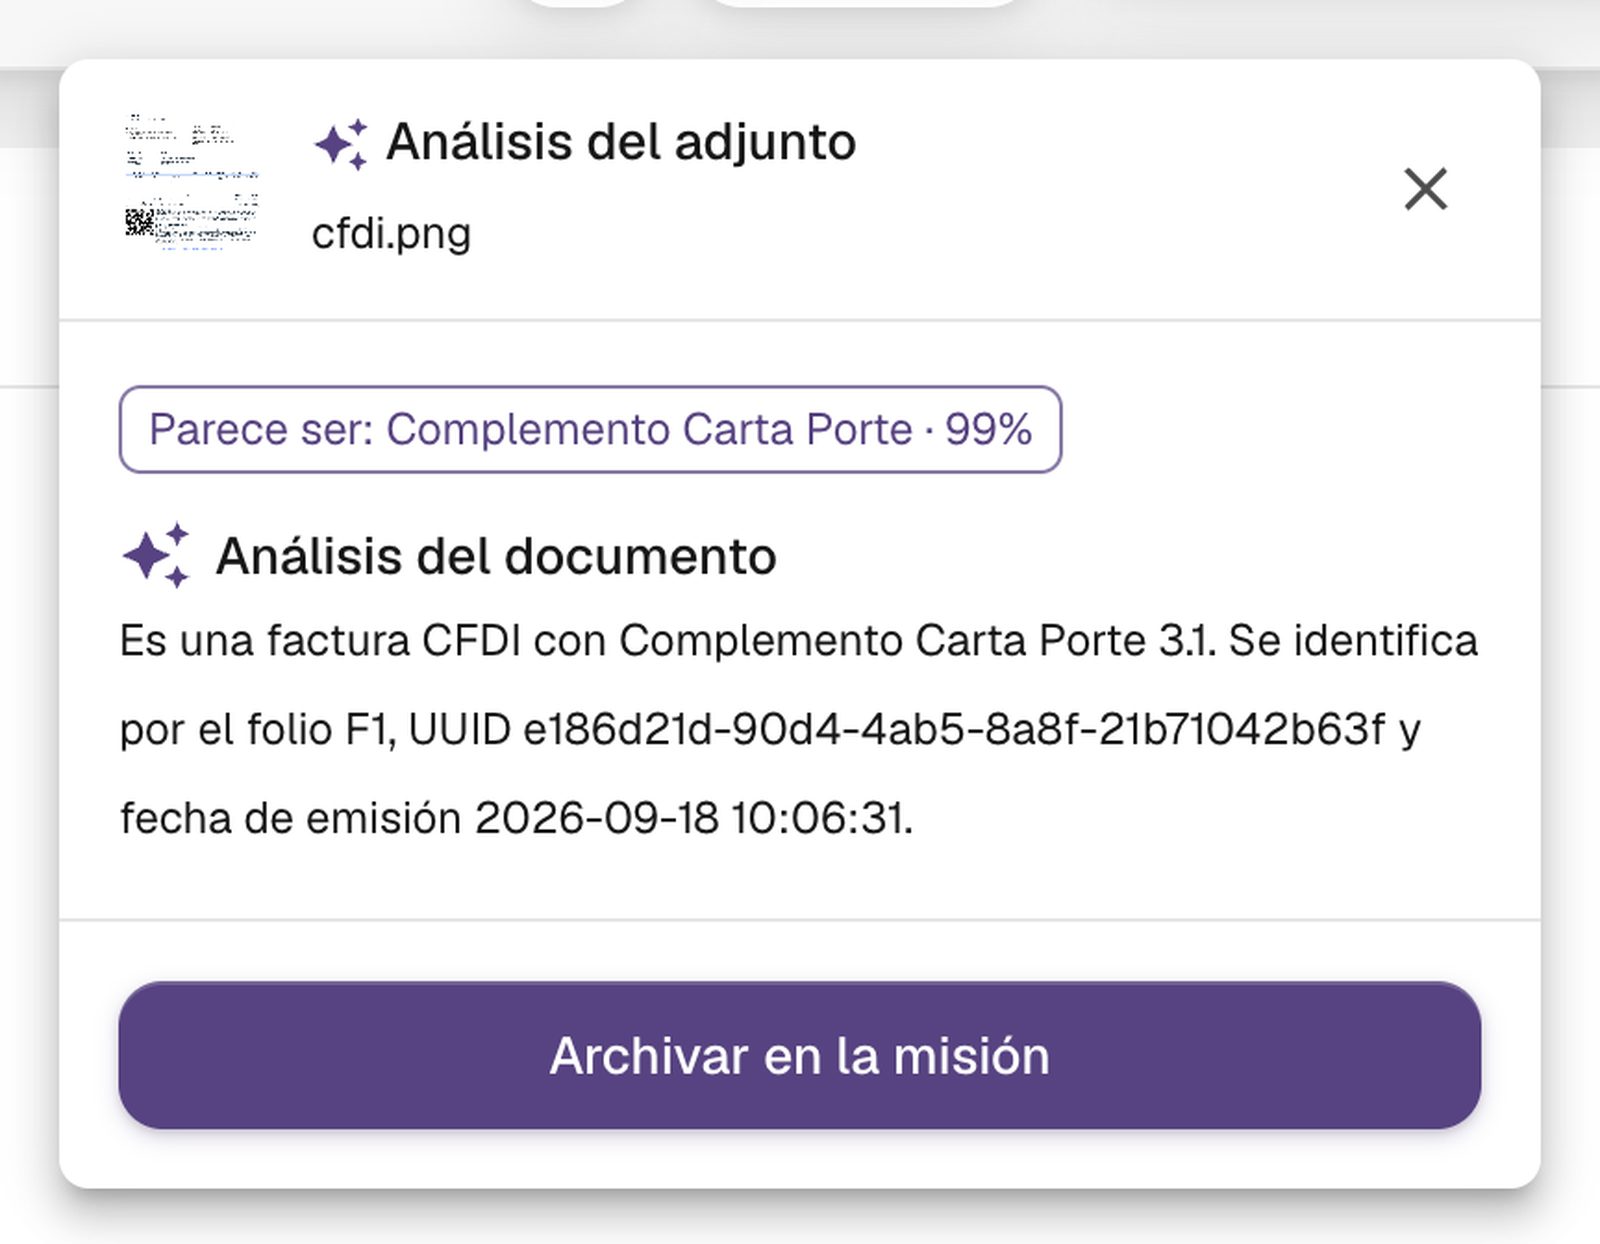
With File in the mission the attachment goes to the trip's documents with its fields already proposed. Nothing is saved without your confirmation.
You may also be interested in: AI document reading | Trip documents
How does the driver use the chat from the app?
In the Aliado app the driver opens the conversation of their active mission and can:
- Write messages or send photos and files (with the photo grid and AI reading).
- Record voice notes with the microphone, as in WhatsApp; they are transcribed by themselves.
- Use hands-free mode: on saying "Breiko Breiko" out loud the app plays a tone and starts recording without touching the phone; after a few seconds of silence, the message is sent. Available on Android.
- Reply in a thread with a long press on a message, photo or file.
- See the read receipts of their messages.
Aliado also alerts them with a tone and a message when there is an active incident near their route or an alert on their mission, so they do not have to look at the screen.
You may also be interested in: Aliado app: chat and voice | Report from the chat
What can the driver report from the chat?
The driver can describe an incident by voice or text in the chat ("there is a blockade on highway 57 near Querétaro"). Aliado classifies it (road, safety, weather or general), asks them to confirm and, if they accept, creates the incident on the Map for the whole control tower. The report also stays in the mission's log.
For a fuller report, with a point on the map and photos, the driver uses the app's + button.
You may also be interested in: Report from the app | Report from the web
Notifications and alerts
Aliado tells you about what matters: a unit that deviates, a confirmed appointment, an incident on your route, a document about to expire. You decide which notices you receive and through which channel.
Where do I see my notifications?
The bell in the header shows how many new notifications you have. When you open it you see the most recent ones with tabs: Favorites, All, Missions, Units, Road incidents, Appointments and Catalogs; Mark as read clears the counter and View more notifications opens the full center.
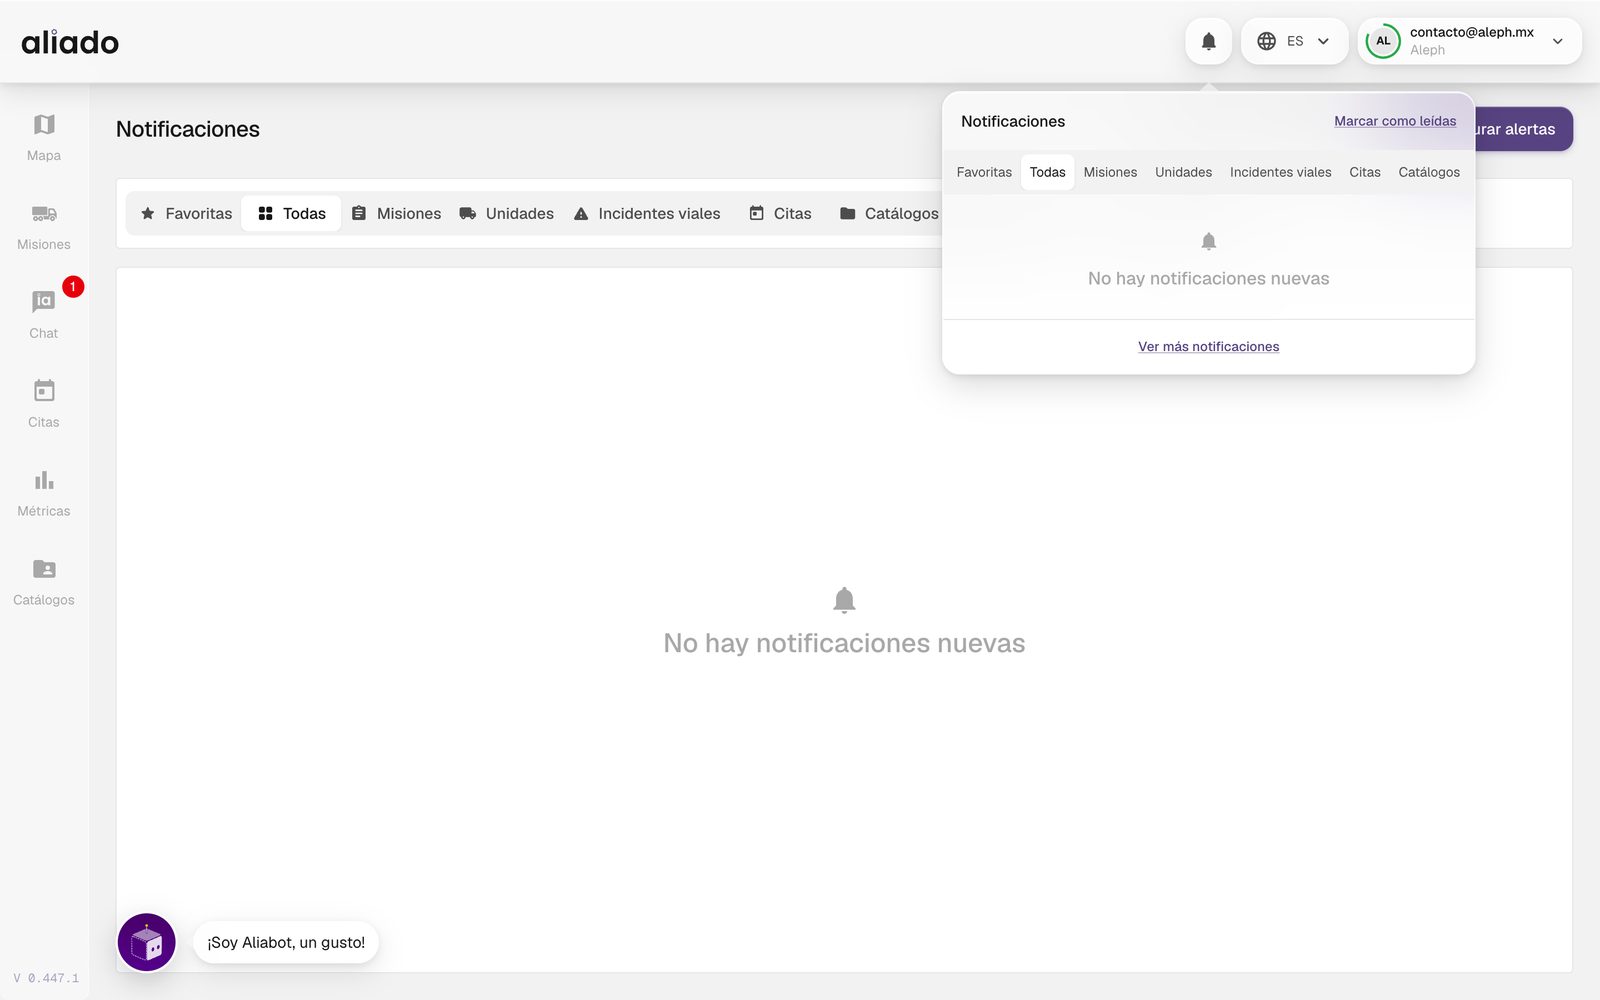
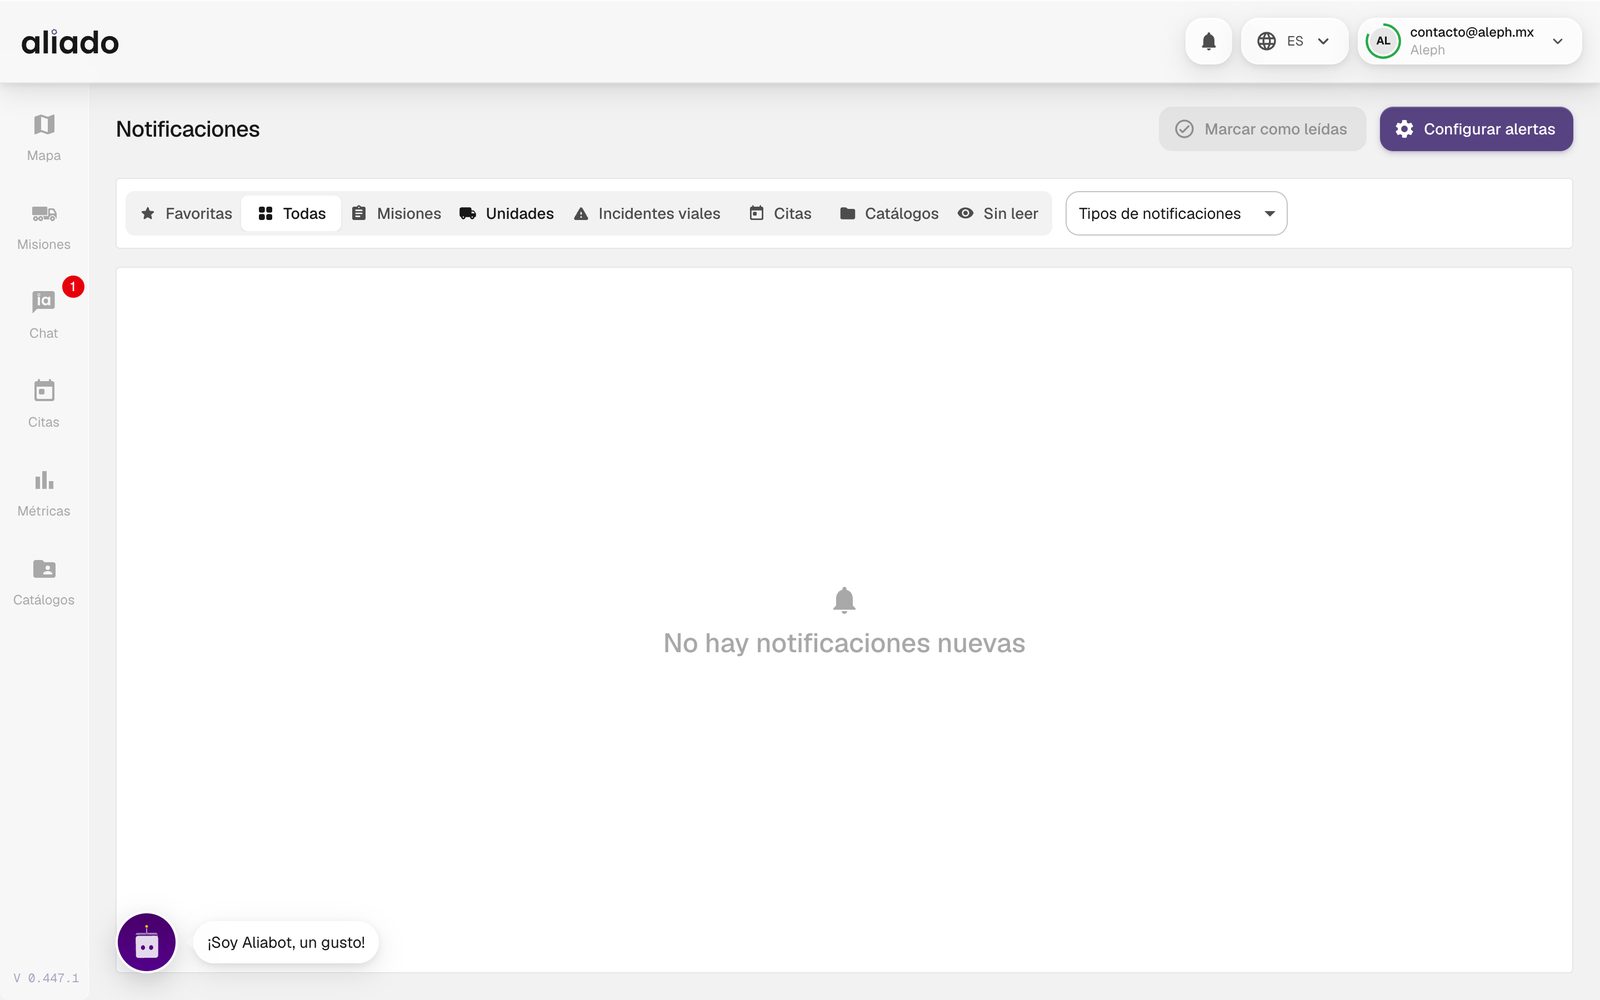
In the notification center each row carries a red dot (unread) or a green one (read). View detail marks the notification as read and takes you to the destination: the mission, the unit, the appointment or the incident. If an incident alert no longer exists, Aliado tells you instead of doing nothing.
Favorites are the notification types you marked with the star in Configure alerts: that way you find them first.
You may also be interested in: Configure alerts | Which notices exist
How do I configure which alerts I receive?
- Open the bell › View more notifications and press Configure alerts.
- On the left choose the module: Missions, Units, Road incidents, Appointments, Tendering, Catalogs or Bulk uploads; below, in the Assistant group, is Aliado AI (Aliado AI via WhatsApp). The search box finds a notice by name.
- Turn each type of notice on or off with its switch and choose the channels with the Web, App, Email, WhatsApp and SMS chips. The star marks it as a favorite.
- Enable all / Disable all apply per section and keep the chosen channels. Changes save by themselves (Saving… › Saved).
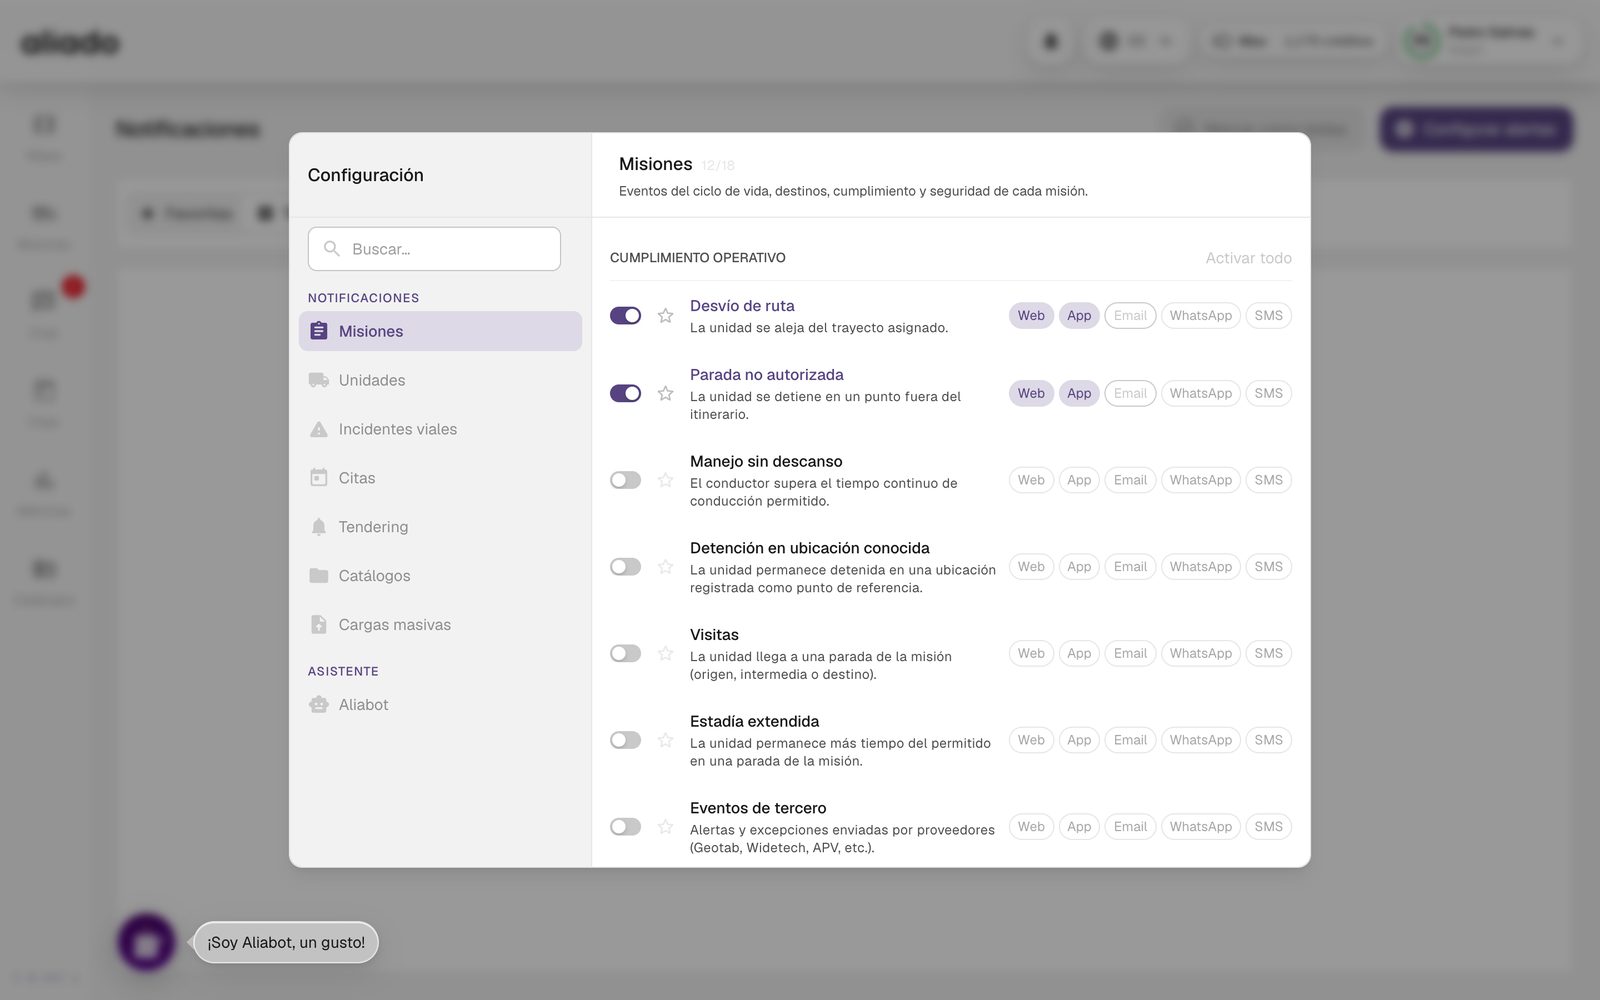
You may also be interested in: Notification channels | Aliado AI via WhatsApp
Which notification channels exist and what do they require?
| Channel | Where it arrives | What it requires |
|---|---|---|
| Web | The platform's bell and notification center | Nothing; it is the default channel. |
| App | Push notification in the Aliado app | Having the app installed and signed in. |
| Your email | A confirmed email in your profile. | |
| WhatsApp message | That your organization has WhatsApp contracted and that you verify your phone. | |
| SMS | Text message | That your organization has SMS contracted and that you verify your phone with the code you receive. |
WhatsApp and SMS are charged per message with your organization's credits; that is why they are an add-on contracted separately. To verify your phone, in Configure alerts click the WhatsApp or SMS chip that is off (Verify your phone to enable WhatsApp. Click to send a code.) or go to Assistant › Aliado AI › Verify phone; you can also do it from your profile.
You may also be interested in: How credits work
Which notices exist?
These are the notices you can turn on, grouped as they appear in Configure alerts:
Missions
- Operational compliance: Route deviation, Unauthorized stop, Driving without rest, Stop at known location, Visits (arrival at a stop), Extended stay and Third-party events (alerts from telemetry providers).
- Safety and risk: Risk zone, Cachimba (an informal roadside stop) and Incident (the mission crosses an active incident).
- Connectivity: No GPS signal.
- Carta porte: Pending information, Information completed, Stamped document and Canceled document.
Units
- Risk zone, Cachimba, Known location, Incident and No GPS signal, for units with or without a mission.
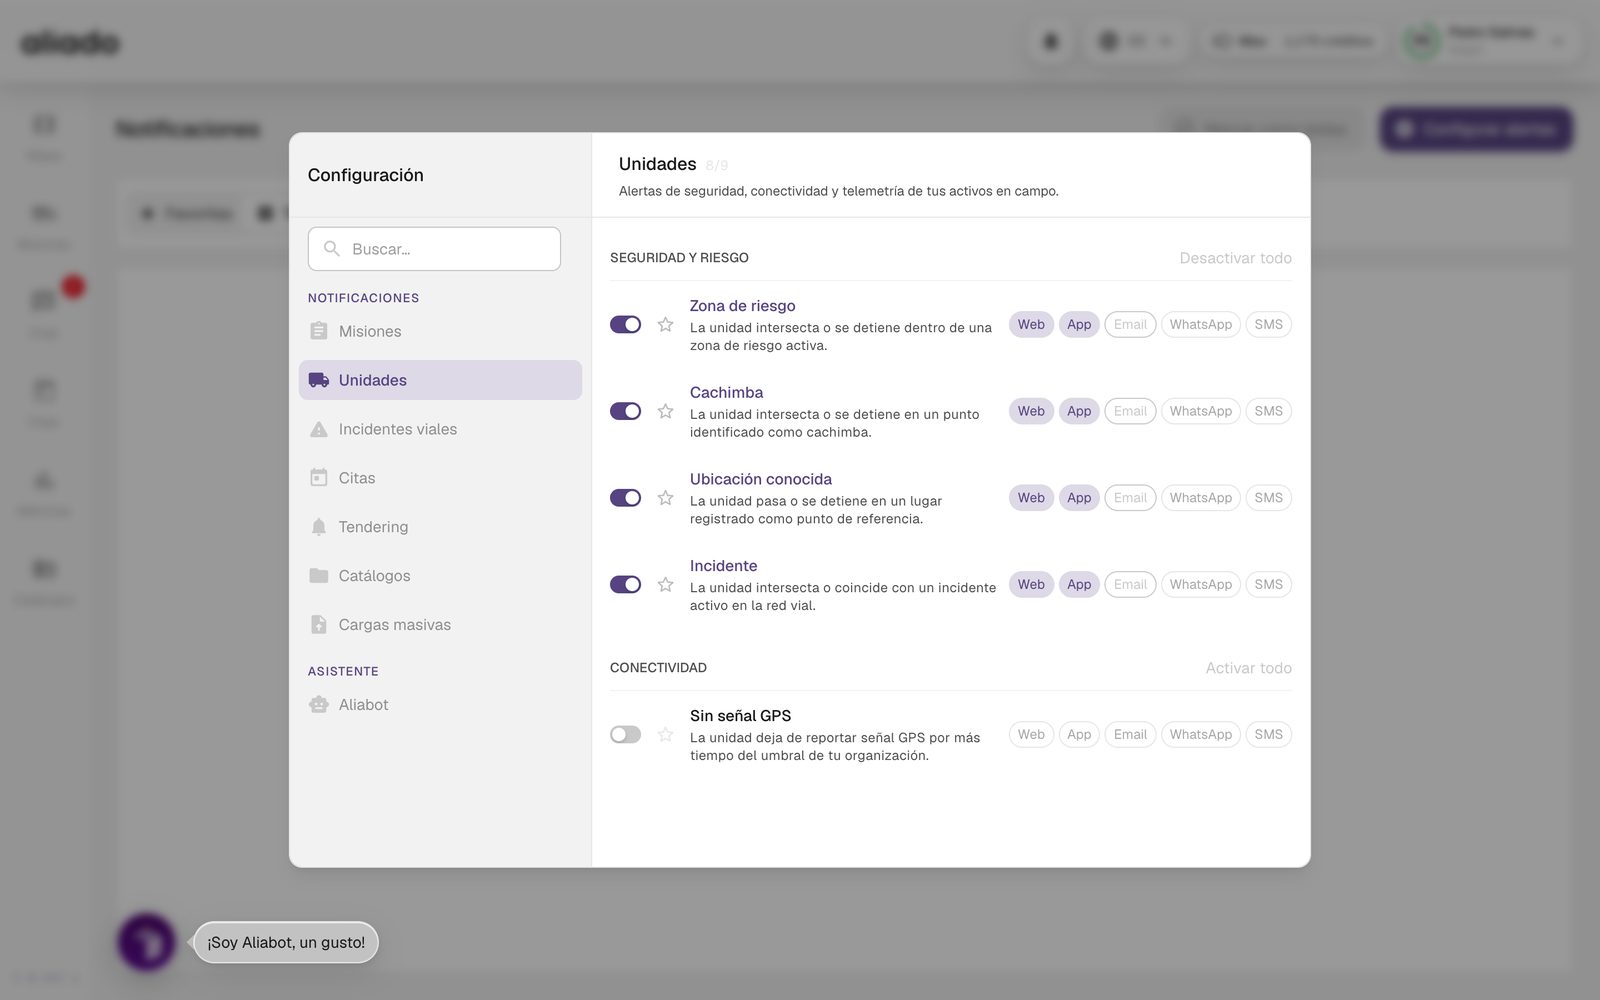
Road incidents
- By route (a saved route matches an active incident) and By location (an incident covers one of your locations).
Appointments
- Appointment status: New appointment, Appointment accepted, Appointment rejected, Appointment confirmed, Appointment QR code generated, Appointment updated, Appointment cancelled and Appointment completed.
- Documents: Documents assigned by guest and Updated or modified documents.
- Presence: Appointment arrival and Appointment departure.
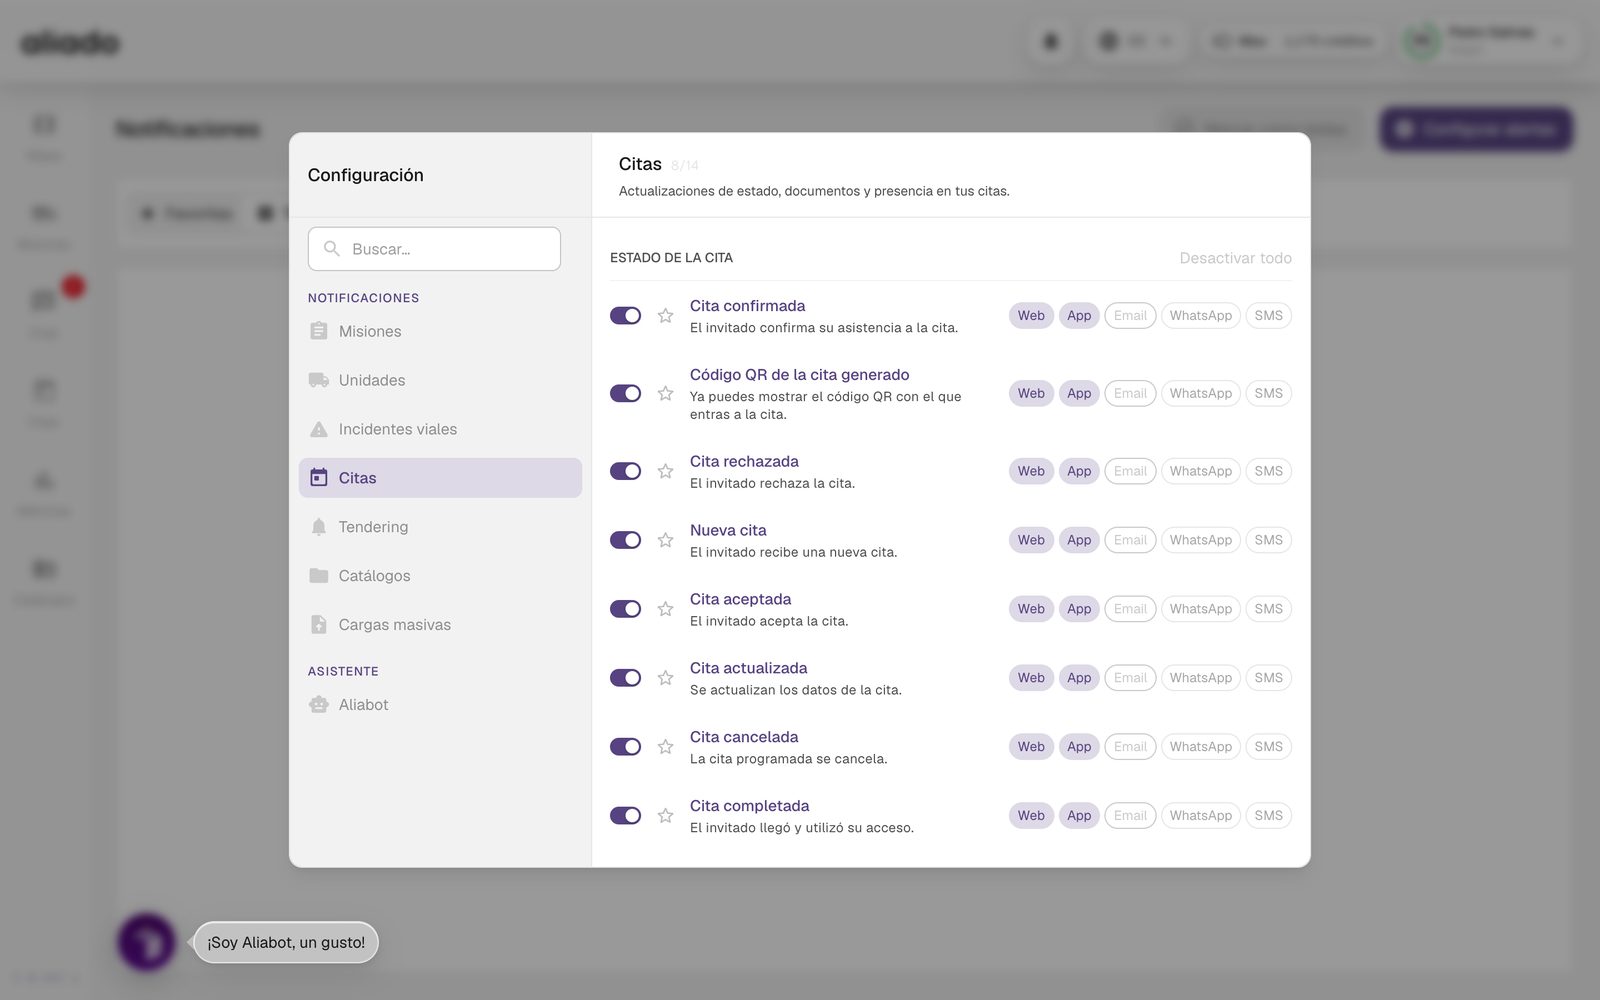
Tendering
- Requests for quotes: You are invited to quote a route, Quotes received, Quote awarded, An ally declined to quote, Request for quotes cancelled and Your quote was not chosen.
- Appointment tendering: You were offered an appointment, The appointment moved to the next ally, Your turn expired, An ally accepted your appointment, No ally accepted and Tendering cancelled.
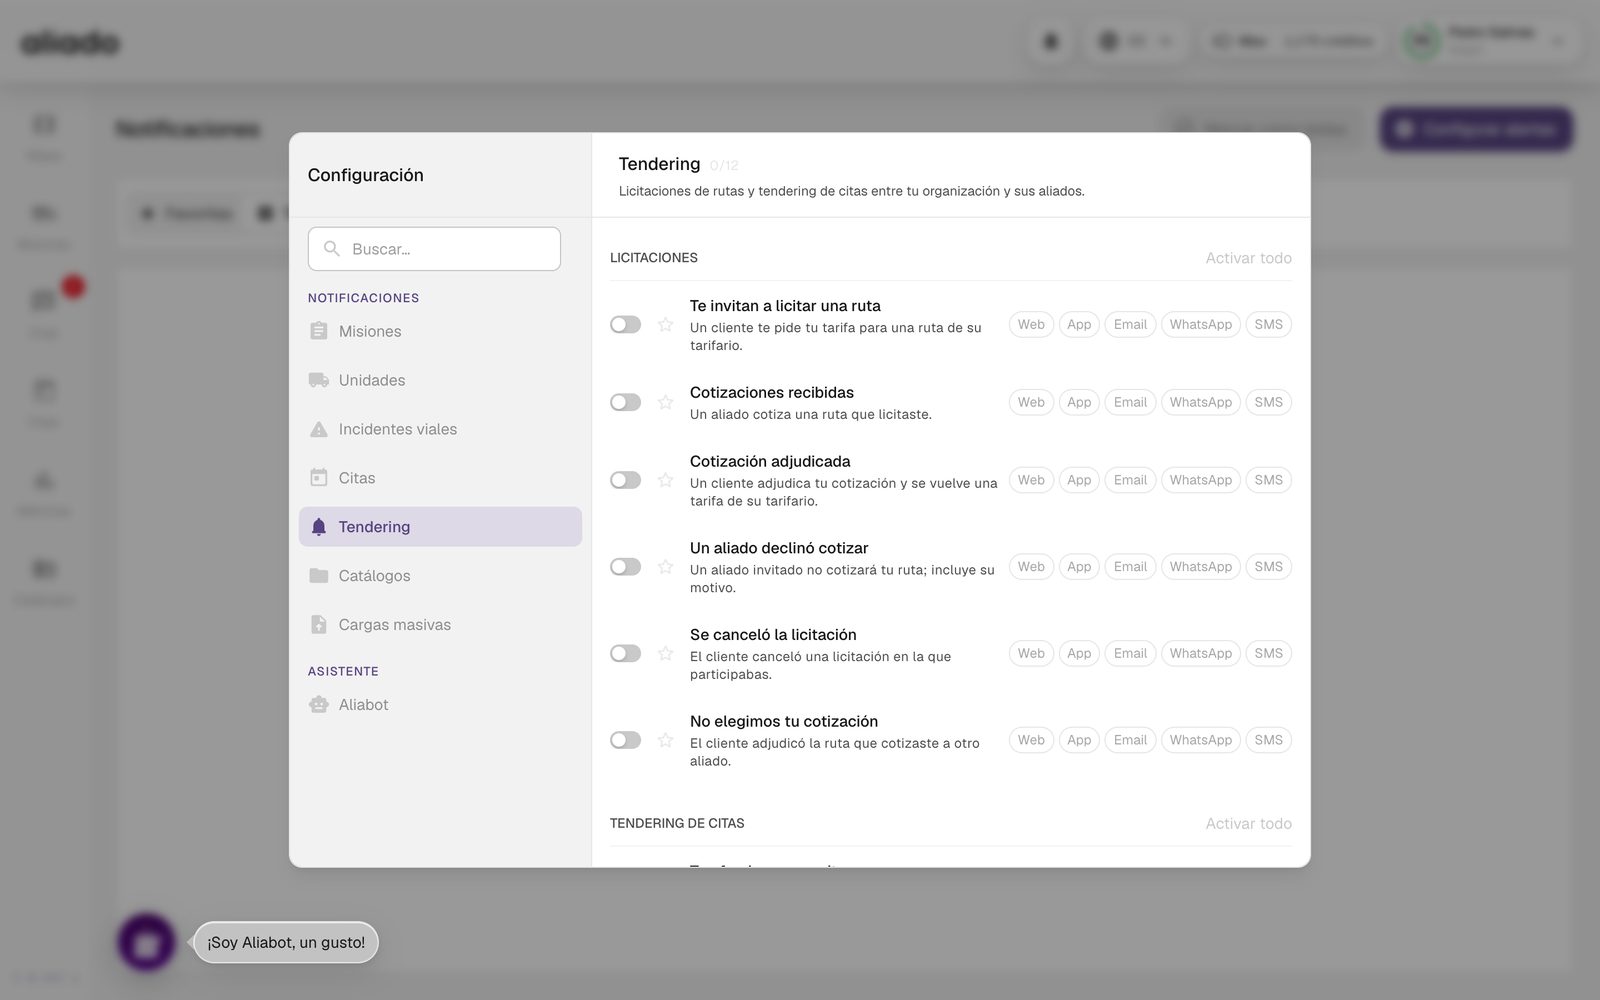
Catalogs
- Creation and modification of people, vehicles, locations, templates, rate card and tags.
- Document expiring soon (10 days before) and Document expired.
- Invitations to an organization (sent, accepted, rejected) and Alliances: request, accepted, rejected, removed, Tag shared, Tag no longer shared and Tag permission updated.
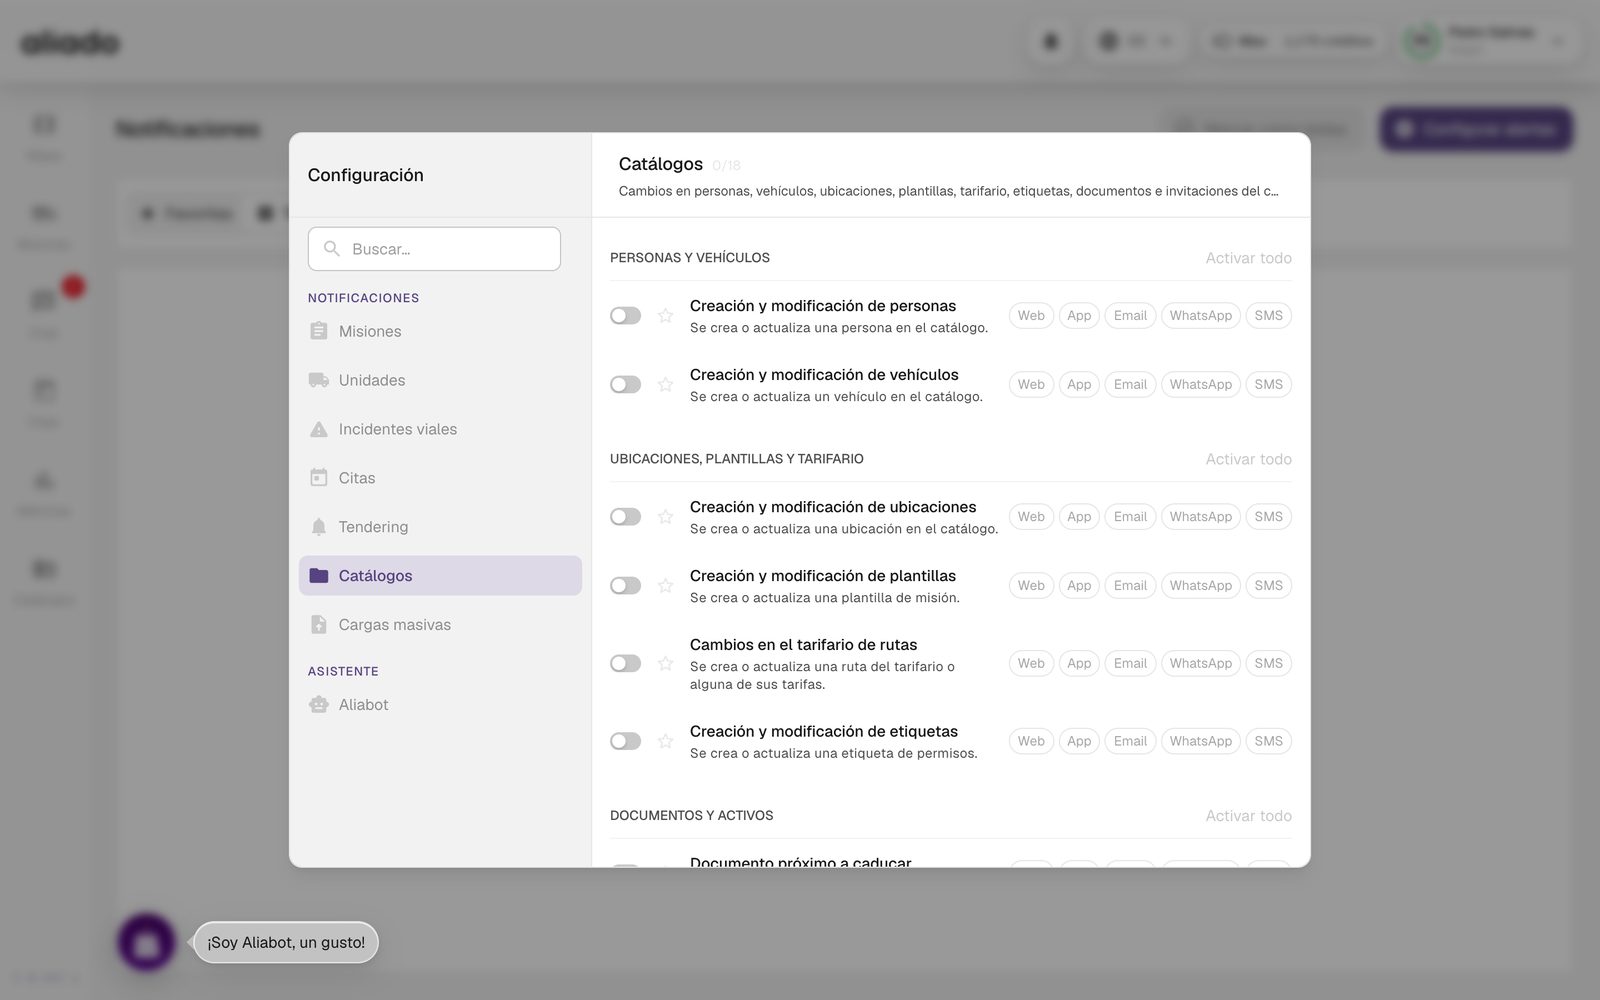
Bulk uploads
- Interpretations (the upload can now be reviewed) and Processed (it finished creating records, successfully or with errors).
What is the "No GPS signal" alert?
It fires when a unit stops reporting position for longer than the threshold set for your organization. It arrives as a Units notice (and a Missions one if the unit is on a trip) and the event stays in the log.
- From the notification or from the unit's detail you can Ignore no-GPS-signal alert for that unit (for example, a trailer stored in the yard) and turn it back on later. The silence is per organization: your allies do not see it.
- The readings state of each unit is seen in the Assets catalog (Last reading) and in the Map's Assets view.
You may also be interested in: See my units
What is the difference between road incidents and alerts from my units?
- Road incidents are external events on the road (blockades, accidents, weather, safety) reported by Aliado, external sources or users. Your fleet does not cause them. You see them on the Map and are notified when they affect a saved route or one of your locations.
- Missions and Units alerts are notices about the behavior of your own operation, generated by the GPS: deviation, unauthorized stop, risk zone, driving without rest, no signal.
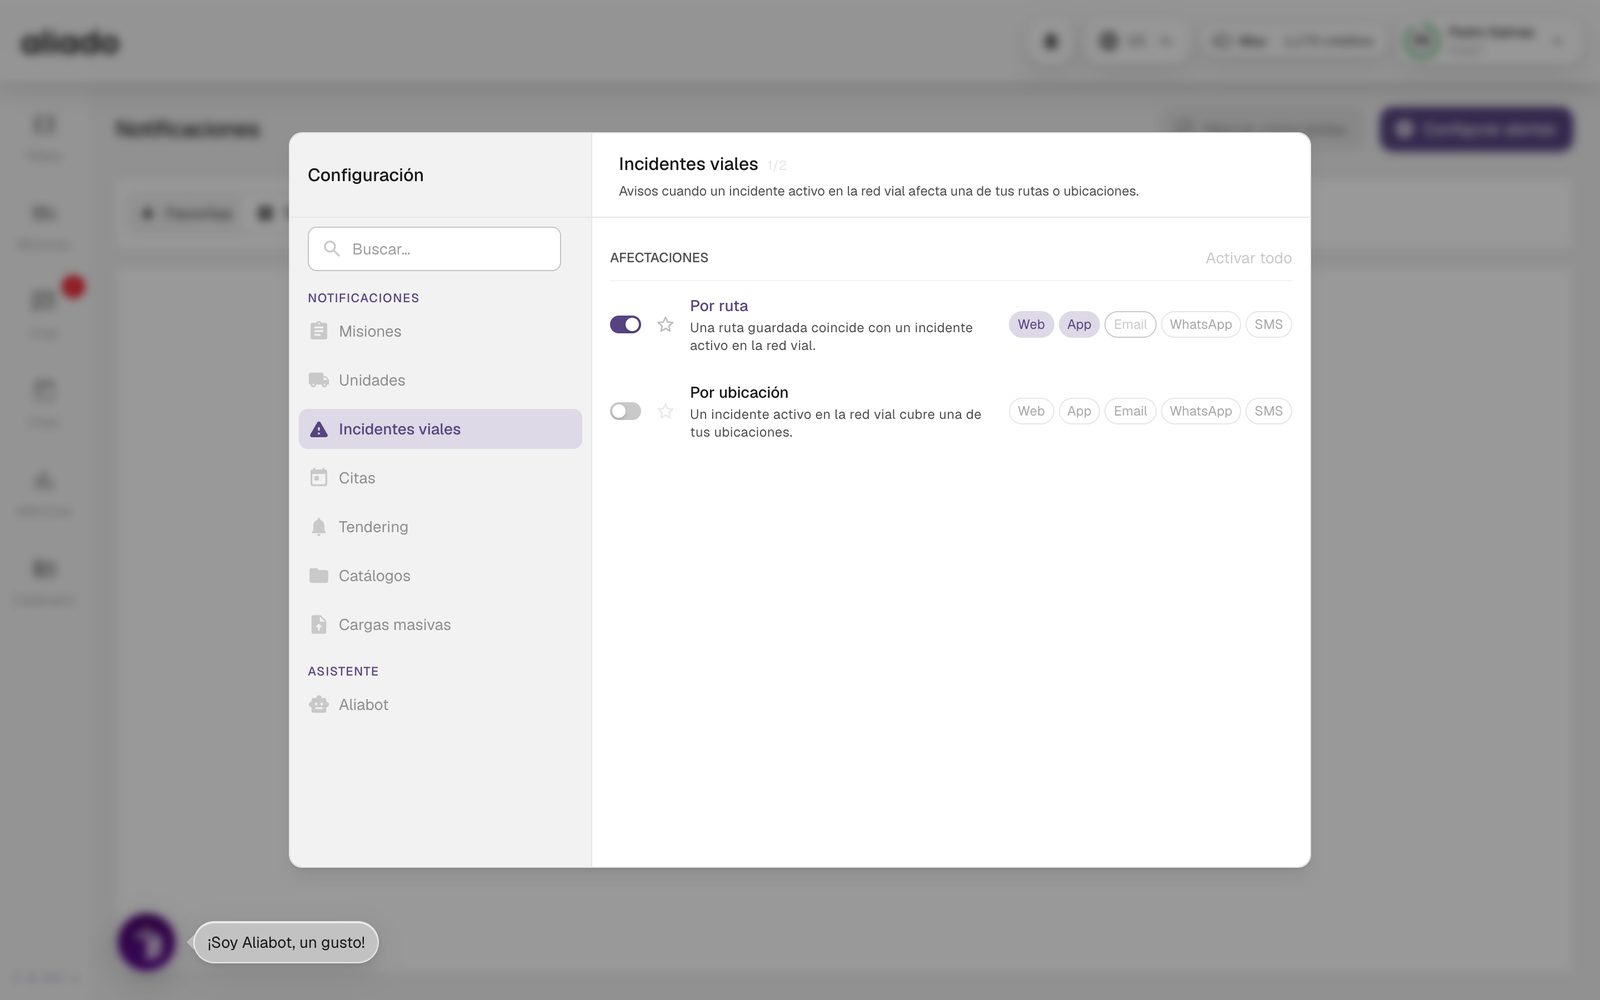
Example: a blockade on the highway is a road incident; your unit stopping at an unplanned point is a mission alert.
You may also be interested in: Real-time incidents | Which notices exist
What is "Aliado AI via WhatsApp"?
It is the option of writing to Aliado AI by WhatsApp to ask about your operation, besides using it in the platform. It requires your organization to have WhatsApp enabled.
- Open the bell › View more notifications › Configure alerts.
- On the left, in the Assistant group, choose Aliado AI.
- Press Verify phone and write the code you receive. Then turn on Aliado AI via WhatsApp; you will see that it is active, with your number.
You may also be interested in: The Aliado AI assistant | Notification channels
How do I mute the notification sound?
The web platform makes two kinds of sound:
- The bell: it sounds once each time a new notification arrives. It has no volume control and no switch to mute it.
- The chat: it sounds when a new message or conversation arrives. This one can be adjusted.
Muting the chat
- Go to Chat and press the three-dot icon (Settings) above the list of conversations.
- In Conversation settings lower New messages volume, New conversations volume or both to zero.
The setting is saved in that browser and also applies to the chat you open from a mission. If you sign in from another computer or browser, adjust it again.
If what bothers you is the bell
- In Configure alerts turn off the notice types you do not need: a notice that does not arrive does not sound either.
- Mute Aliado's tab in your browser (in Chrome: right click on the tab › Mute site) or lower your computer's volume.
On the phone, the sound of the Aliado app's notifications is controlled from the phone's own notification settings.
You may also be interested in: Configure alerts | The Chat
Catalogs
Catalogs is where you manage the resources of your operation. All the tables share the same mechanics: search box, column filters, multiple selection, CSV download and creation one by one or by bulk upload.
What is in Catalogs?
- Users: the people of your organization, with role, status, documents, permissions and tags.
- Assets: trucks, trailers, dollies and devices, with plates, type, last reading and documents.
- Locations: origins, destinations and reference points, with address, coordinates and geofence.
- Templates: preconfigured missions, with optional recurrence.
- Route rate card: sourcing routes with equipment and rates per ally; Requests received.
- Labels: the permission tags with which you organize and share resources (the tab is called Labels; the fields call them tags).
- My organization: general information, documents, requests and Allies.
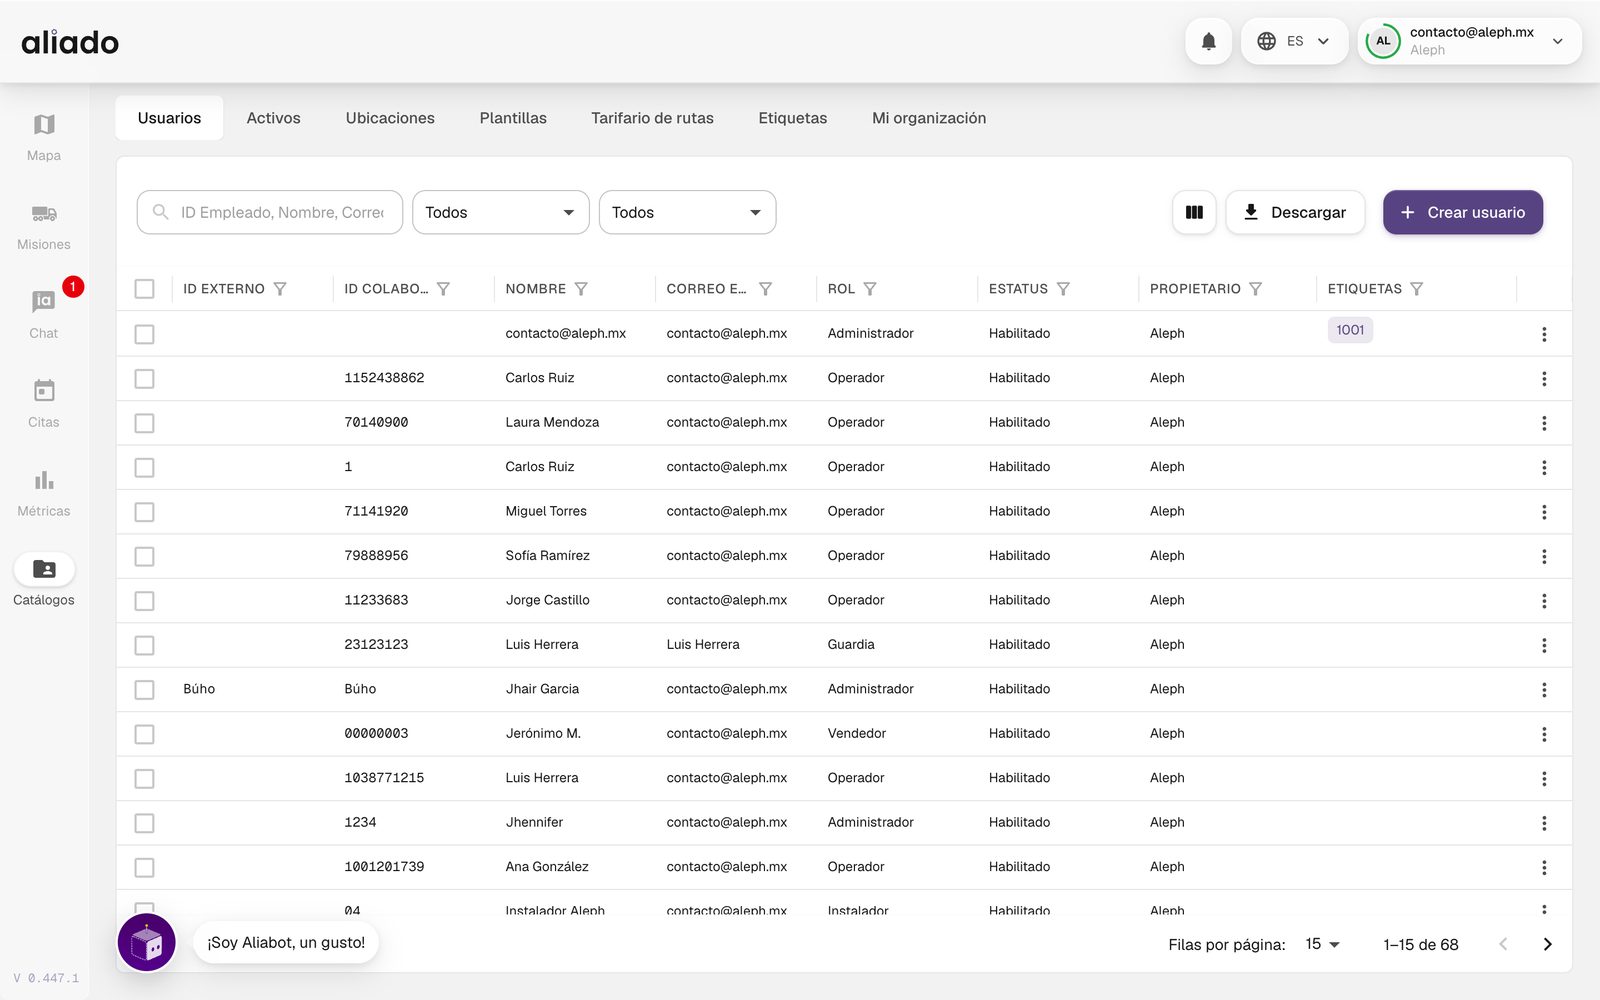
The Owner column appears in all the tables: it tells whether the record is yours or an ally shares it with you through a tag. Only the owner can delete it.
You may also be interested in: Filters, columns and download | Tags
How do I manage users?
- In Catalogs › Users press Create user and choose Create from scratch, Bulk upload or Invite existing user (someone who already has an Aliado account and whom you want to add to your organization).
- Enter Name, Employee ID, Role (Administrator, Driver, Guard or Installer), External ID, Email, Phone and the initial Password (at least 6 characters). Press Create user.
- Open the user to complete their profile: Personal information (including the driver data for Carta Porte), Documents, Permissions, Tags and Requests. The QR icon generates the driver's personal code.
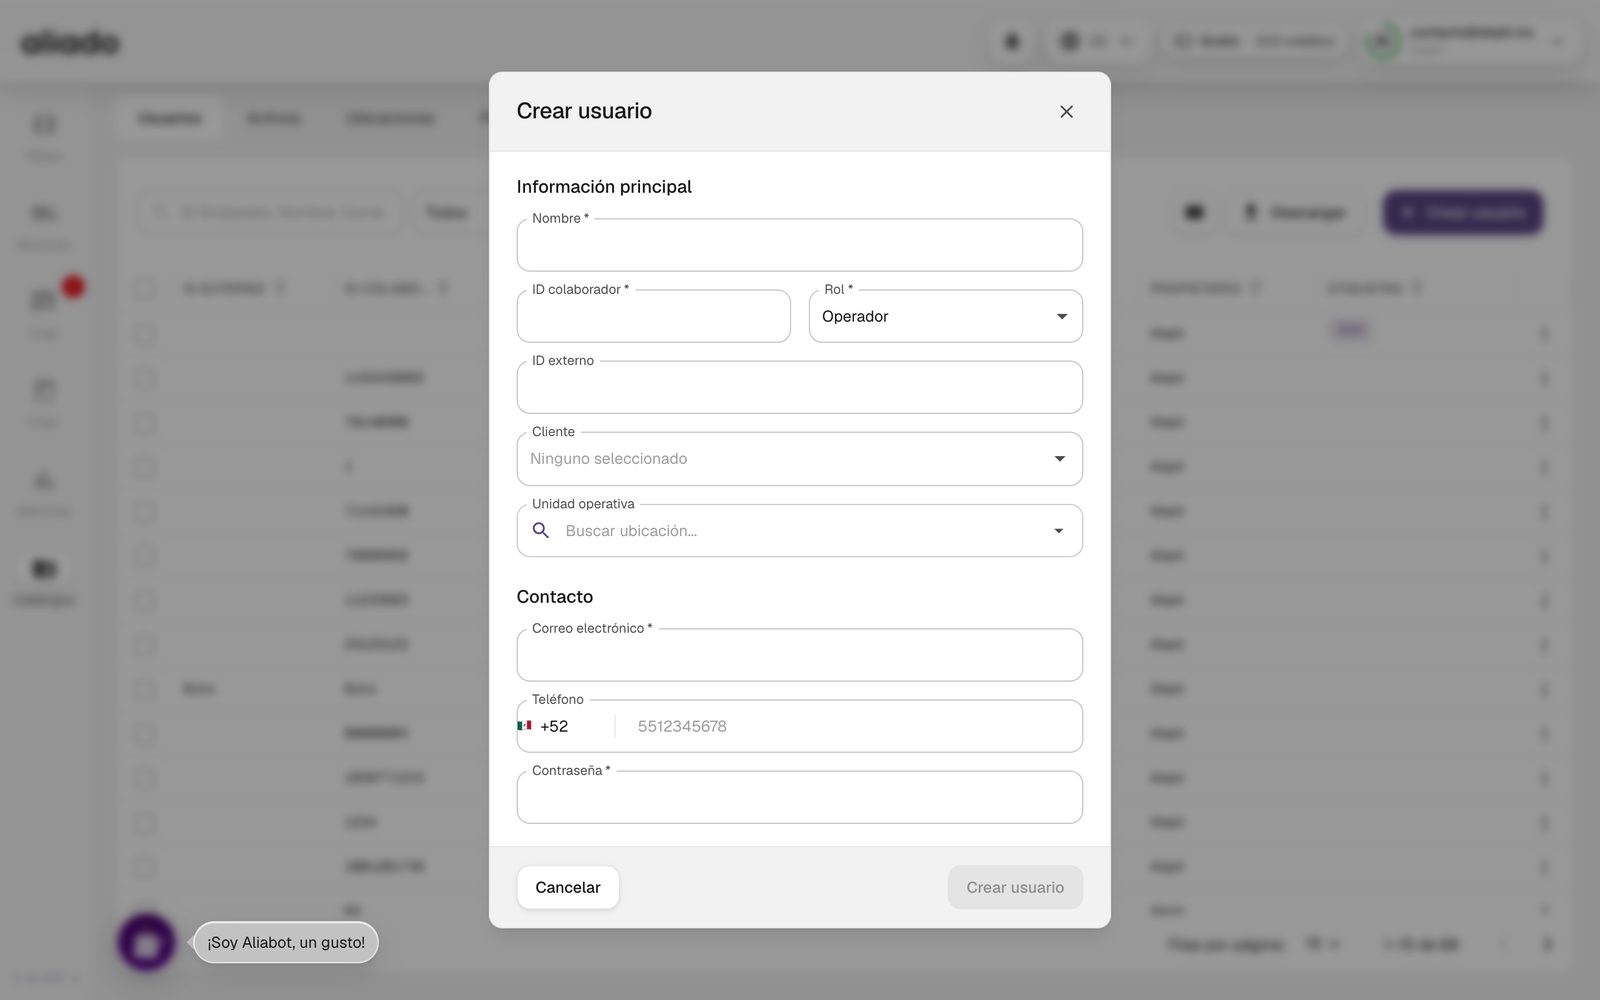
From the detail you can disable the user (they can no longer sign in, without losing their history). The External ID and Employee ID columns are for matching with your systems.
You may also be interested in: Roles | A user's permissions | Bulk upload
How do I manage assets?
An asset is any unit or device that moves with your operation. When creating it you choose the Asset type among dozens of real types (truck, tractor unit, dry van, refrigerated, flatbed, tank, dolly, forklift, mobile phone…). The type defines the dimensions that truck routing uses and whether it carries a seal.
- In Catalogs › Assets press Create asset › Create from scratch (or Bulk upload).
- Enter the ID or Economic number (unique in your organization), External ID, Asset type, License plates and Tags. Press Create asset.
- Open the asset to add physical characteristics, documents (vehicle registration card, insurance policy) and see its telemetry and log.
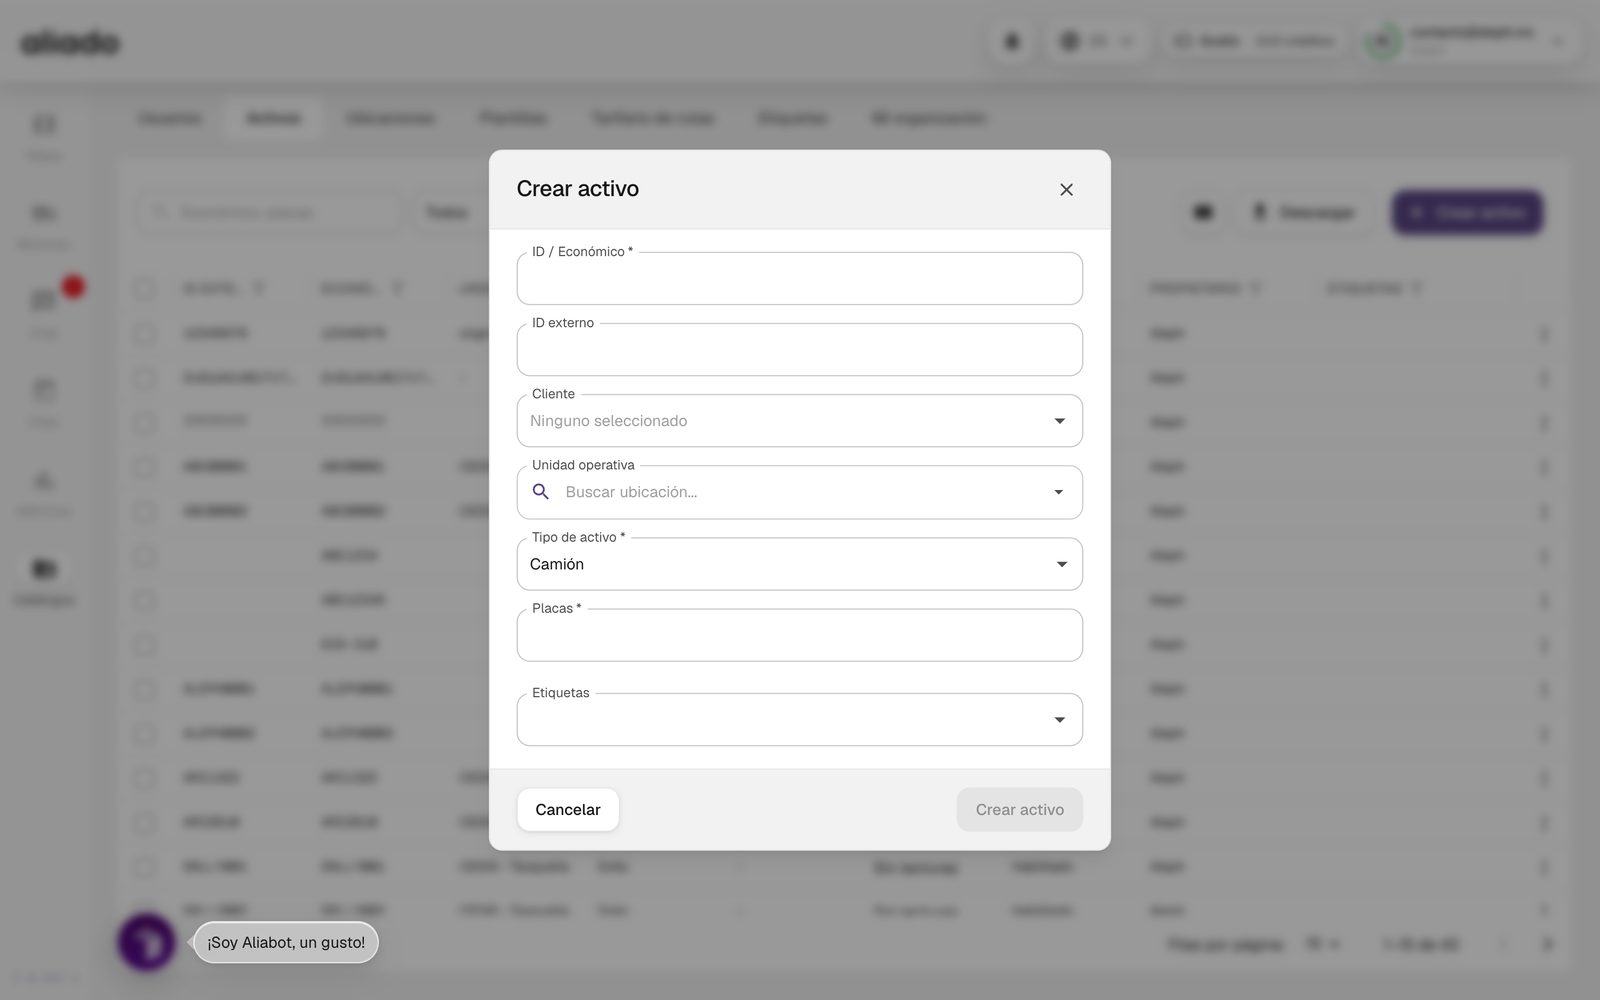
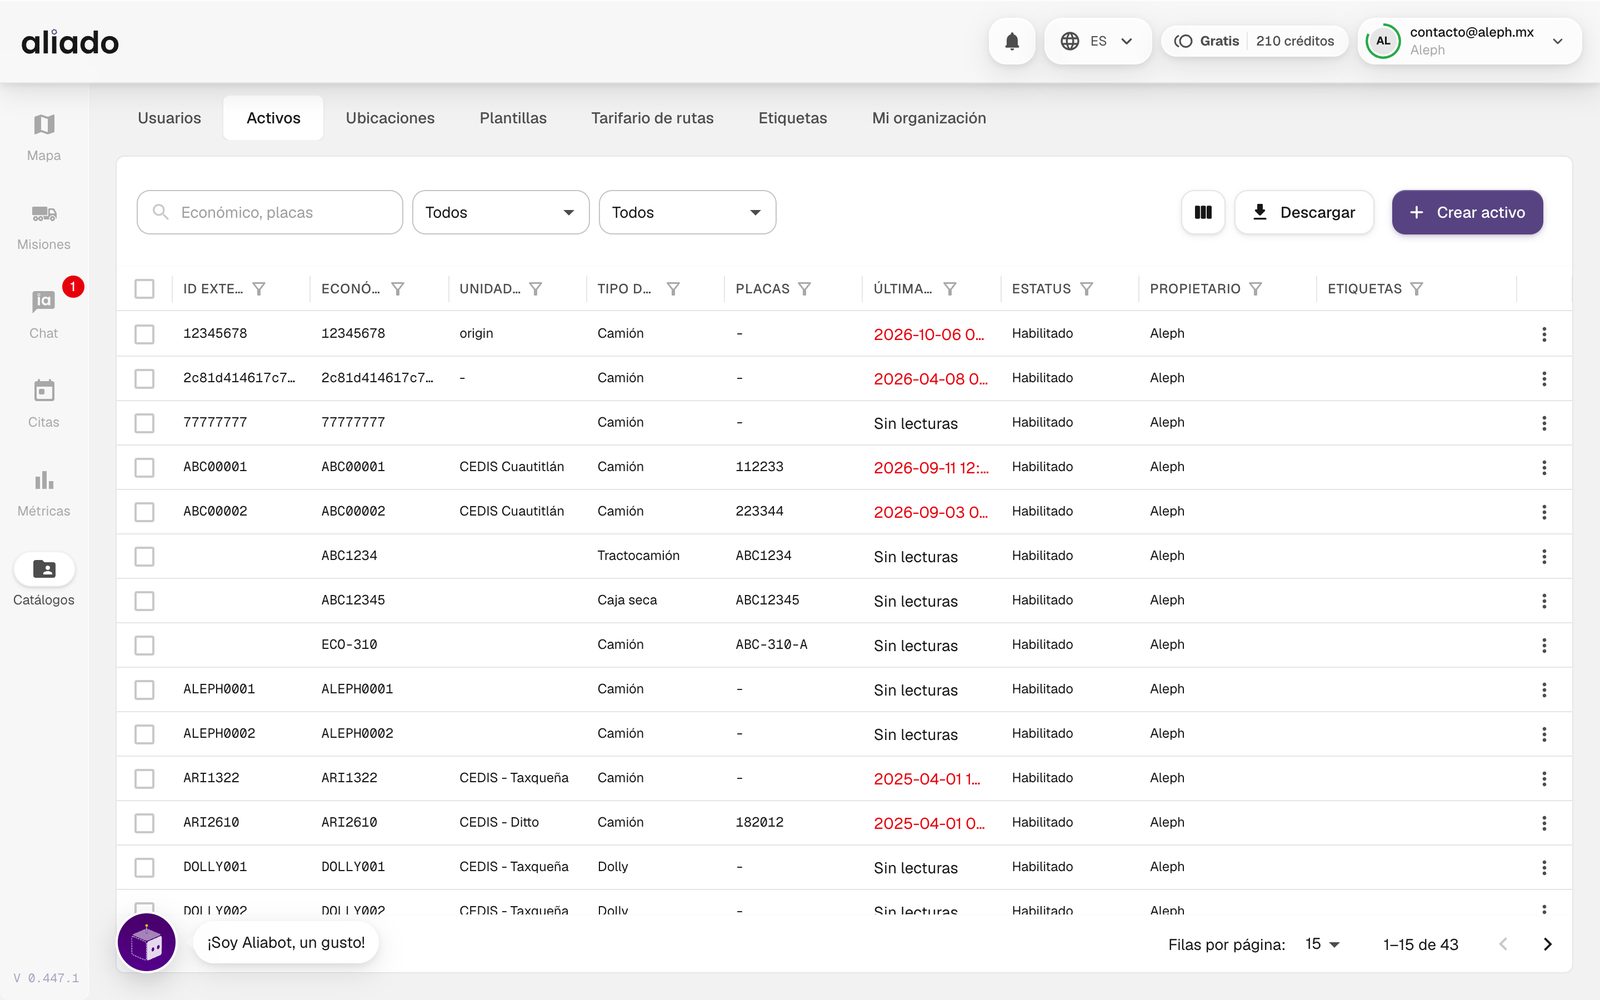
You may also be interested in: See my units | No GPS signal alert | Connect a unit's GPS | An asset's QR code
How do I create locations and geofences?
- In Catalogs › Locations press Create location › Create from scratch.
- Search for the address on the map on the left or enter Street and number, Postal code, State, Municipality, Neighborhood, Country and Reference; the Coordinates fill in when the point is located. You can also paste coordinates directly.
- Draw the geofence with the map tools: circle, rectangle or polygon (close the polygon with a double click and then adjust the vertices). The geofence is what triggers arrivals, departures and stays.
- Assign Tags if you are going to share it and press Create location.
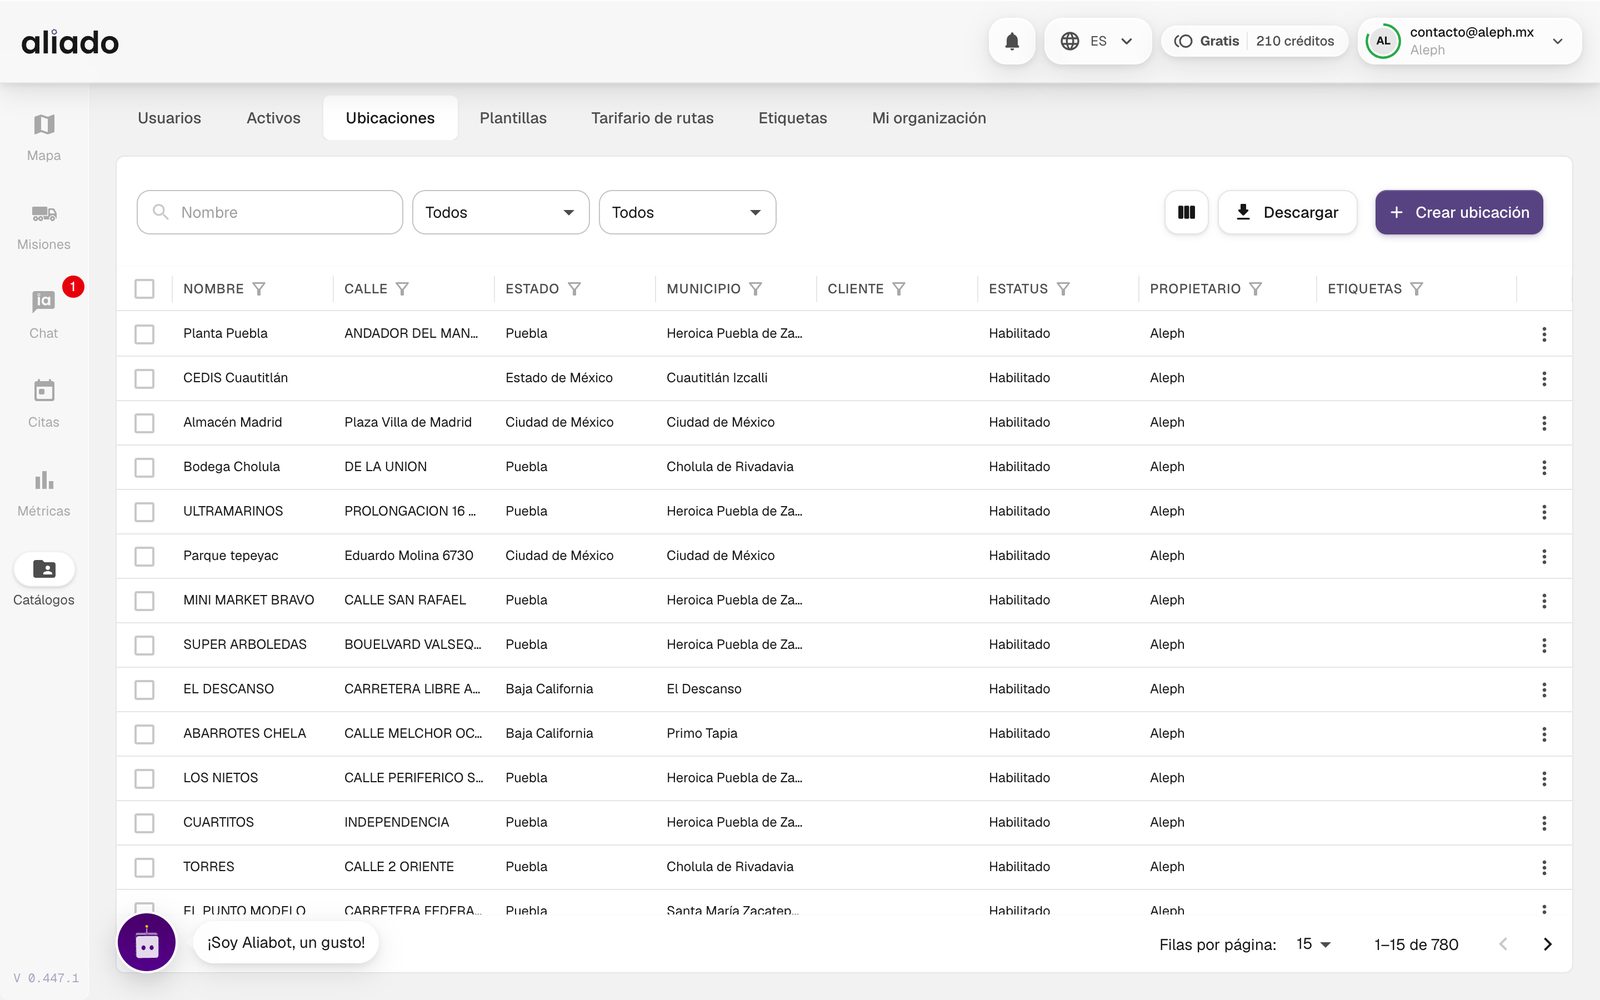
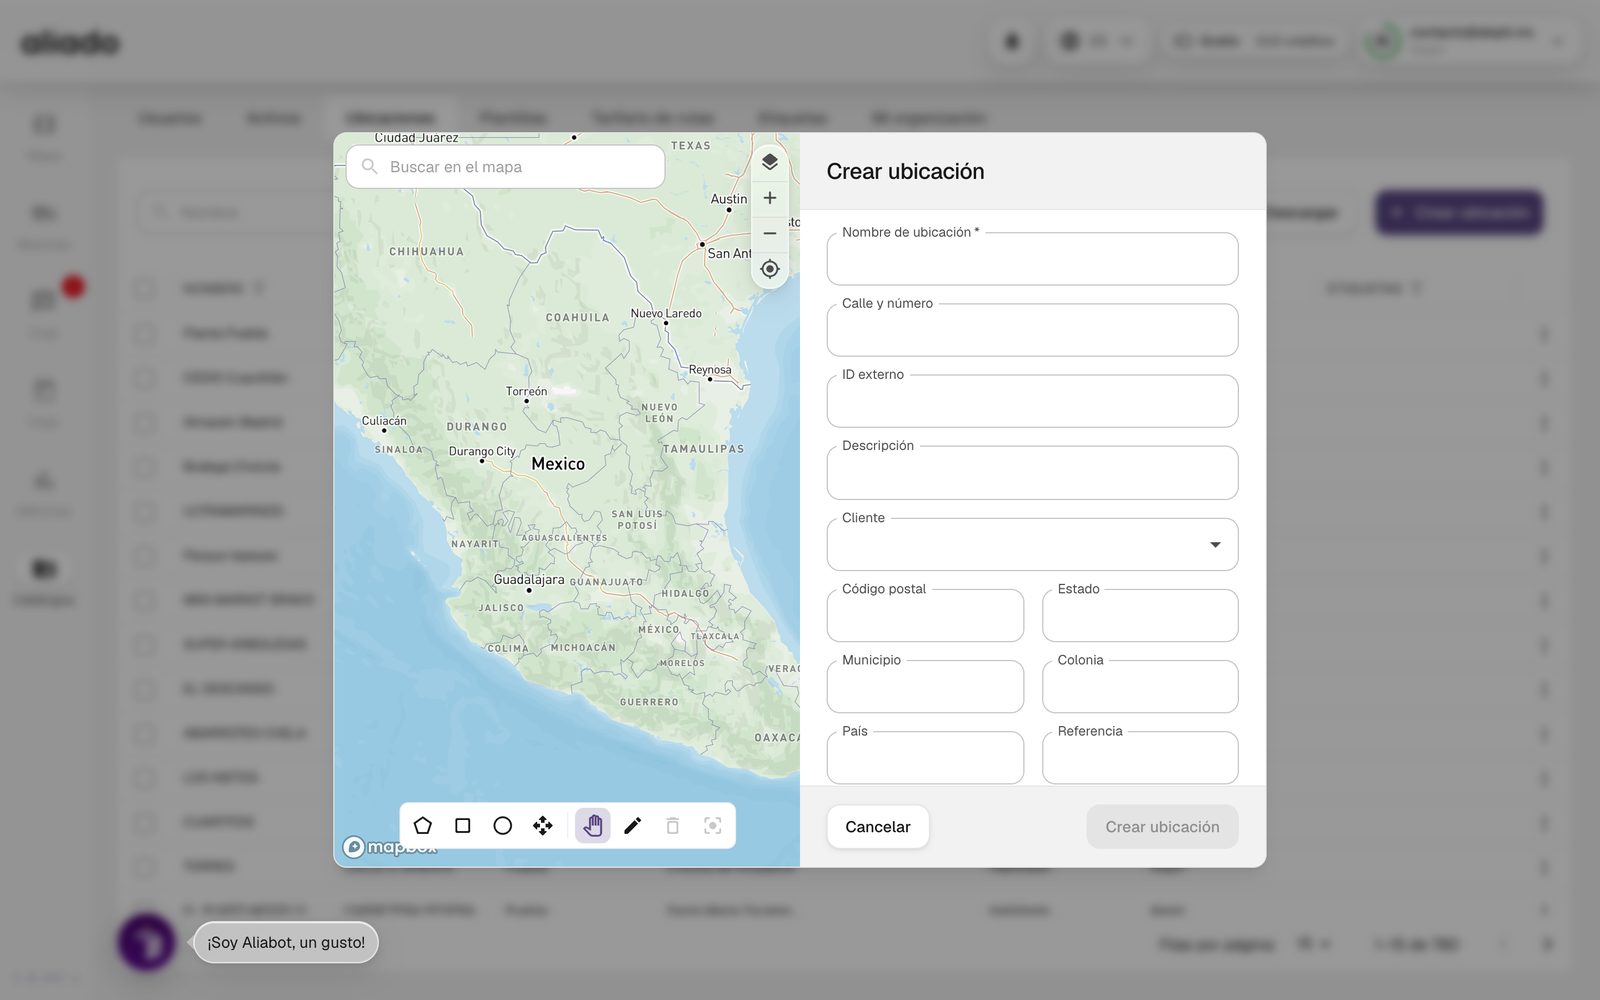
Disabled locations stop appearing in the selectors of missions and appointments, but keep their history. The locations your allies share with you appear in the selectors with their owner.
You may also be interested in: The map's Locations layer
How do I manage templates?
Catalogs › Templates lists your mission templates with their destinations, assets, drivers, whether they have a geo-route and their recurrence. Create template opens the same mission creator; you can also load templates from a file or save any mission as a template when creating it.
From the three dots on each row you edit the template, change its Recurrence (daily, weekly, biweekly, monthly, yearly) or create a mission from it.
You may also be interested in: Create missions from a template
How do I do a bulk upload of records?
Users, assets, locations, templates and rate card accept bulk upload from the create button of each tab:
- Press the tab's create button › Bulk upload.
- Upload your own Excel (.xlsx) or .csv file: there is no template to download. The upload's Aliado AI assistant interprets the columns and you can give it instructions (for example, "column C is the economic number").
- Review the preview: rows with errors are marked for you to correct (duplicate economic numbers, nonexistent locations).
- Press the process button and confirm. View history keeps each upload and its result.
You may also be interested in: Bulk upload of locations | Bulk upload of missions
How do I filter, sort and export the tables?
- Each column has a funnel: choose values from a list with a search box, sort ascending or descending and apply. Filters on different columns combine.
- Show/Hide columns customizes the table; Download exports what you see as CSV (it respects the filters).
- The checkboxes on the left select rows for batch actions: assign tags, start or cancel missions, delete records.
- Changing page, filter or order clears the selection.
What is in My organization?
Catalogs › My organization (also from the account menu) has four tabs:
- General information: name, responsible user, visibility in the Directory, external ID, certifications (CTPAT, OEA, Distintivo CANACAR, Recurso Confiable, Transporte Limpio SEMARNAT), legal name, RFC and the Fiscal data (CFDI / Carta Porte).
- Documents: the company's documents and those you require from your allies.
- Requests: ownership requests for the organization and other pending requests.
- Allies: the organizations you have an alliance with, their invitations and their authorization.
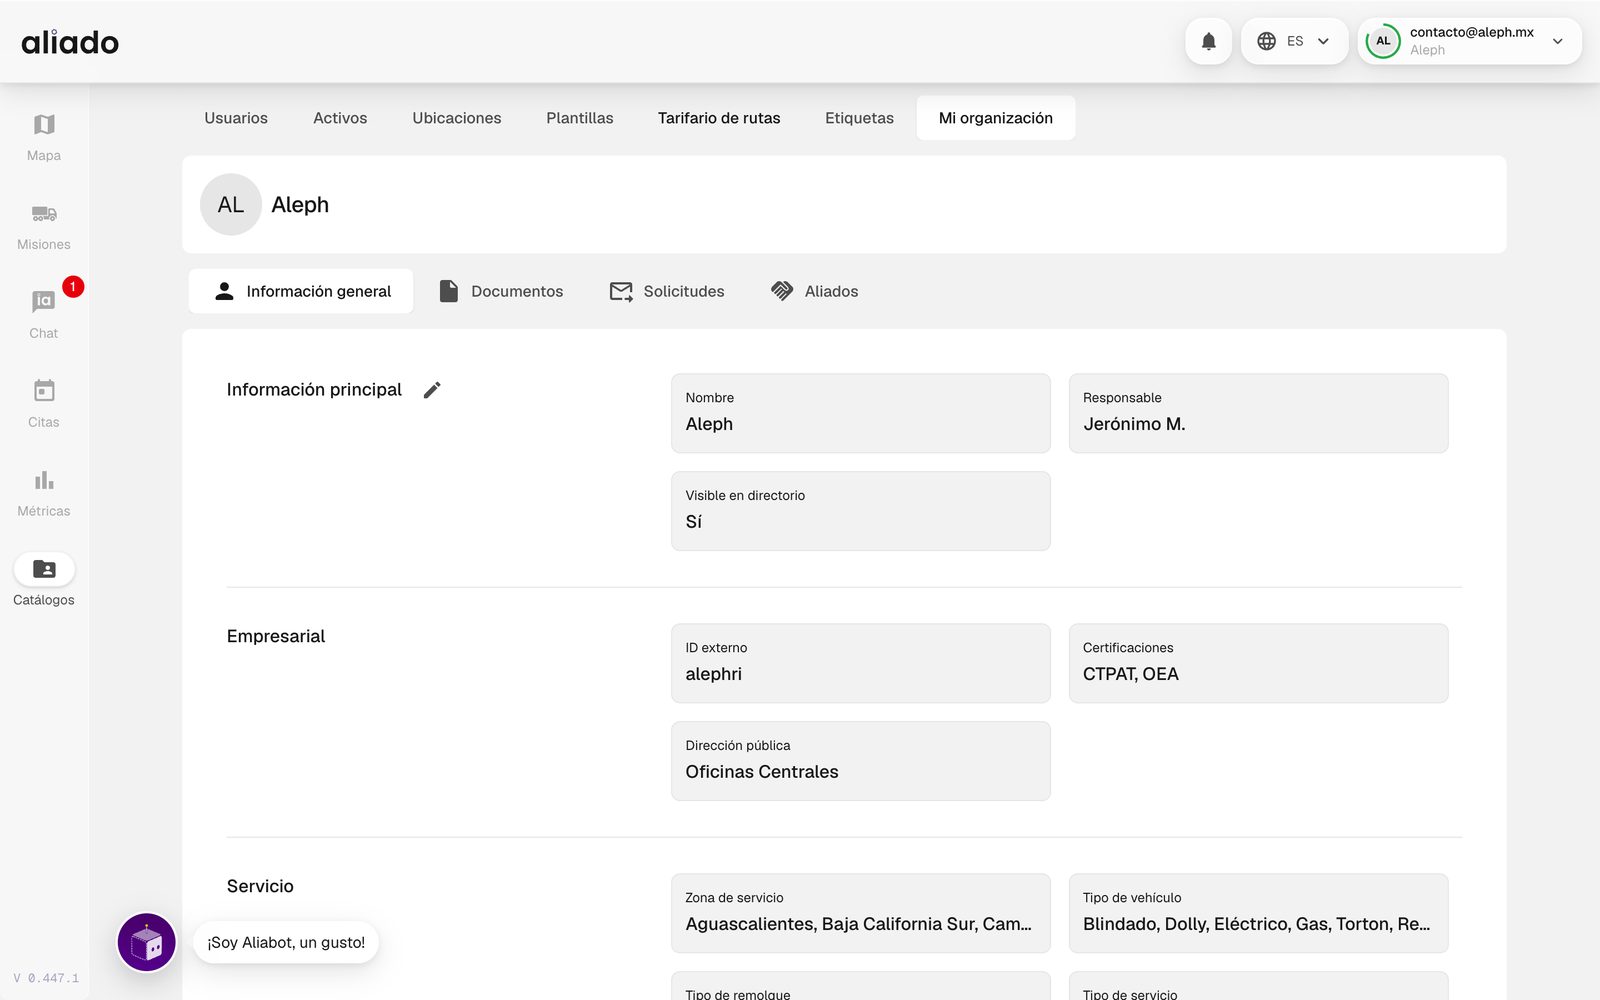
If you see the Validation in progress notice, there is an ownership request in progress.
You may also be interested in: Allies | Organization documents
How do I bulk upload locations from Excel? Is there a template?
There is no template to download: you upload your own Excel or CSV and the upload's Aliado AI assistant interprets the columns. All that matters is that each row is one location and carries its name and how to find it.
| Data | Required? |
|---|---|
| Name | Yes, and without repeating in the file or with the locations you already have. |
| Latitude and longitude, or street or municipality | Yes, at least one of these ways of locating it. |
| External ID, postal code, neighborhood, state, country, description, reference | Optional. |
- Go to Catalogs › Locations and press Create location › Bulk upload.
- In Upload file drag your file or click to choose it (.xlsx or .csv). If your format is unusual, explain it to Aliado AI in Tell us about your file....
- Press Process file. It takes you to the upload history; wait for the upload to become Interpreted or Pending arrangements and open it with Open details.
- Review the table (external ID, name, location and geofence, street, postal code, neighborhood, municipality, state, country…). The Records requiring attention filter shows the rows with errors; correct them in the table or ask Aliado AI to reinterpret the file.
- Press the final button (Create N locations) and confirm in Load locations.
You may also be interested in: Bulk upload of catalogs | Create a location and its geofence
How do I see or download the QR code of an asset or a user (a unit's exit QR)?
Each asset and each user in your catalog has its QR code. It is the same one the guard scans in Aliado Seguridad to confirm the unit or the driver at the entry or exit scan: there is no separate "exit QR".
- Go to Catalogs › Assets (or Catalogs › Users).
- In the row, press the QR icon (QR Code). It is also next to the edit pencil in the detail of the asset (General information tab) or of the user (Personal information).
- A window opens with the QR and, below, the code as text. Copy code copies it; Download saves the QR as a PNG image (depending on your browser, the button says Share and opens the options to send it).
Print it and stick it on the unit, or keep it handy on the phone to show it at the gate.
You may also be interested in: Scanning in Aliado Seguridad | An appointment's QR
How do I connect or turn on a unit's GPS?
A unit appears on the map when Aliado receives its positions. There are three ways to achieve it:
- With the GPS the unit already has (your tracking provider's): Aliado connects to your provider and receives its positions. Today that connection is enabled by the Aliado team; ask for it from the Still have a question? form at the bottom of this Help Center, with your provider's name.
- With the driver's phone, without installing anything: Link tracking sends the driver a link by SMS or WhatsApp and they share their location from the browser. It is set up in My organization › Link tracking and, per mission, in the planner with Send links automatically; you can also press Request location in the detail of a mission in progress. It requires your organization to have SMS or WhatsApp enabled.
- With the Aliado app on the driver's phone, which asks for background location permission for tracking during their missions.
To know whether a unit already reports, look for it on the Map, Assets view: you will see its Last reading, or the No readings filter if it has never reported.
You may also be interested in: Register the units before sending positions | Migrating GPS | No GPS signal alert
Do units or GPS devices have to be registered before sending positions?
Yes. Aliado assigns each position your GPS provider sends to an asset of your organization, looking it up by its External ID. If there is no asset with that identifier, the reading is discarded (Unit not found) and the unit does not appear on the map. The exception is an integration with automatic unit creation turned on: there Aliado registers the unit by itself with the first reading.
- Register each unit in Catalogs › Assets (one by one with Create asset or all of them with Bulk upload).
- In External ID enter the vehicle's identifier exactly as your GPS provider sends it. When the provider sends the positions straight to Aliado, hyphens and spaces do not count: QA-GPS-123 is looked up as QAGPS123.
- Once your provider is connected, check on the Map, Assets view, that the unit has a Last reading.
You may also be interested in: Connect the GPS | Assets
What is "migrating GPS"?
In Aliado there is no function or button called "Migrate GPS". If what you need is one of these things, this is how it is done:
- Changing GPS provider or moving your units to another account of the provider: the connection with the provider is enabled by the Aliado team; write to us from the Still have a question? form with the previous provider and the new one.
- Getting a unit to start reporting: check that it exists in Catalogs › Assets with the External ID the provider sends.
- A unit without GPS: use Link tracking with the driver's phone.
You may also be interested in: Connect the GPS | Register before sending positions
Allies and tags
An ally is another Aliado organization you work with: your carrier, your customer or your supplier. Permission tags decide what each user and each ally sees and can edit.
What is an ally?
Allies live in Catalogs › My organization › Allies (or My allies in the account menu). Each card shows the organization, how many assets it has and how many report live, and whether it is authorized. View details opens its record with Authorization, GPS, Documents and the Shared Tags tab.
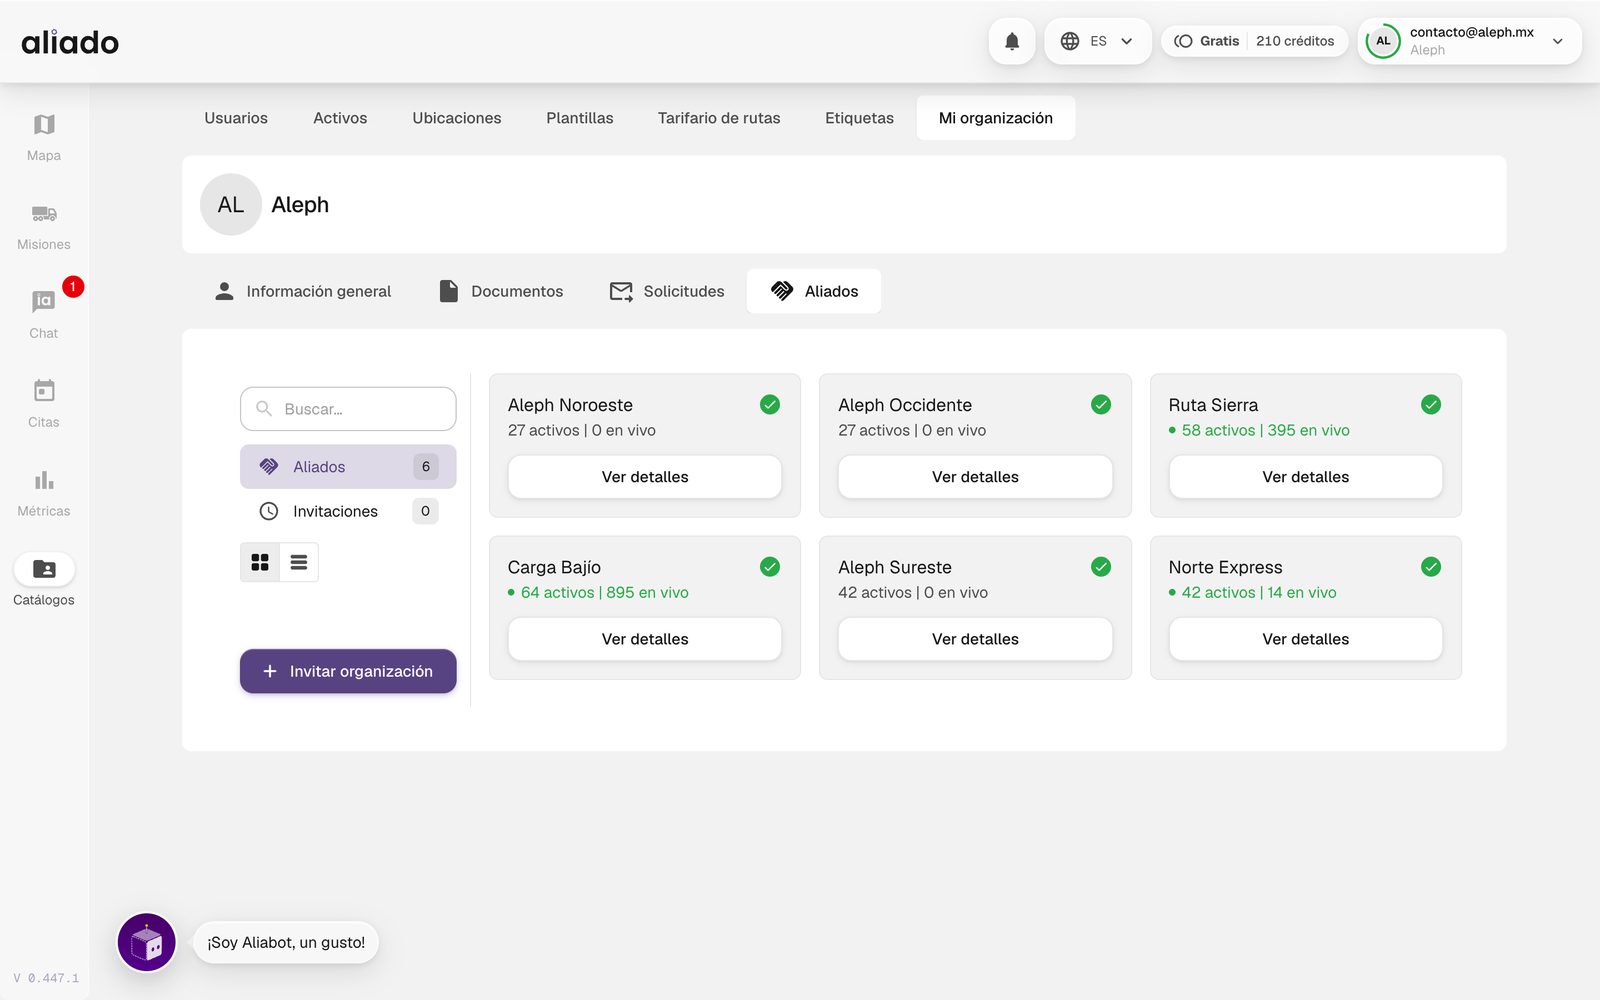
With an ally you can: invite it to appointments and tenderings, assign its drivers and units to your missions, share resources with it by tag and see its performance score in the Directory.
You may also be interested in: Invite an organization | Authorize an ally | Share tags
How do I invite another organization to be my ally?
- In Allies press Invite organization. If the company is already in Aliado, search for it; if not, share the invitation link by WhatsApp, email, LinkedIn or another channel.
- The invited organization receives an alliance request; one of its administrators presses Accept alliance or Reject.
- Meanwhile the invitation appears in Invitations with its date and the option to revoke it.
You can also invite from an appointment (+ Invite new organization) or from a company's card in the Directory.
What does authorizing an ally mean?
Authorization is your go-ahead for an ally to transport for you: only authorized allies can enter your tenderings, be assigned in your appointments and carry your missions. You can make it conditional on their uploading the Documents required from my allies and on their units reporting GPS; the ally's record shows compliance with both.
You may also be interested in: Tendering | Required documents
What are permission tags?
Tags group resources (locations, assets, missions, templates, routes) and define who can see them. A user with the Bajío Zone tag sees the resources tagged Bajío Zone; an ally you share that tag with does too.
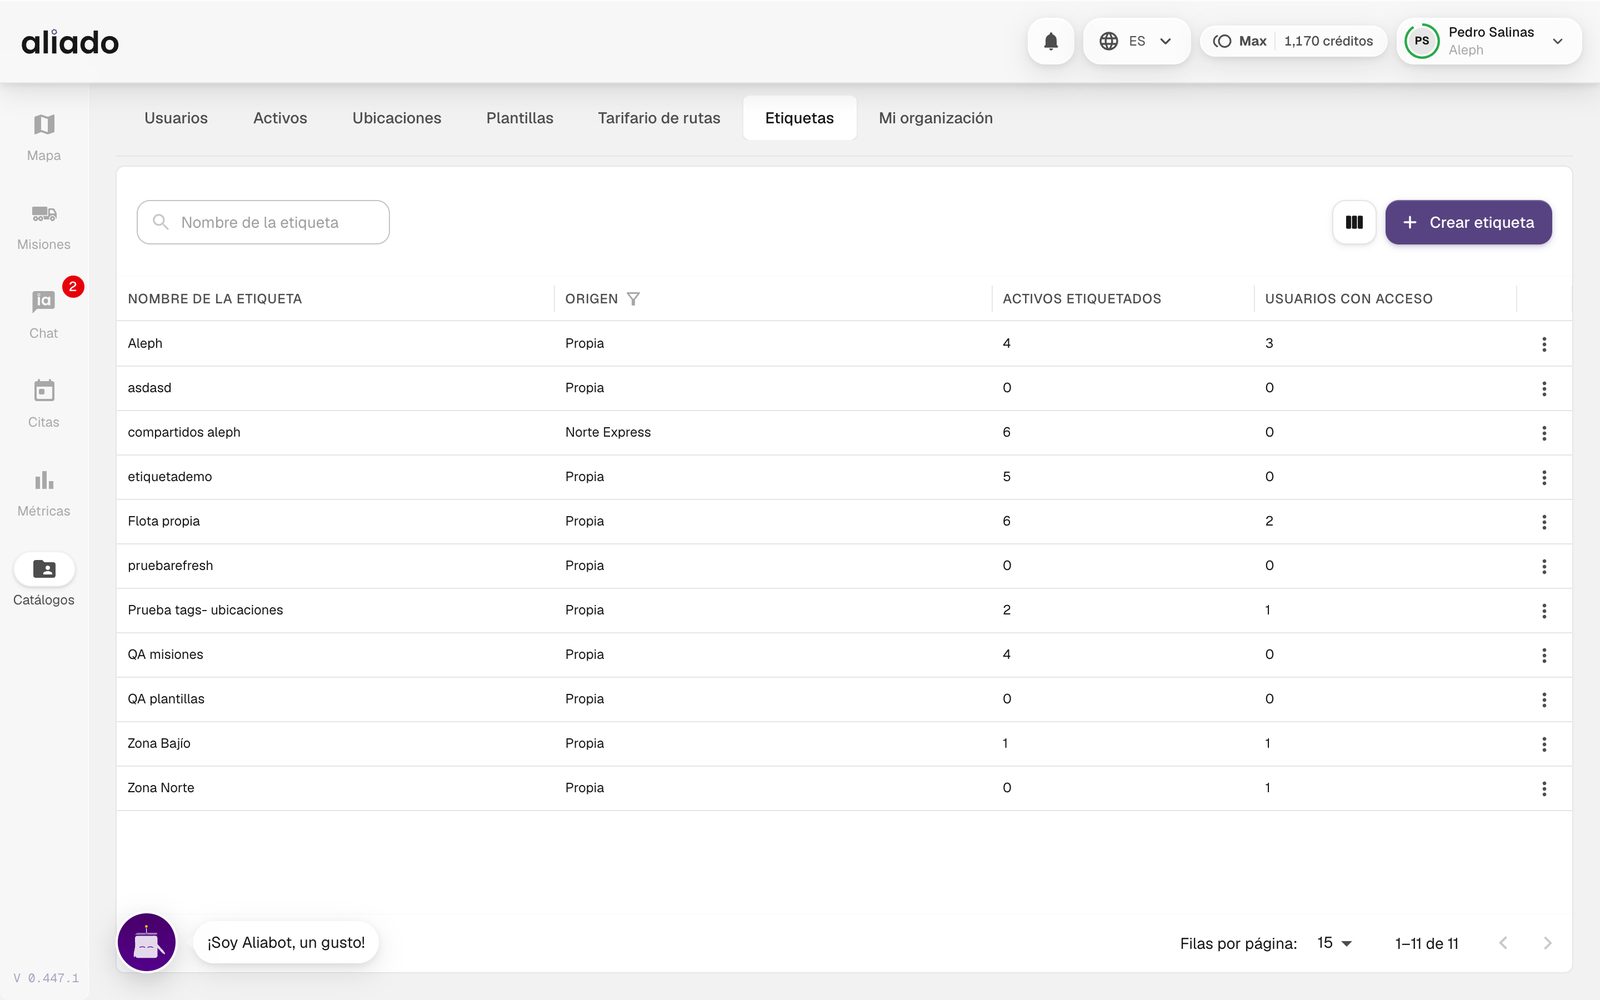
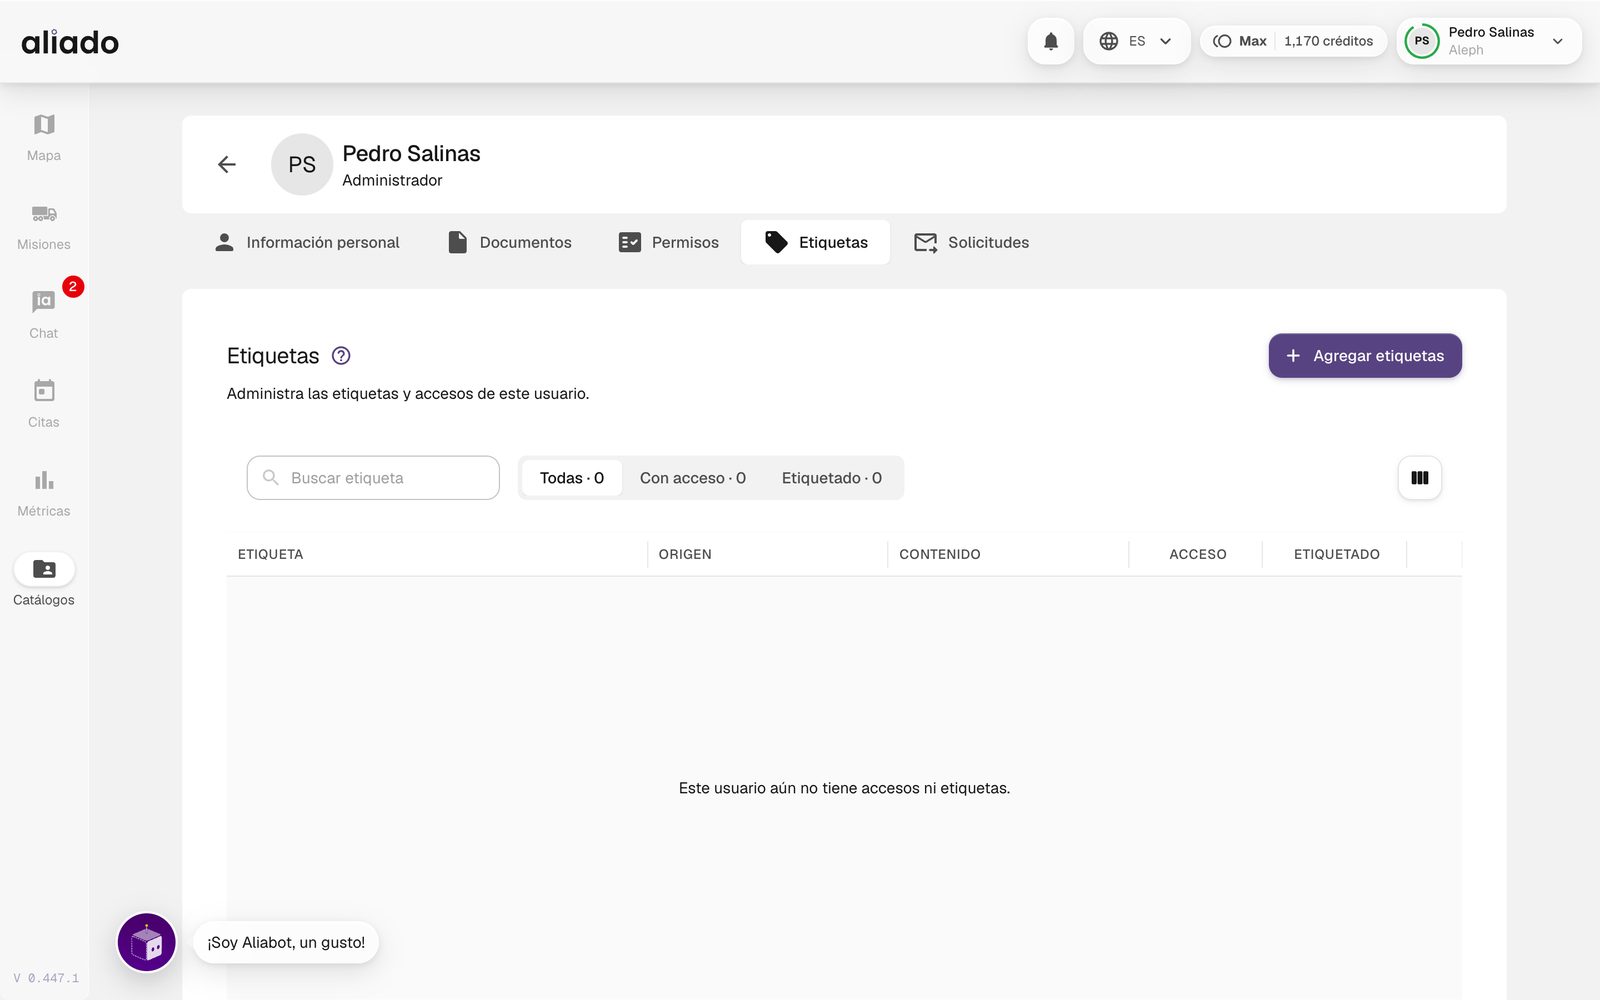
- In Catalogs › Labels press Create tag.
- Tag the resources from their detail (Tags field) or in batch: select rows in any catalog and use Assign tags to add, remove or replace.
- Give your users access from their profile, Permissions and tags tab › Add tags › Give access.
The Origin column says whether the tag is Own or shared with you by an ally. Deleting a tag removes it from all the users, resources and allies that had it.
You may also be interested in: Share tags | Tag a mission | A user's permissions
How do I share resources with an ally?
- Open the ally in Allies › View details and go to the Shared Tags tab. An active alliance is needed; if there is none, the tab offers you Invite to alliance.
- Press Share tags, choose the tags and the permission: Read only or Edit (with edit the ally can also modify those resources).
- The ally is notified that a tag was shared and sees your resources in its catalogs with your name in the Owner column. You can change the permission or stop sharing whenever you like.
It is the way for a carrier to use your locations and templates when creating missions, or for a customer to see only the missions that concern it.
How do I assign permissions to a user?
Open the user in Catalogs › Users and go to Permissions. There are three blocks:
- Status: enabled or disabled.
- Features: which modules they use and at what level (read or write): Mission dashboard, Mission map, Appointments, Chat, Catalogs, Metrics…
- Locations and suppliers/customers: which locations and organizations they have access to.
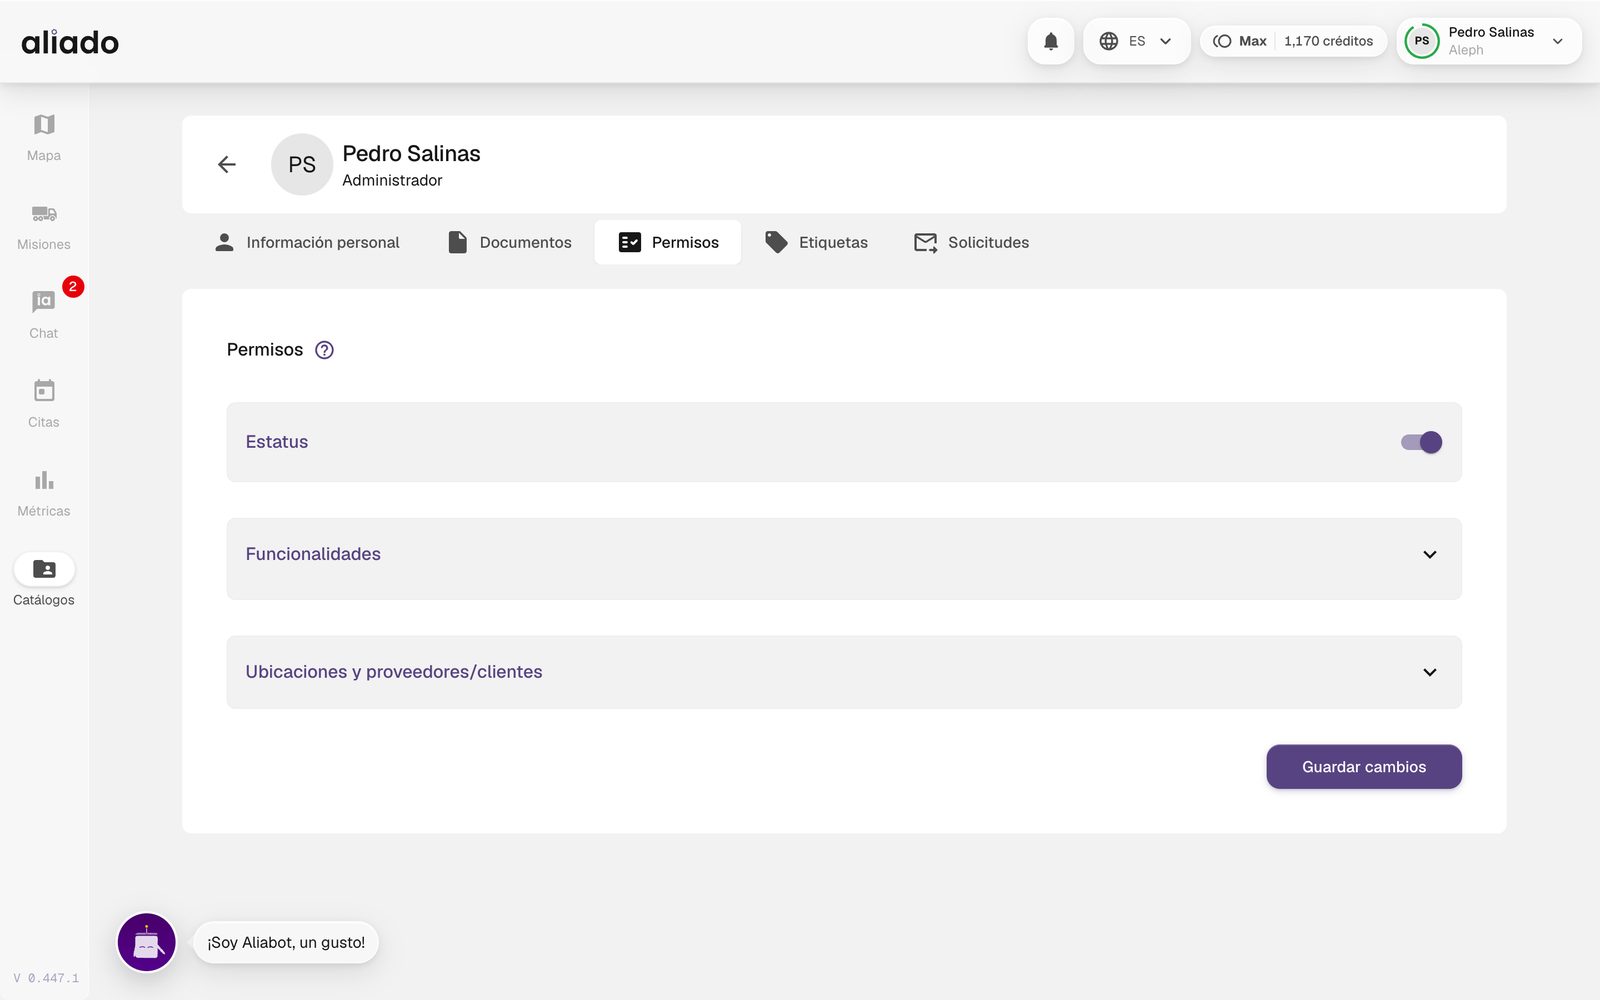
Press Save changes; the user receives the new permissions without signing in again. To narrow by resource also use the tags tab.
How do I register or apply a tag to a mission?
A mission's tags decide who can see it (Access labels). They are set mission by mission, when creating or editing it:
- Open Missions › Create mission or, on an existing mission, Show actions › Edit mission.
- Press the tag icon at the bottom of the creator (Access labels; it shows how many the mission carries).
- In Access labels (Control who can see this mission) choose the tags in the Tags field. If the tag does not exist, write its name and choose Create “…”.
- Press Done and then Create mission or Update mission.
You can also create tags beforehand in Catalogs › Labels › Create tag. On the board, the Access tags column (turned on in Show/Hide columns) shows and filters each mission's tags.
You may also be interested in: Tags | Making a mission visible to one user only
How do I make a mission visible to only one user?
There is no "who sees this mission" selector user by user: it is achieved with tags. Tagging the mission is not enough, for two reasons: a user with access to no tag still sees tagged missions too, and it is enough for a user to have access to any of the mission's tags to see it. That is why the accesses are arranged first and the mission is tagged at the end:
- Create a tag just for that mission or that group of missions (for example, "North Customer") in Catalogs › Labels › Create tag. Creating it changes nothing about what anyone sees.
- To each of the other users who must not see it, give access to at least one tag the mission will not carry (for example, a general one for their zone): in Catalogs › Users press Details on their row and go to the Permissions and tags tab › Add tags › Give access. If they had no access before, also give them the tags of the other tagged missions, assets and locations they use: with their first access they stop seeing whatever carries tags they do not have. If you have to withdraw an access, first give the new one and then remove the old one, so they are never left without accesses.
- Give access to "North Customer" to the user who should see it, with the same steps (and, if they had no accesses, those of their other records too).
- Now tag the mission: Edit mission › Access labels icon. Add "North Customer" and, in the same panel, remove the mission's other tags. Press Done › Update mission. From here on, among the users with accesses, only those with access to "North Customer" see it.
- Check the result in Catalogs › Labels: open each tag the mission carries and, with the accesses filter, verify who has access to it. That filter does not show two groups that can also see it: the driver assigned to the mission (change them if they must not see it) and the users with no access at all (in Catalogs › Users, each one's Permissions and tags tab says whether they have accesses).
Drivers work separately: they only see the missions they are assigned to, regardless of tags.
When you add new users to your organization, give them access to their tags (other than the mission's) before they start using Aliado: a new user is born without accesses and would see the mission. Then repeat the check of the last step.
You may also be interested in: Tag a mission | How tags work | A user's permissions
Metrics and controlled visibility
Metrics summarizes how your operation is doing; Controlled visibility lets your customers follow their deliveries without entering Aliado or seeing the live position of your units.
What does Metrics show?
The Metrics module charts your operation by period (daily, weekly, monthly), origin and destination or driver: scanned versus unscanned missions, planned versus scanned missions by origin, punctuality of missions and appointments, and rankings of drivers and carriers. Each card can be downloaded.
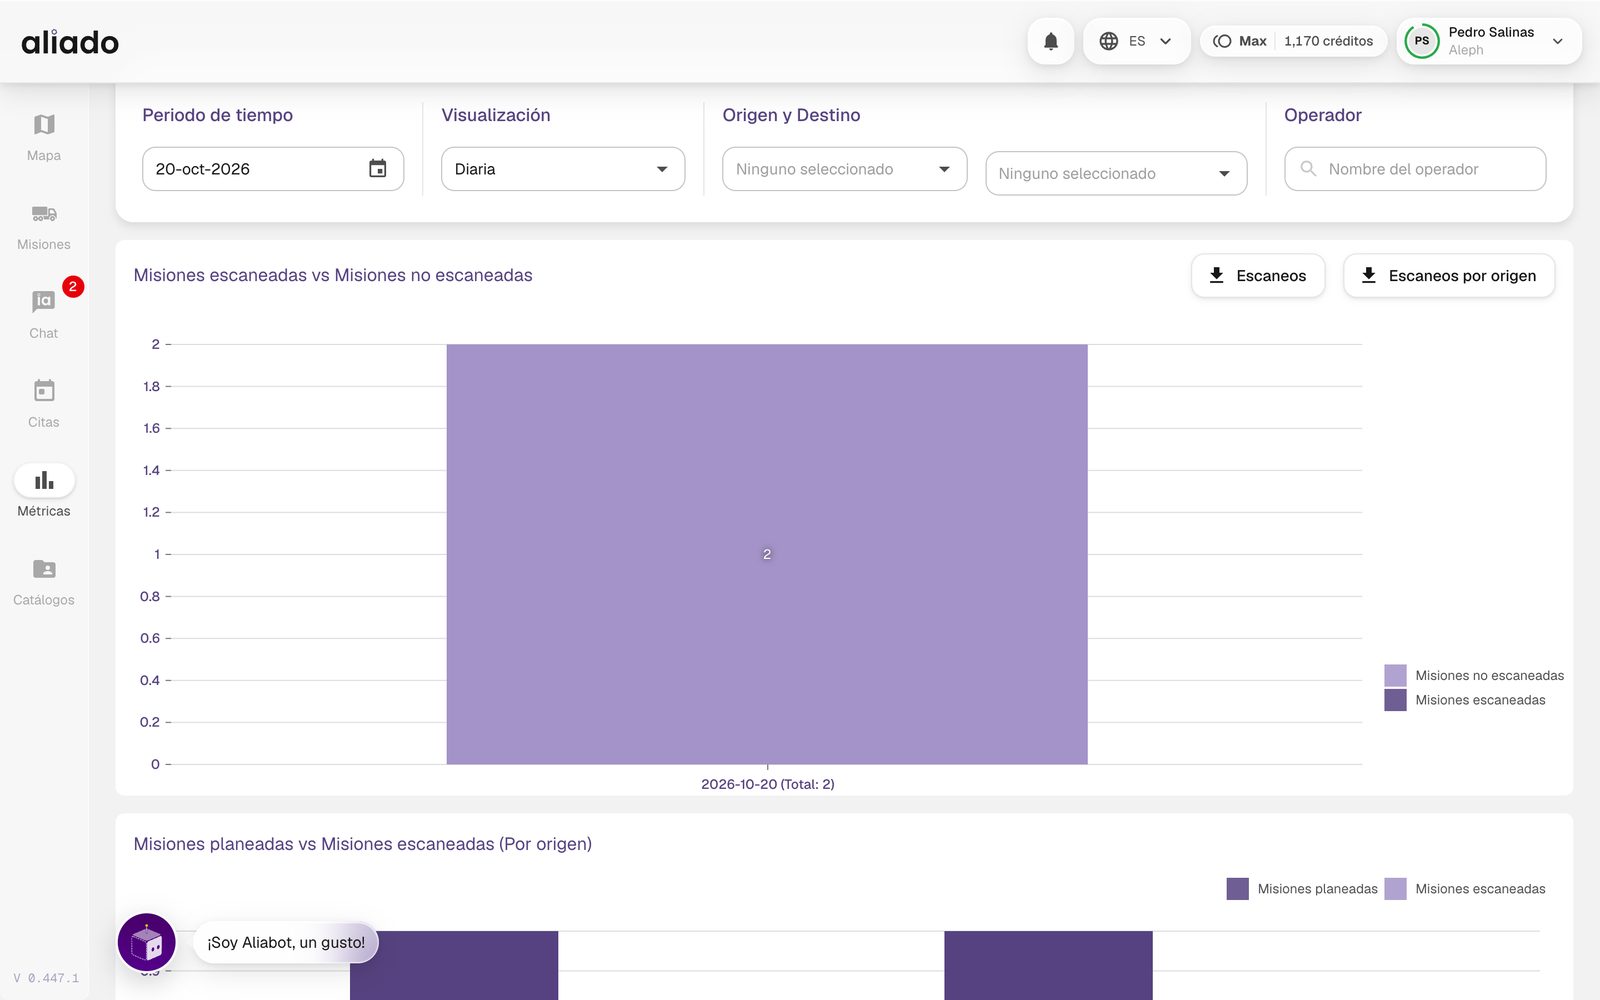
How do I keep my customer informed about their deliveries?
With Controlled visibility your customer receives each day a link to a board with the trips that concern them: status, ETA and punctuality, without access to the platform and without seeing the real-time location of your units.
- From the Missions board press the share icon, or go to Missions › Controlled visibility.
- Press Create user and enter First name(s), Email and Phone.
- Choose How they receive the dashboard: Email, WhatsApp or SMS (WhatsApp and SMS are charged per message and require having them contracted).
- Choose All locations or only the ones that concern them, leave the user Active and press Create user.
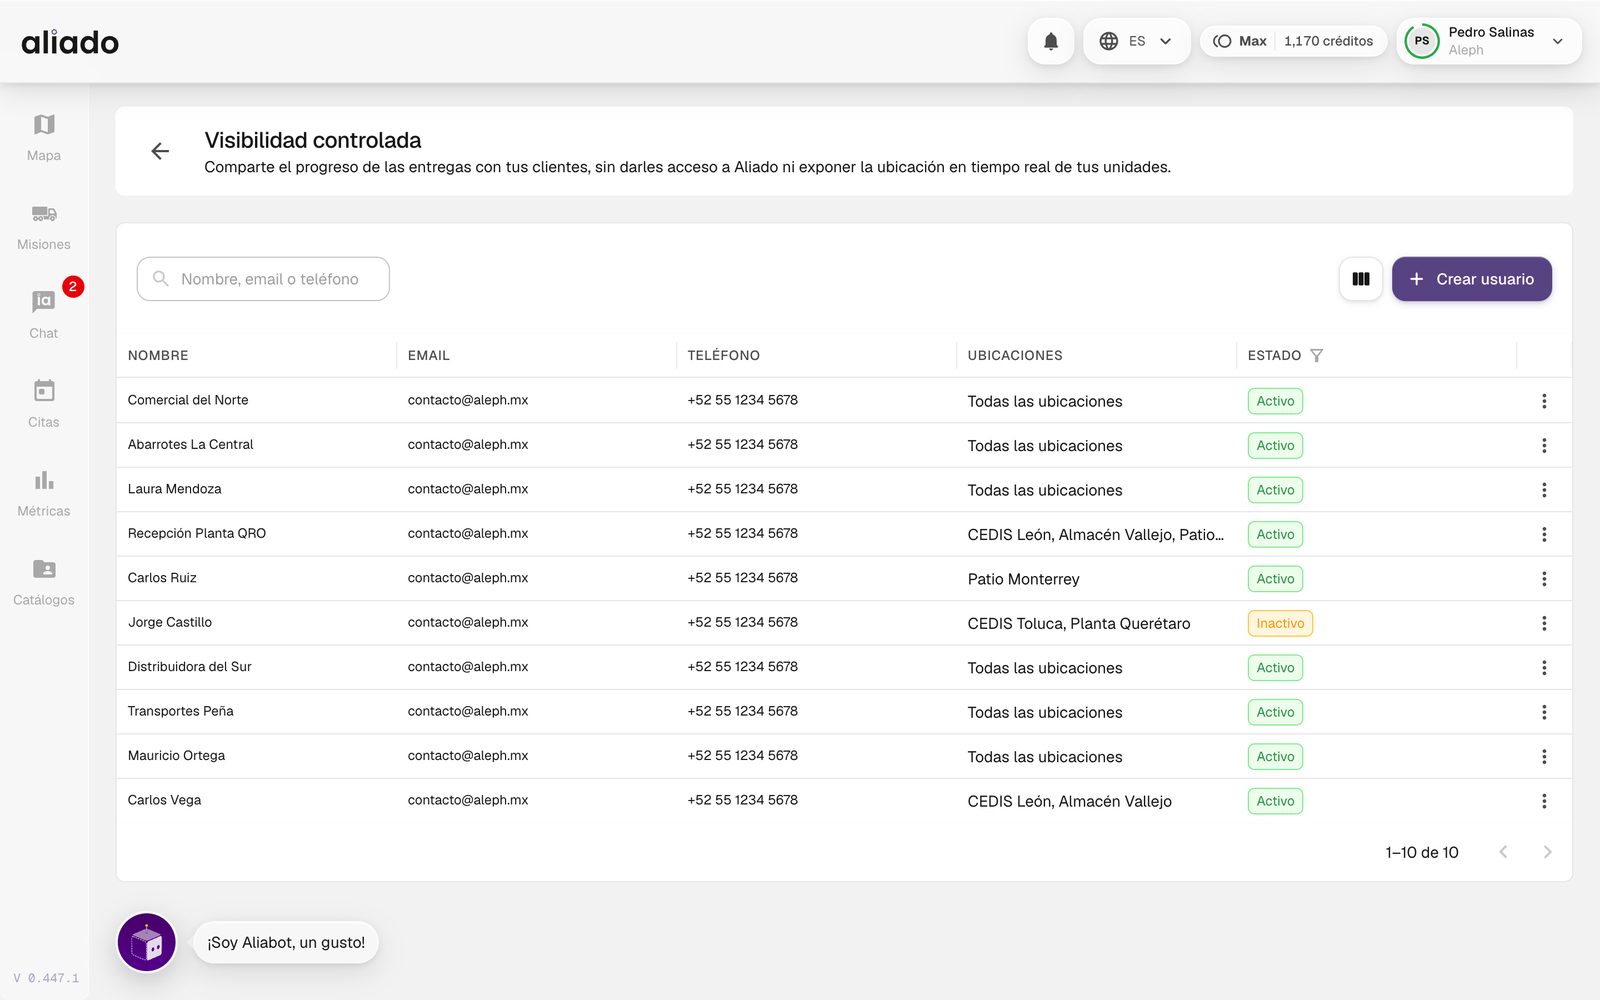
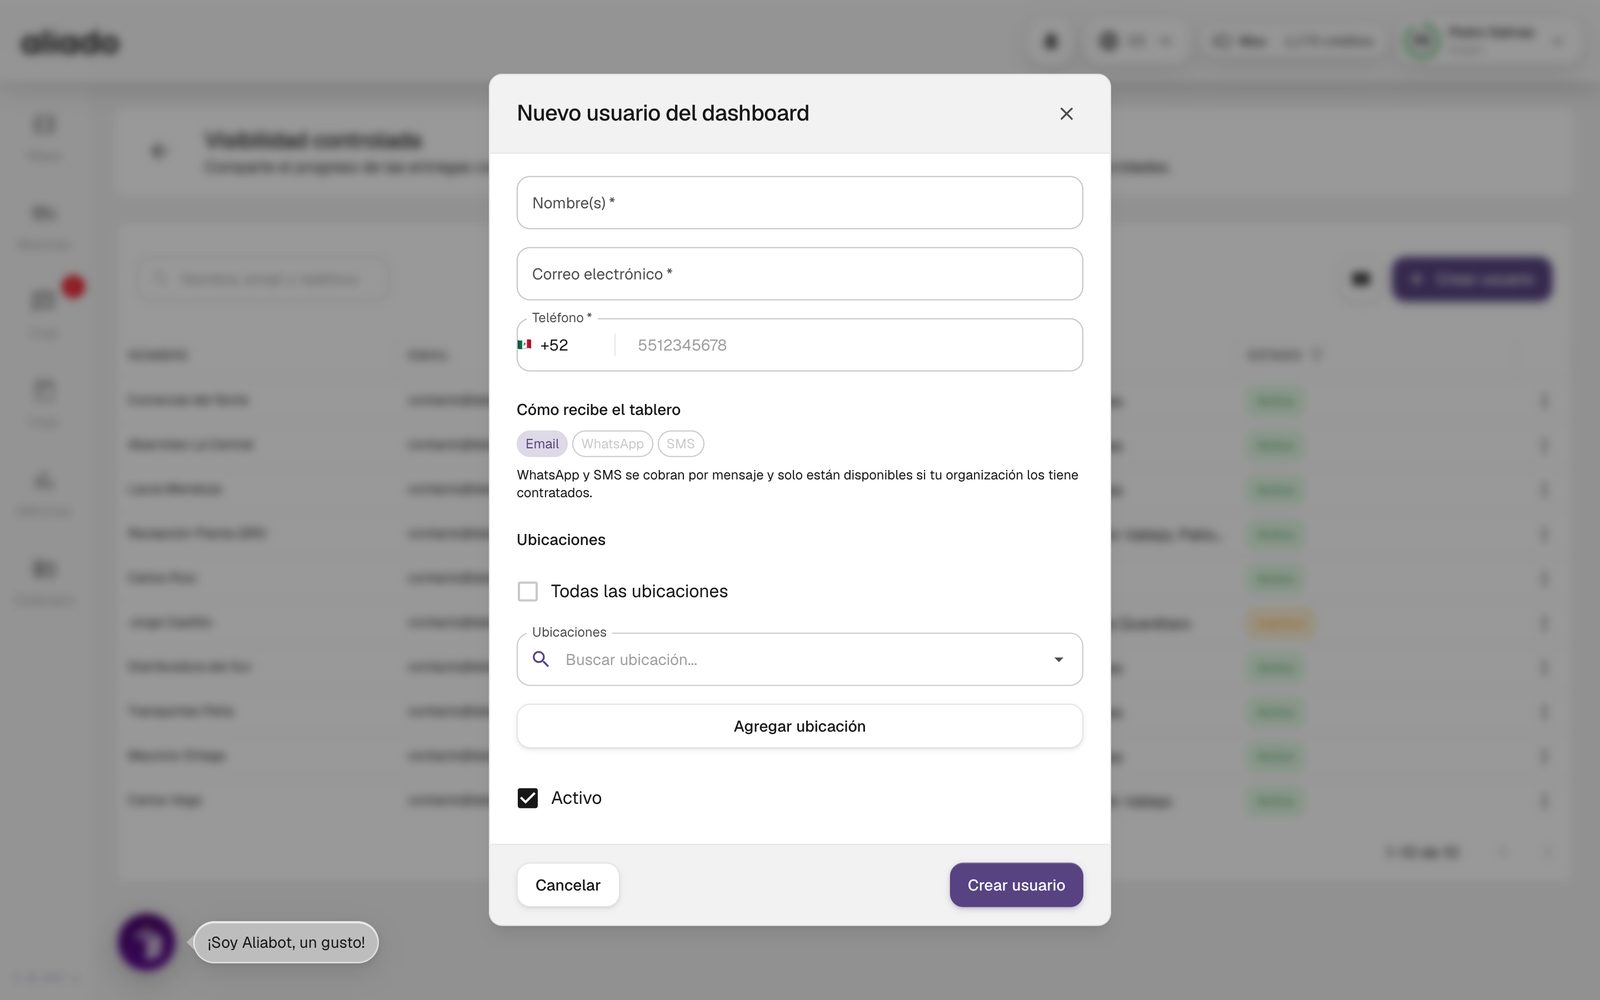
The message goes out automatically each morning (7:00, Mexico City time) with the day's trips. If you edit the user, the board they receive is updated.
You may also be interested in: Notification channels
Account, plans and credits
Everything to do with your account and your organization's: profile, plan, shared credits, top-ups, payment history and how to earn credits by inviting other companies.
What is in My profile?
From the account menu › My profile you see your main information (name, employee ID, role, customer, operating unit), your Operator (Carta Porte) data, and the Documents, Permissions, Tags and Requests tabs. The pencil edits and the QR icon shows your personal code.
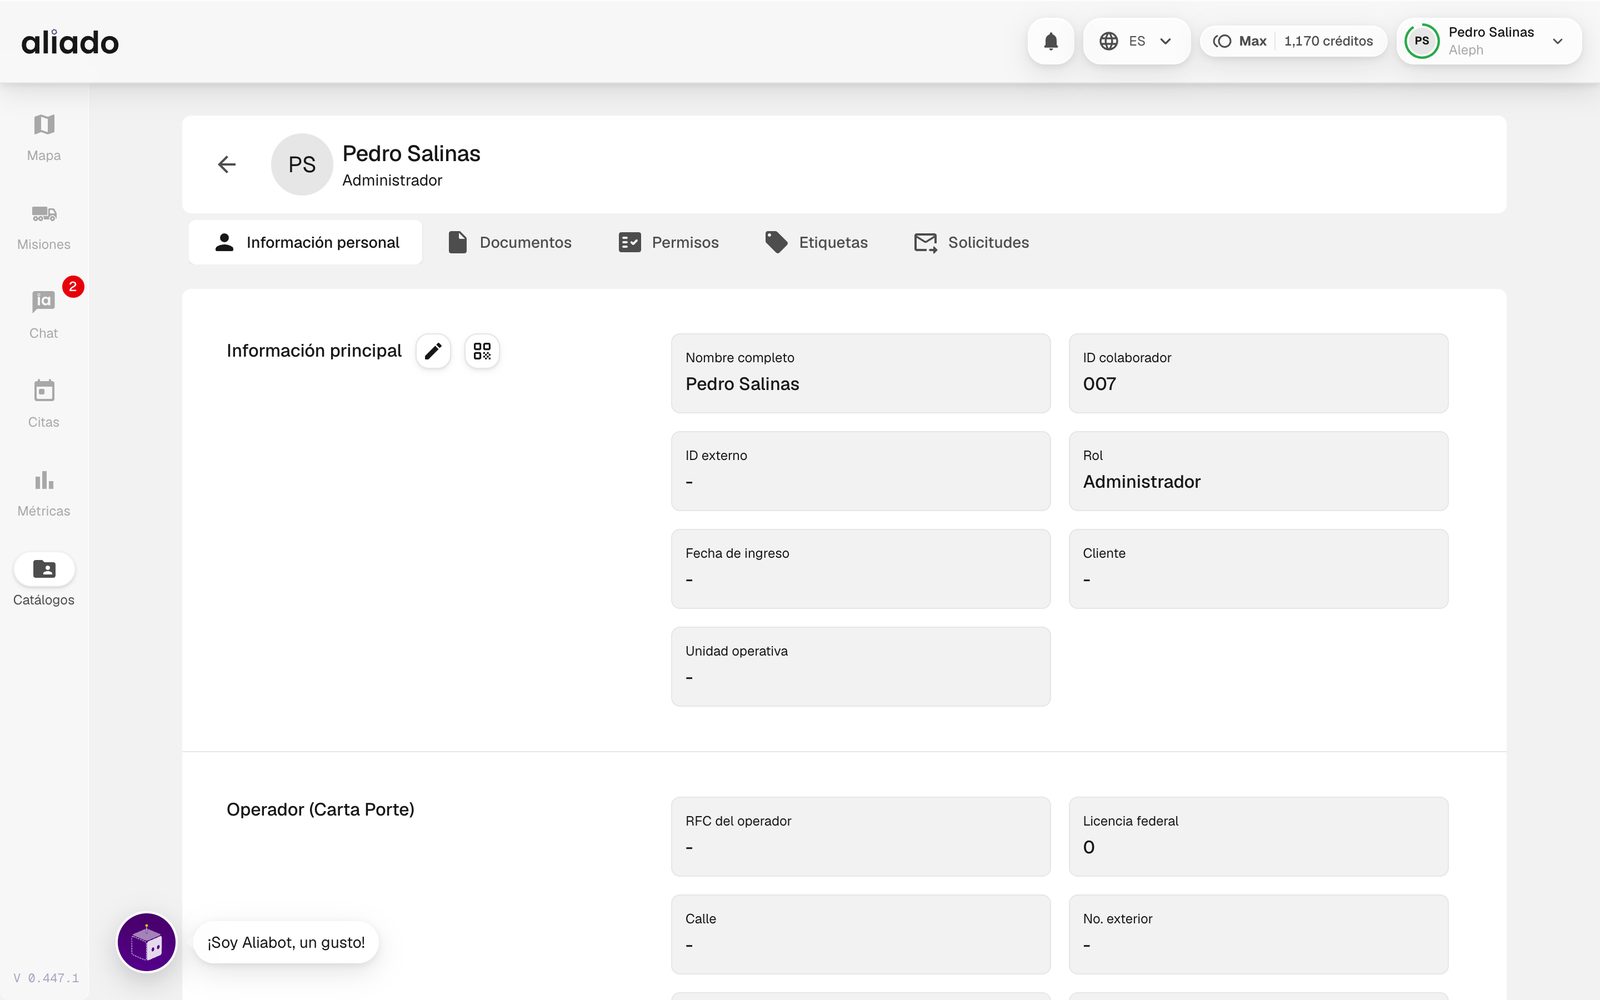
In the app, Profile gathers the same for all roles: credits, metric or imperial units, phone verification and Configure alerts.
What plans does Aliado have?
Every account starts on the Free plan, at no cost and without a card, with a daily allowance of credits and gift credits when you sign up. Pro extends the daily allowance and includes unlimited Aliado AI analyses; Enterprise is tailor-made, with a contract and through sales. Some organizations also have plans managed by Aliado (such as Max) that are not bought from the screen.
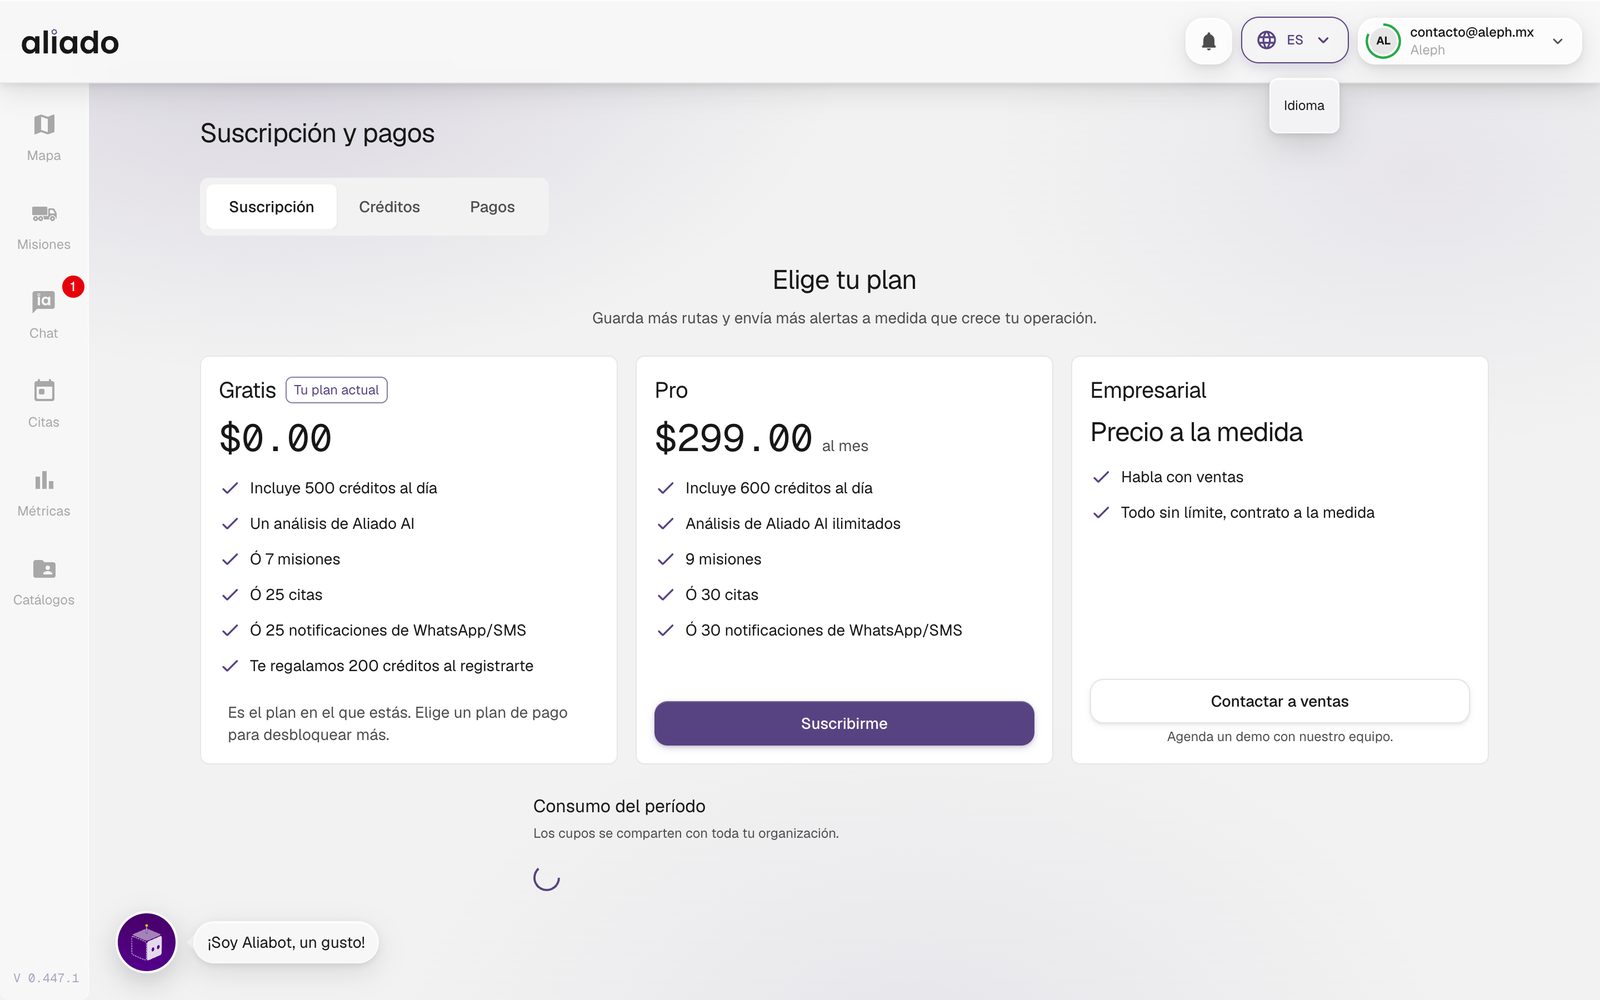
What each plan includes (credits per day, Aliado AI analyses, and how many missions, appointments and WhatsApp/SMS notifications they cover) is always shown up to date in Subscription and payments › Subscription, in your browser's currency. To change plan press Subscribe; if your plan is managed by Aliado, contact sales.
You may also be interested in: How credits work | Aliado AI credits
How do credits work and what are they used for?
Credits are Aliado's internal currency (1 credit = 1 Mexican peso). They belong to your organization: what a colleague spends comes out of the same credits. They are used by themselves: there is nothing to turn on or assign, and they are only deducted when the action has a cost on your plan. The actions you take (creating a mission, an appointment or a user) deduct them when you confirm; what is sent or runs by itself (notices by WhatsApp or SMS, automatic Link tracking links, reviews of a monitoring turn) deducts them each time it goes out, without you confirming each one.
Depending on your plan, these can cost credits: Create a mission, Create an appointment, Add a user, Mission template, Appointment template, the layers, analyses, reports and PDF of Aliado AI, notices by WhatsApp and SMS, Link tracking links and each review of Monitoring with Aliado AI. When you create a mission, an appointment or a user, below the button you will see This action costs N · you have M left; if it does not appear, that action has no cost on your plan.
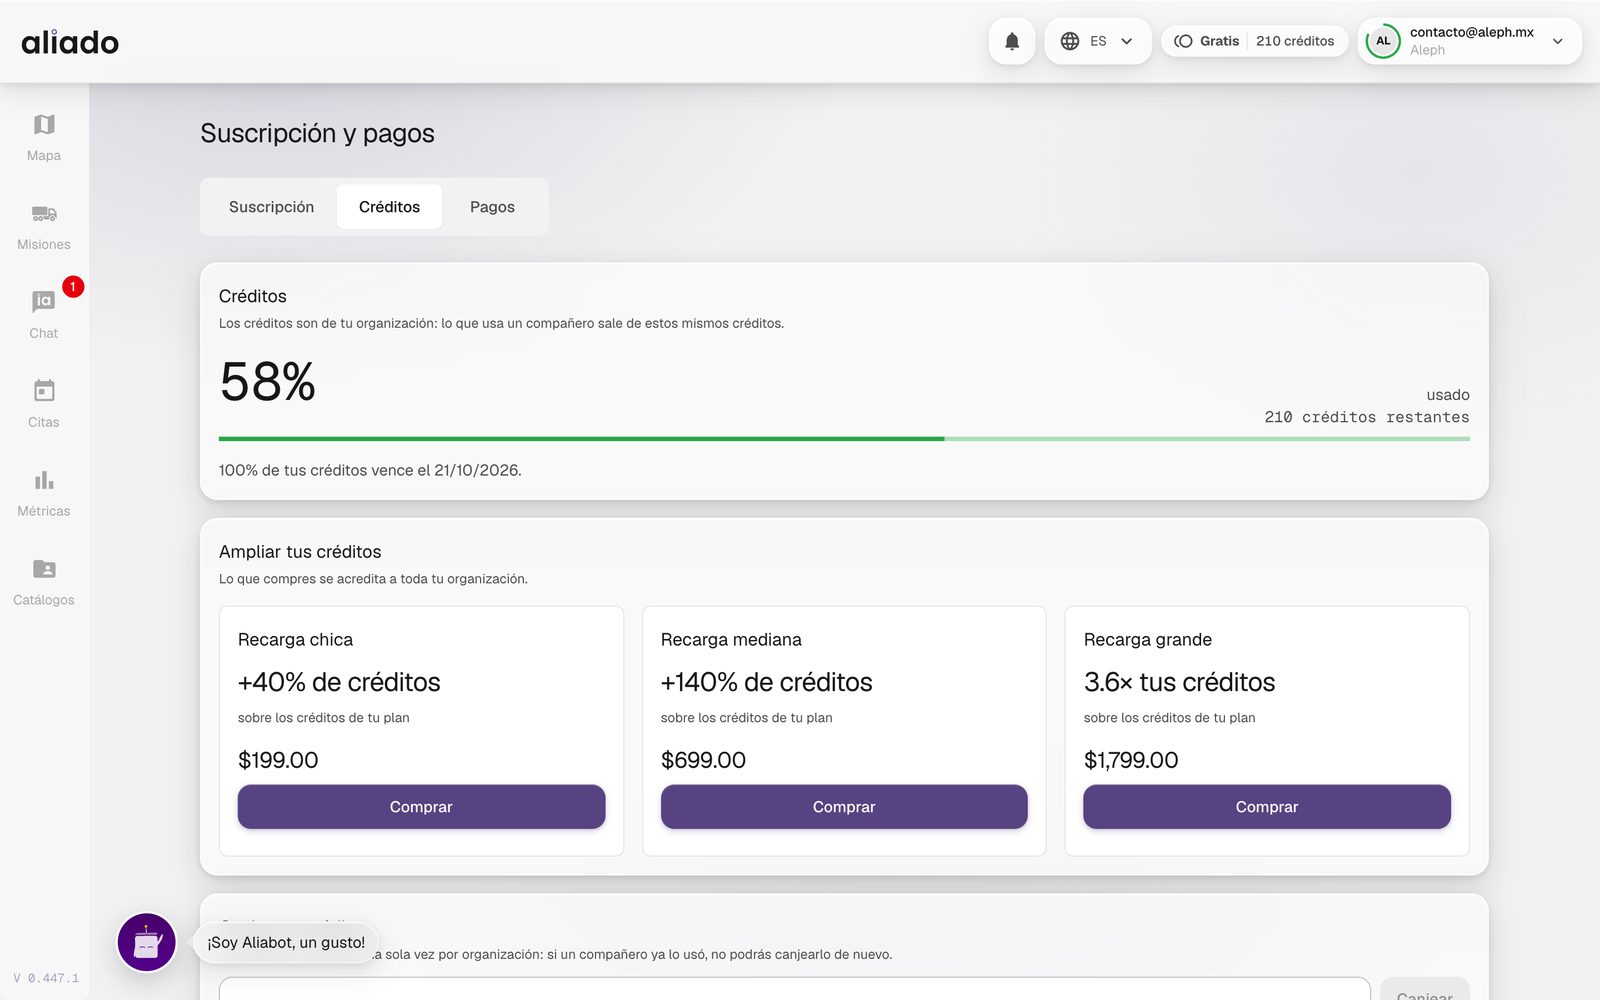
- The balance is seen in the header and in Subscription and payments › Credits, with the percentage used and the expirations in the order in which they will be consumed.
- Extend your credits offers top-ups (small, medium, large) credited to the whole organization. You can also redeem a promotional code.
- If you run out of credits, alerts keep arriving but without their content, and paid actions show the plan notice. We let you know before they run out.
The exact price of each action is shown in the platform at the moment you run it; we do not write it here because it can change with your plan. If in Credits you see Your plan doesn't meter credits: there is nothing to use up, your plan does not deduct credits.
You may also be interested in: Payments | Earn credits by inviting | Business account on Free
How do I pay and where do I see my payments?
When you subscribe to a plan or buy a top-up you choose the payment provider available (card through Stripe, or PayPal). After the payment, credits take a few seconds to show; the page updates by itself.
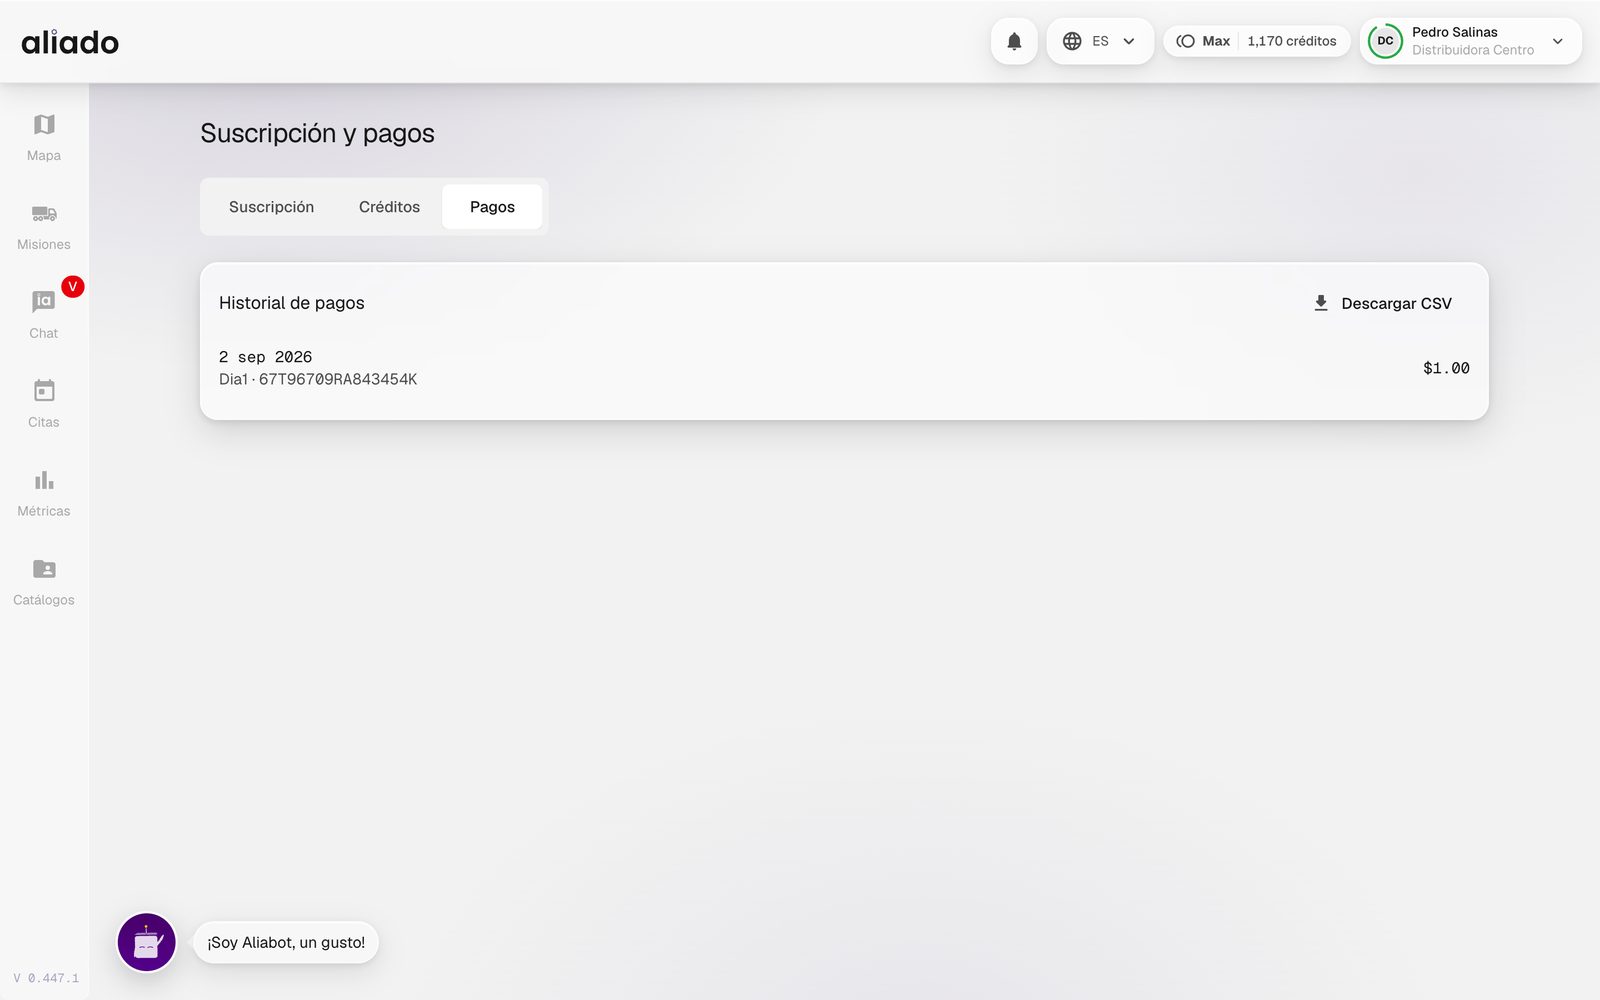
Subscription and payments › Payments keeps the Payment history with date, concept, reference and amount, and exports it with Download CSV.
How do I earn credits by inviting other companies?
The Invite chip in the header (and the invitations section in Subscription and payments › Credits) gives you a link with Copy link and Send on WhatsApp. When a company signs up with your link, both receive reward credits; the redemption is automatic on sign-up.
You may also be interested in: Credits
I forgot my password, how do I recover my account?
- On the sign-in screen press Forgot your password?, write your email and press Send instructions. You will see the same confirmation whether the account exists or not.
- Open the link in the email and enter New password and Confirm password: 8 to 128 characters, with an uppercase letter, a lowercase letter, a number and a special character.
- If the link expired or was already used, ask for a new one.
After the change, an administrator goes straight into the platform; a driver or guard sees the store buttons to open their app. The Aliado app also has Forgot your password? on its sign-in screen.
If the email does not arrive (check spam too), your organization's administrator can set a new password for you: in Catalogs › Users they press Details on your row and, in the Contact and access data section, the Change password icon. If you are the only administrator and cannot get in, write to us from the Still have a question? form at the bottom of this Help Center, which does not ask you to sign in.
You may also be interested in: Change my password while signed in | How to sign in | Confirm my email
How do I change my password while I am signed in?
If you are already inside Aliado and want another password, there is no need to log out or ask for an email:
- Open the account menu in the header › My profile.
- Scroll down to the Contact and access data section and press the icon next to the title (Change password).
- Write the new one in Password and repeat it in Confirm password; the button turns on when both match. The current password is not asked for.
- Press Change password. You will see Password updated successfully and your session stays open.
The icon appears if you have the Edit and create permission on Catalogs. If you do not see it, ask an administrator of your organization to change it from your record in Catalogs › Users (it is the same icon), or use Forgot your password? on the sign-in screen, which does not ask for the current password.
You may also be interested in: I forgot my password | My profile | Users
How do I confirm my email?
If your email is not confirmed, your avatar in the header shows a dot and the account menu marks it next to My profile (Email not confirmed). Confirming it turns on the Email channel of the alerts.
- Open the account menu › My profile. You will see a notice that your email isn't confirmed, asking you to confirm it to get alerts by email.
- Press Send confirmation email. An email arrives; open its link.
- If it does not arrive, check spam and press Resend. One email per minute can be requested.
If the notice offers Confirm with a code, you can also write the 6-digit code that arrives by email and press Confirm email.
Another way: in Configure alerts, the Email chip appears off with Confirm your email to enable this channel; clicking it resends the confirmation email.
You may also be interested in: Notification channels | How to sign in
Why does my business account appear as free (Free plan)?
The plan you see in the header and in Subscription and payments is that of your organization's active subscription. If your organization has no active subscription registered in Aliado, the platform shows Free and applies its limits, even if your company has a contract. It usually happens for one of these reasons:
- You signed up with Sign up instead of receiving an invitation: that creates a new organization, on Free, different from your company's. Check the name in the account menu › My organization.
- Your organization's enterprise plan is not yet loaded in Aliado.
- The subscription ended: when it expires or is canceled, the organization returns to Free.
- If you are in an organization that is not your company's, ask your company's administrator to add you from Catalogs › Users › Create user › Invite existing user and accept the invitation.
- If it is the right organization, write to us from the Still have a question? form (or ask your Aliado contact) with your company's name to review its plan.
You may also be interested in: Plans | Credits | Support and contact
Aliado app (drivers)
Aliado is the mobile app of the driver and, more and more, of the whole organization: iOS and Android, with chat, incident reporting, tasks per stop, appointments with QR, catalogs and notifications.
What is the Aliado app and where do I download it?
The Aliado app is for whoever rides in the unit and for whoever needs Aliado on the phone. The driver signs in with the same user their administrator created (Driver role) and sees their missions, the chat of each one, their appointments, their driving log and their notifications.
- Android: Aliado on Google Play.
- iOS: Aliado on the App Store.
What the app asks for when installed: background location (for GPS tracking), microphone (voice notes and hands-free), camera (incident photos and evidence) and notifications. The permissions onboarding explains each one and does not block use.
You may also be interested in: Roles | Chat and voice
How do chat and voice work in the app?
- In Missions the driver opens their trip and goes into the chat. They can write, send photos (with a grid) and files, and record voice notes that are transcribed by themselves.
- With the keyword "Breiko Breiko" (Android) the app plays a tone and starts recording without touching the phone; when they finish speaking, the message is sent.
- Attachments are read with AI: the ✦ star shows the progress and the result is filed in the mission.
- Threads with a long press, Read / Unread receipts and previews that say what was sent and by whom.
The control tower sees everything in the platform's Chat and in the mission's log.
You may also be interested in: Chat in the platform | AI attachments
How does the driver report an incident from the app?
- Press the + button on the app's map.
- Choose what happened (general, road, safety, weather), move the map to mark the point and write the title.
- Take a photo with the camera if you like (camera only, not the gallery) and send. The summary closes by itself after a few seconds.
The incident appears right away on the Map of the whole control tower. In the app's inbox, the Road incidents tab shows those that affect their routes and those that affect their locations; with a route on the map only those that touch it are highlighted.
You may also be interested in: Report from the web | Real-time incidents
How does the driver complete the tasks per stop?
In the detail of their mission, the Destinations section shows each stop with its tasks. On arrival, the driver opens the task and delivers the evidence it asks for: they take the photograph, collect the signature on screen or enter the 4-digit code the validator received by email. The task is left as completed in the log, with the evidence available in View evidence for the control tower.
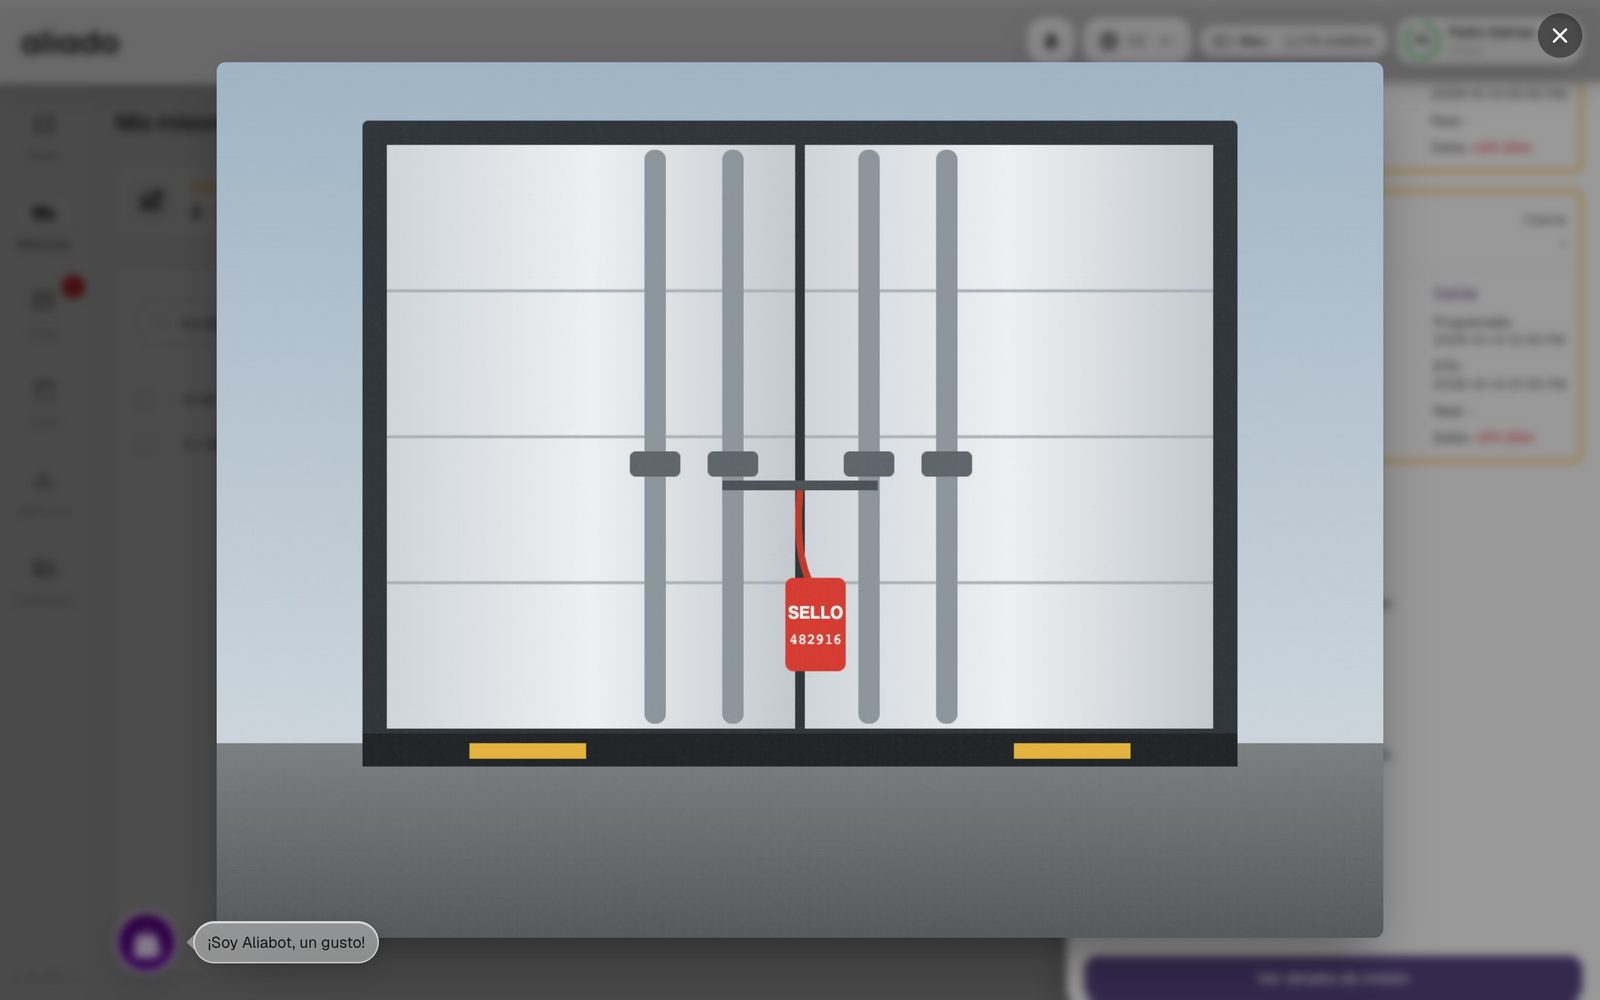
You may also be interested in: Create tasks per stop
How does the driver see their appointments and their QR?
In Appointments (Sent / Received) the driver sees the appointments they are assigned to, with their log and the documents. When the appointment is confirmed, the appointment's QR appears next to their personal QR and the Appointment QR code generated notification takes them straight to it to show it at the gate.
From the app it is also possible to create an appointment (including an appointment by tendering), review documents as host and download the appointments CSV.
You may also be interested in: Access QR | Scanning in Aliado Seguridad
How do notifications and the Profile work in the app?
- The app's bell shows the notifications with Favorites first and the unread count on the app's icon. They are marked as read only when opened.
- Configure alerts is available for all roles from Profile, with the same types and channels as the web.
- Profile also holds the credits, the units (metric or imperial), phone verification and the Aliado via WhatsApp switch.
- No GPS signal alerts can be ignored per unit from the notification itself.
You may also be interested in: Configure alerts
What do the map and the driving log show in the app?
- The app's map shows the mission's planned route, the telemetry and the incidents within the trip's window; saved routes use the truck profile and warn if there is no truck route between the stops.
- The driving-time log shows the driver's driving and rest periods; it refreshes by pulling down and a rest is marked by moving a bar.
- With Edit location on the map the driver can correct the exact point of a stop.
You may also be interested in: Driving times on the web
Can I manage catalogs and missions from the app?
Yes. An administrator with the app has Catalogs with web parity (users, assets, locations, route rate card, templates with recurrence, my organization and tags), can create and edit missions, start and end them, download the missions CSV, generate the instruction letter with observations and issue the Carta Porte with the same wizard as the web. The resources they see depend on the permissions the server gave them and on their tags.
You may also be interested in: Catalogs | Carta Porte
Aliado Seguridad (guards)
Aliado Seguridad is the app of the gate or yard guard. With it they digitally record each entry and exit of a unit, linked to the corresponding mission or appointment, replacing paper controls.
What is Aliado Seguridad and when is it used?
Aliado Seguridad runs on the guard's phone or tablet (Guard role). It is used every time a unit enters or leaves your facilities for a mission or for an appointment: the guard identifies the trip, confirms the unit and the driver, records the seal and the inspection, and marks the entry or the exit. Everything stays in the log of the mission and of the appointment, and feeds the scan metrics.
The app is available for Android on Google Play and for iOS; ask your Aliado contact for your organization's installation link.
You may also be interested in: Record a dispatch | An appointment's access QR
How does the guard record a dispatch?
- The guard opens Aliado Seguridad and chooses the ENTRY or the EXIT tab of the scan.
- They identify the trip: they scan the QR of the instruction letter or the appointment's QR the driver shows in their app, or write the trip's ID and press Start scan.
- They confirm the unit: they scan the asset's QR or look it up by economic number. The unit type is shown with its readable name (dry van, tractor unit…) and, when it applies, the seal is recorded.
- They confirm the driver (scanning their personal QR or looking them up) and press Finish scan. The entry scan or exit scan event stays in the log.
In the platform, the scan updates the arrival and departure columns of the mission and of the appointment, and triggers the Appointment arrival and Appointment departure notices.
You may also be interested in: Instruction letter | Scan metrics
What is the CTPAT/OEA inspection?
When dispatching, the guard can fill in the CTPAT/OEA inspection form in Aliado Seguridad (AEO / CTPAT verification): a list of 17 physical and mechanical points of the unit (brakes, lights, tires, seals, compartments…) verified before authorizing the exit. The record is linked to the dispatch and available for foreign trade audits.
Your company's certifications (CTPAT, OEA, Distintivo CANACAR, Recurso Confiable, Transporte Limpio SEMARNAT) are recorded separately, in Catalogs › My organization › General information, and are shown in the Directory.
You may also be interested in: My organization